I’ve been many times to Florida in my life, but never to organize Miata meetings. I’m glad I’ve been able to do so, it’s been over 10 years I deal with awesome customers from this state and it was the time to give back.
Funny enough, many of the people who attended both events met me during Miatas At The Gap. During the first part of my Road(Ster) Trip, I’ve had A LOT of driving and it was time for me to relax just a little. I decided to stay 4 weeks in Florida to catch up with emails, orders and take a bit of (me) time.
***I’D LIKE TO APPOLOGIZE FOR HOW LATE I’M CREATING THIS BLOG POST, BUT I’M CATCHING UP WITH LIFE***
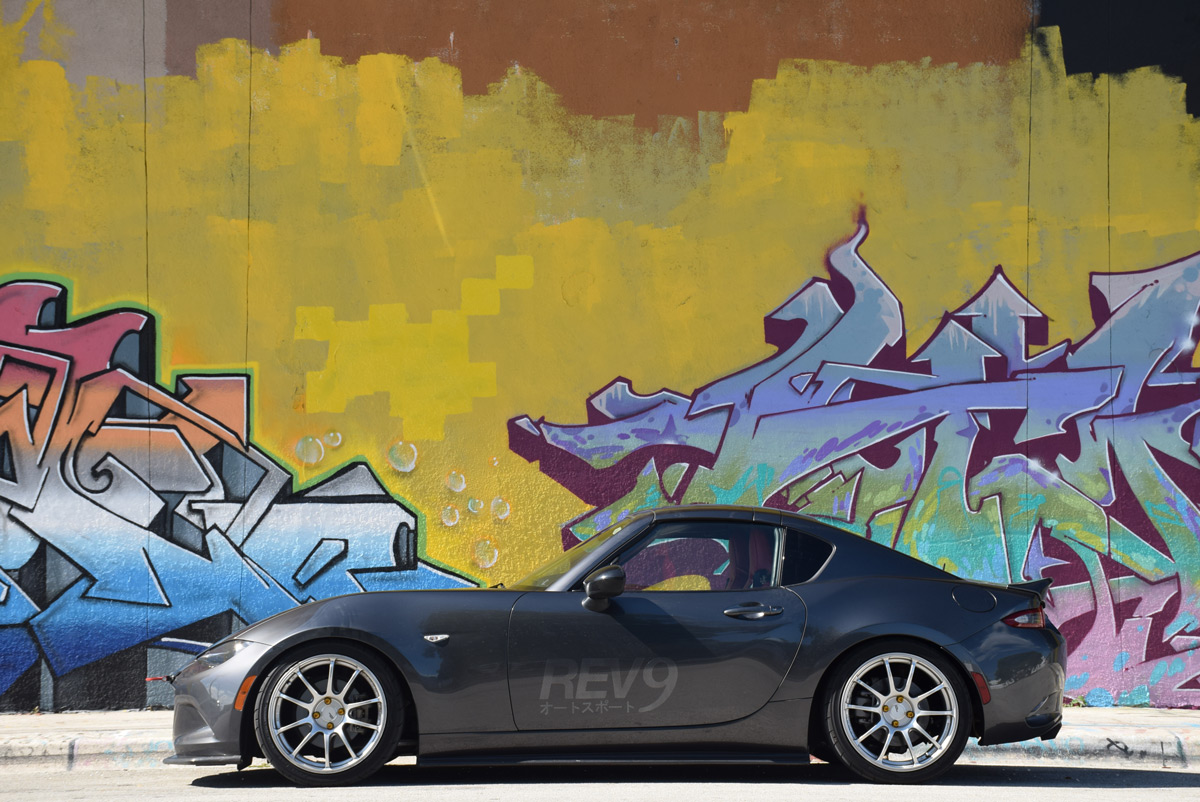
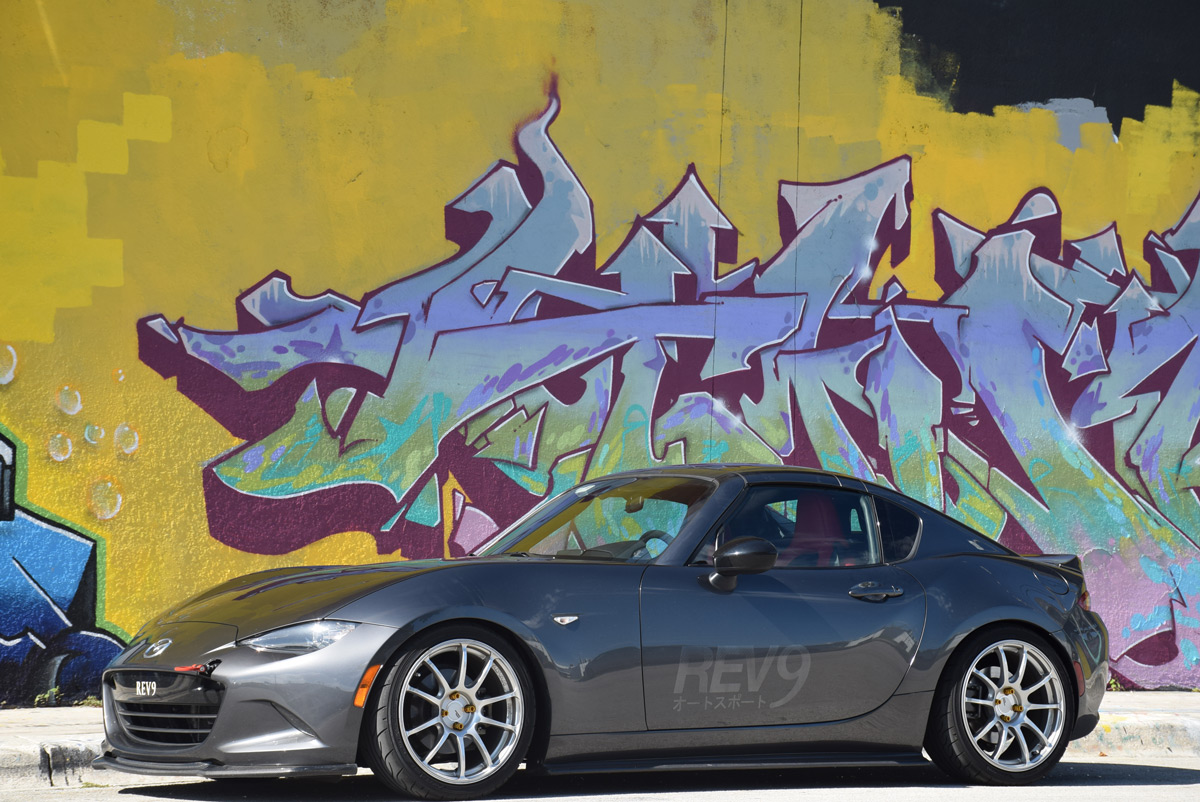
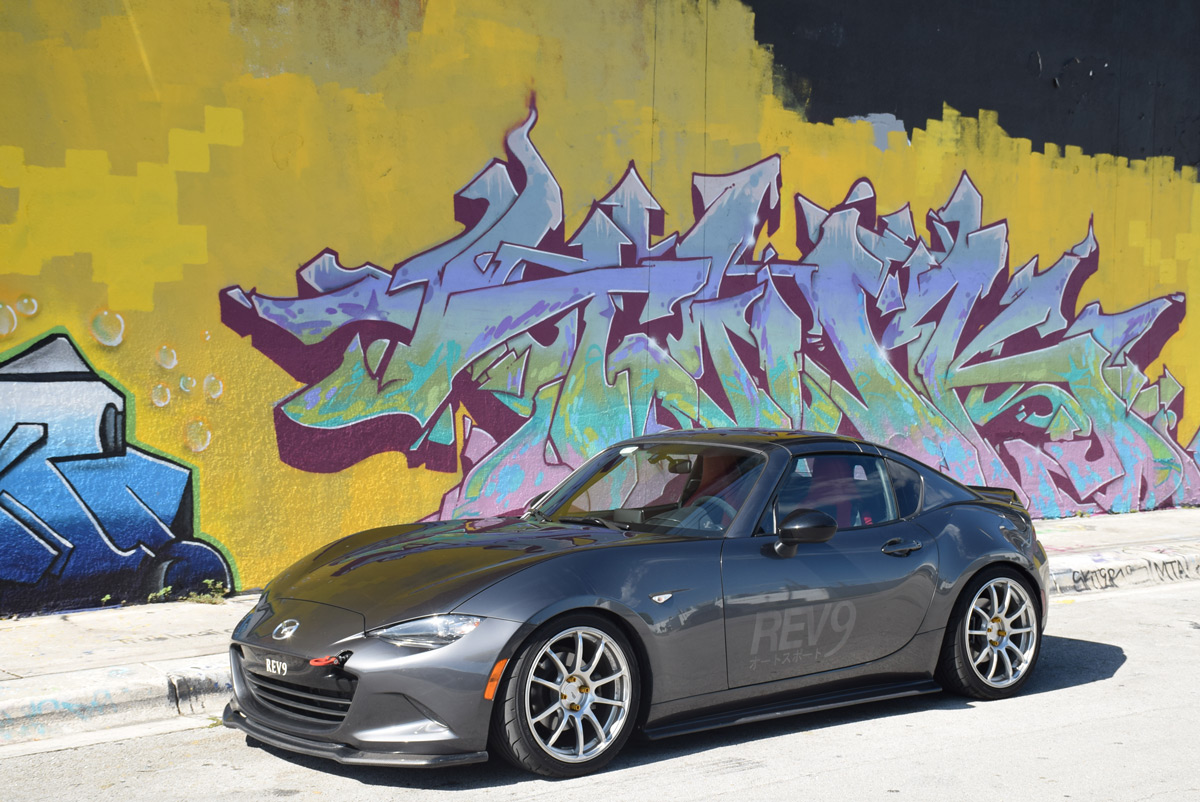
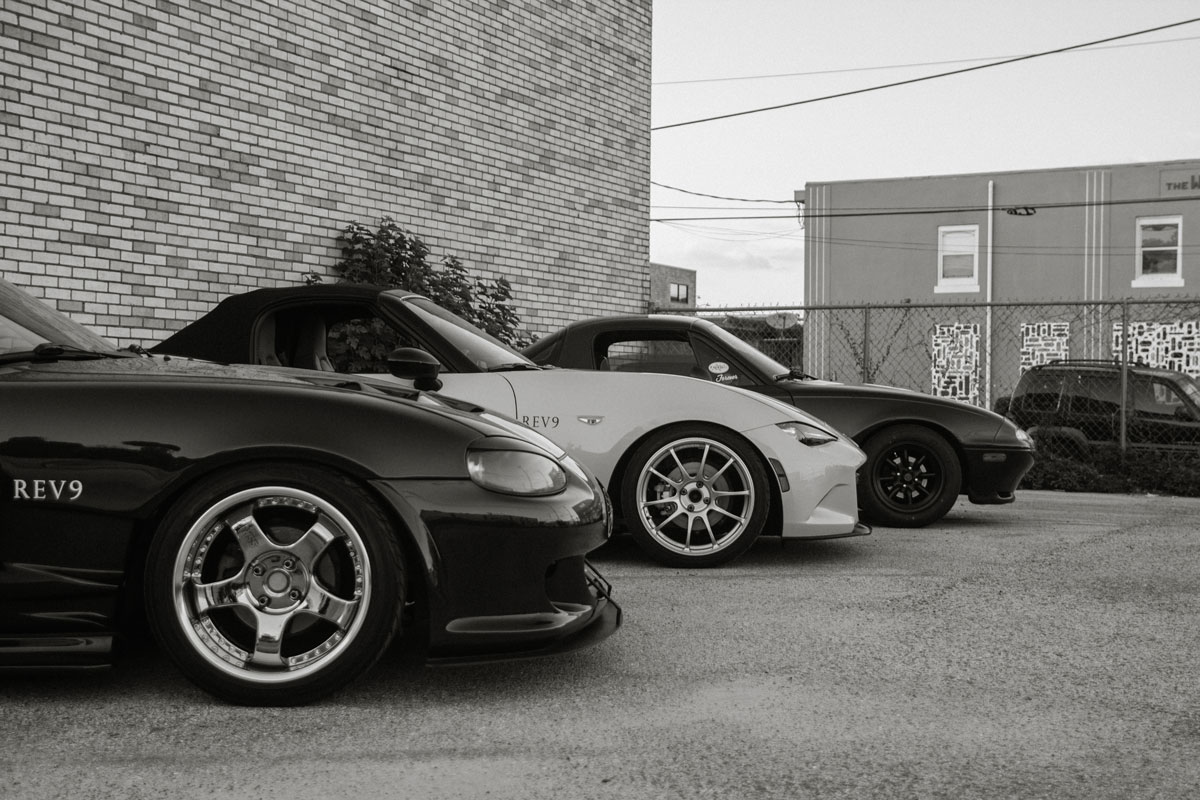
Wynwood (Miami)
And here is the last time someone saw my car in its grey form. I decided to do a photoshoot in one of my favorite spot in Miami : Wynwood District.
The biggest highlight of this trip was the fact that I decided to change the color of my car without really telling anyone. I wanted something that would be unique, yet keep some of the classiness of the car. I went with Autoflex (made by Plastidip) which is a liquid vinyl with a clear coat that you spay on the vehicle to change the color, but most importantly, to protect the paint underneath. I knew I had a very long way to go on my trip, so if I could keep my Machine Grey color intact underneath, it would be awesome.
The result was pretty awesome, I was ready for a disaster, but it ended up looking pretty sweet.
Miami
This was just weeks before the Hurricane Irma happened. The weather really was AGAINST us, it was raining for a few days, but we still managed to do the meeting. I took pictures of pretty much all of those who came to the event! As usual, we went to a craft beer spot : The Tank Brewing Co. Here are some pictures of the event~
And then, a whole bunch of people came up, it really was an awesome event!
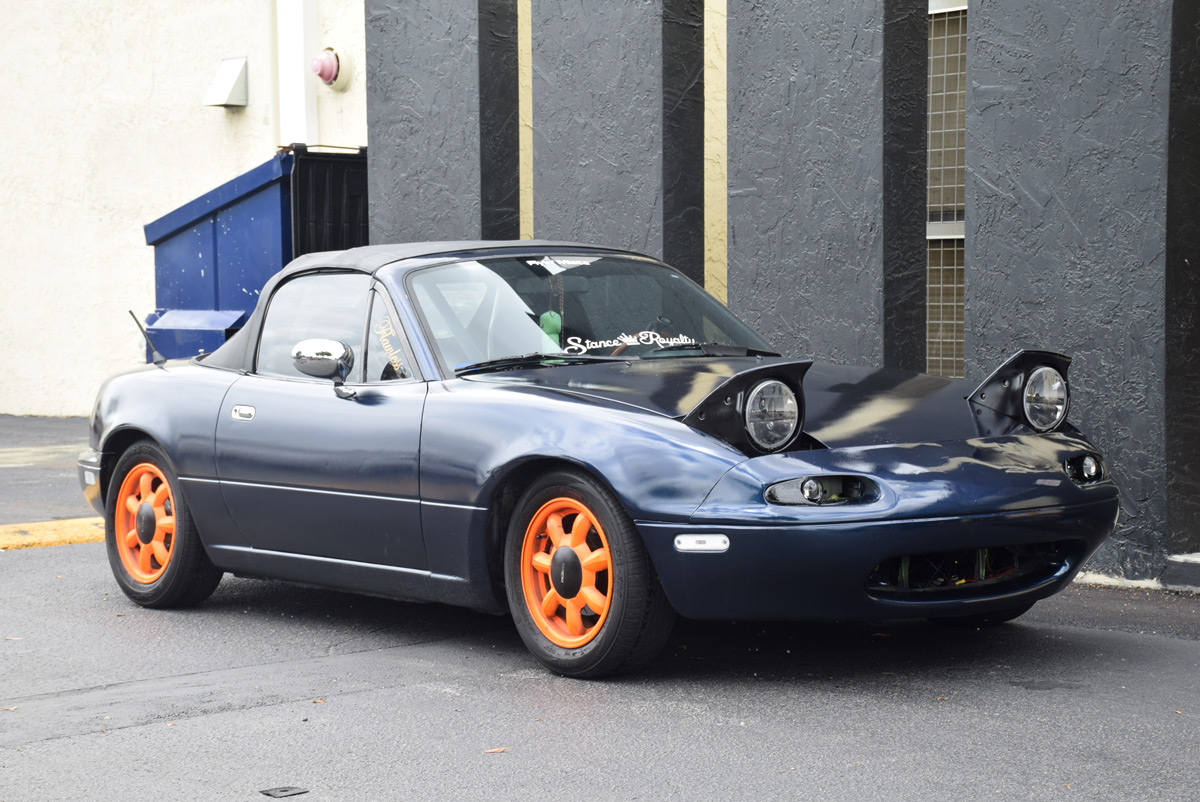
Oh and a non-Roadster came, too!
At one point, the brewery staff offered us to bring the ND Demo Car inside of their bar for a location, that was pretty great!
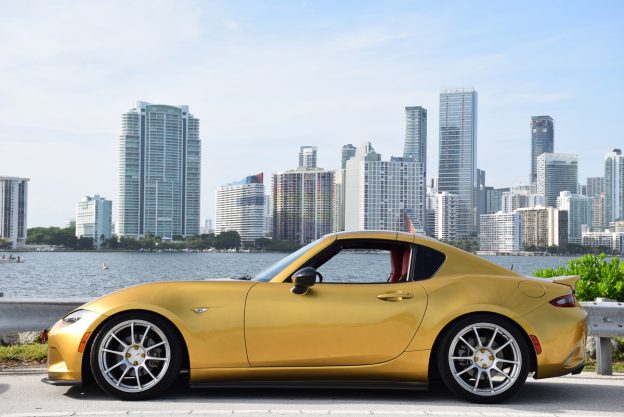
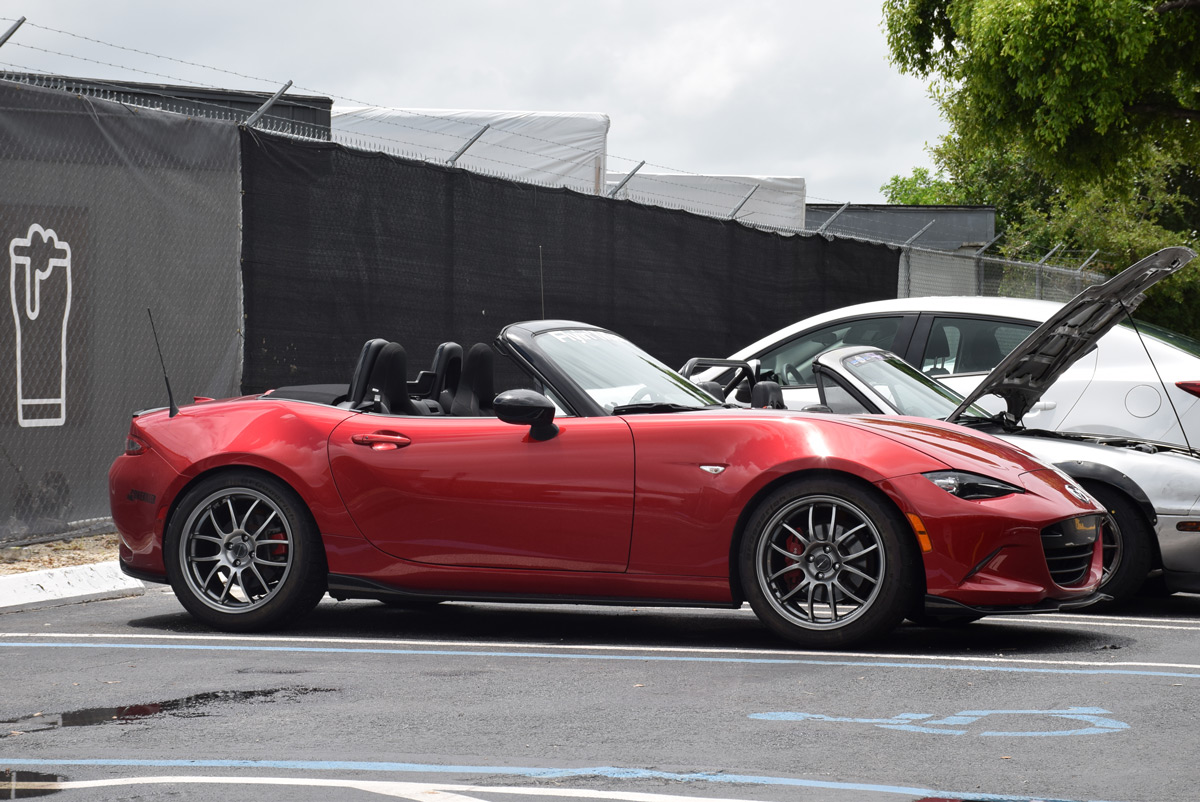
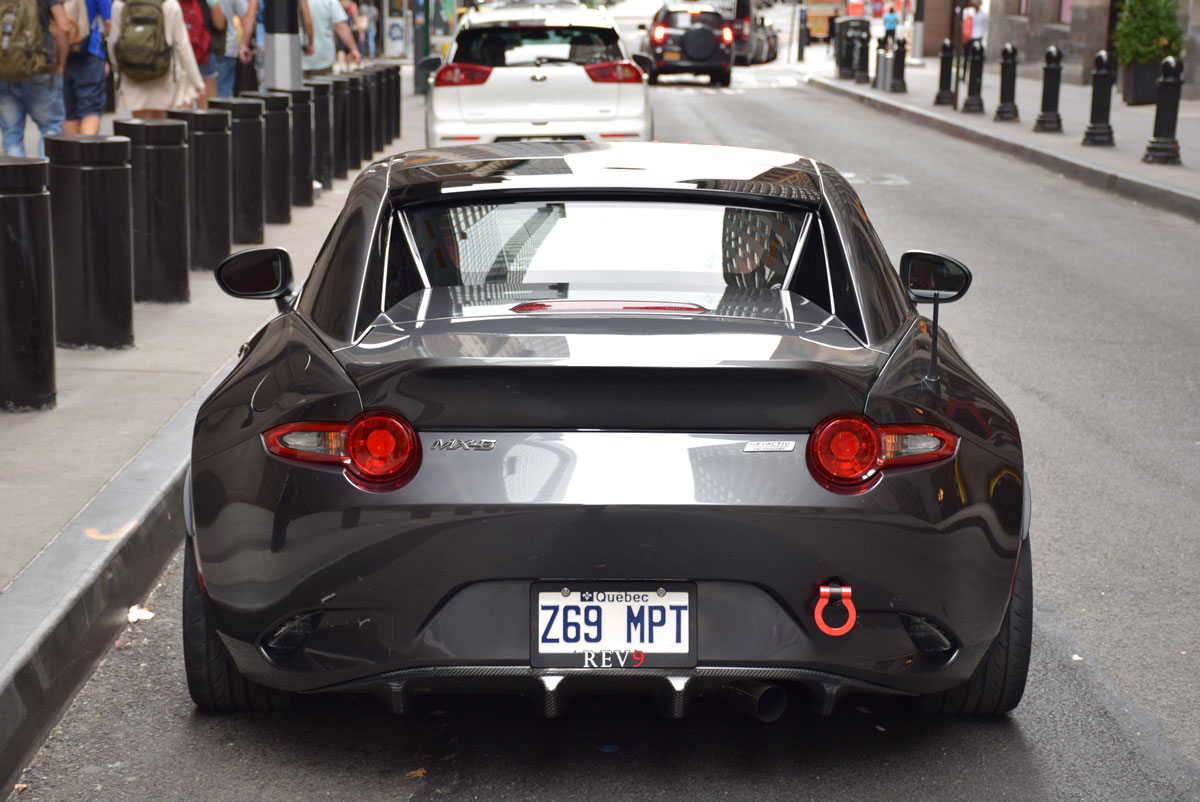
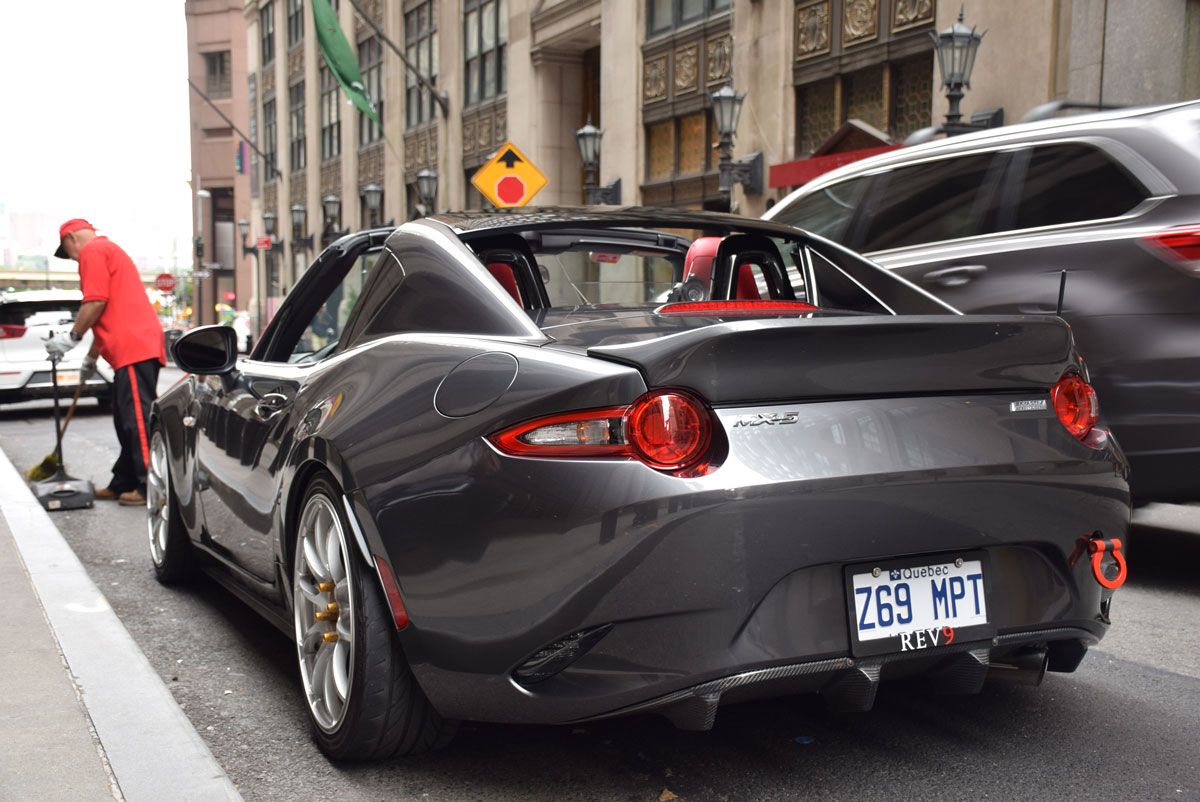
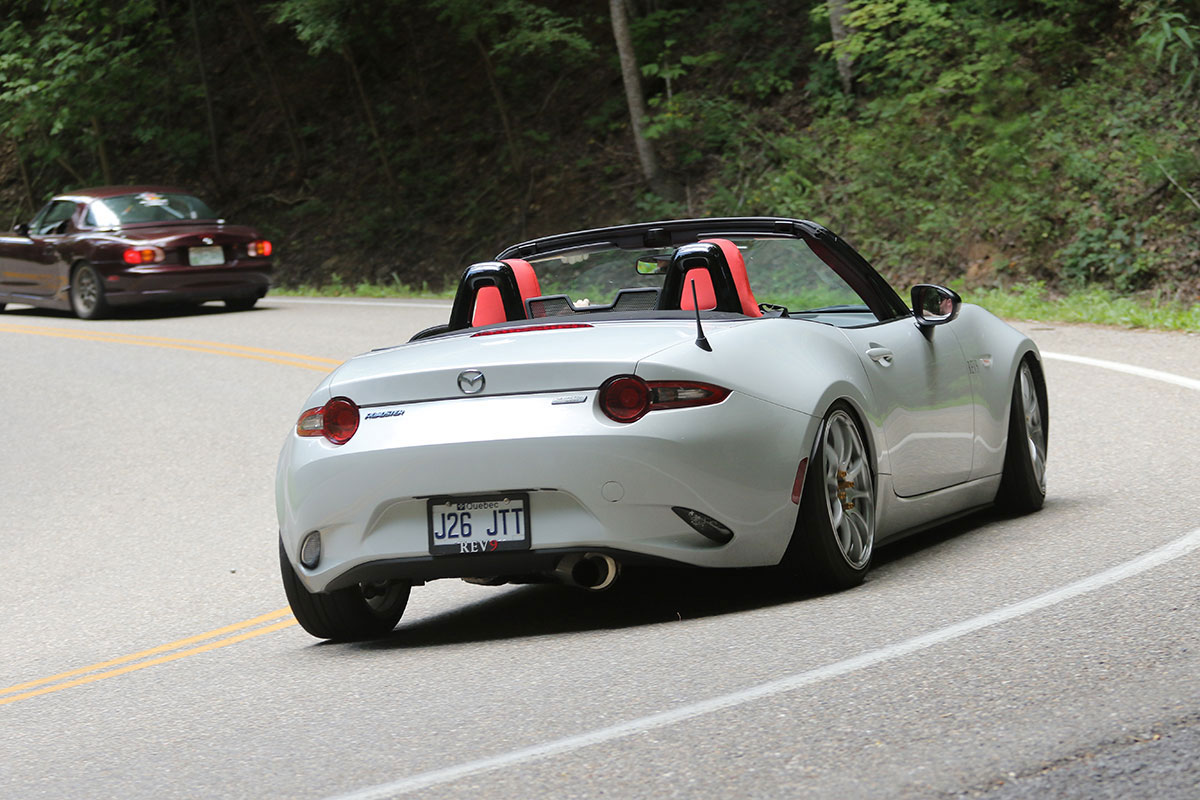
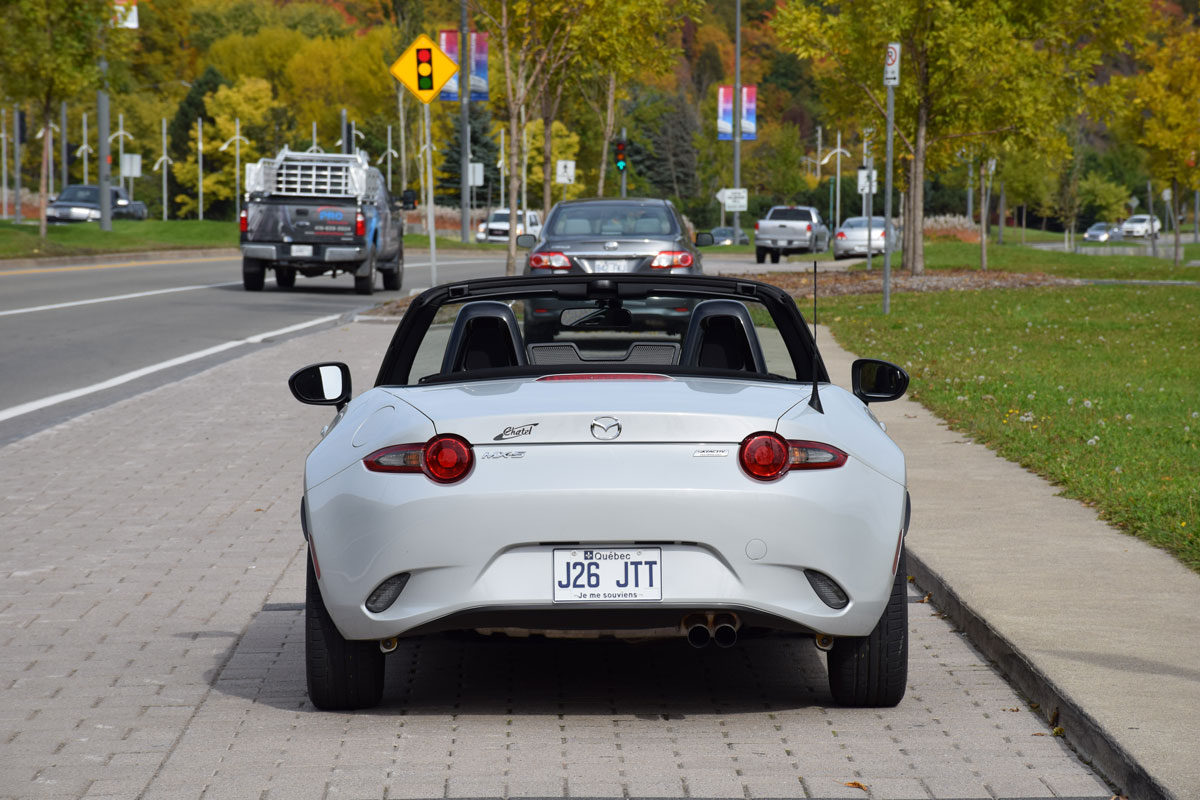
After the event, we went for a little drive in Miami and ended up doing an awesome photo with the city landscape (which ended up on Mazda USA’s Instagram and landed 5.8k likes, really proud of this one)! It really shows the beauty of the 17” Advan RZ Wheels as well as the Rallybacker ND Low Ducktail Spoiler.
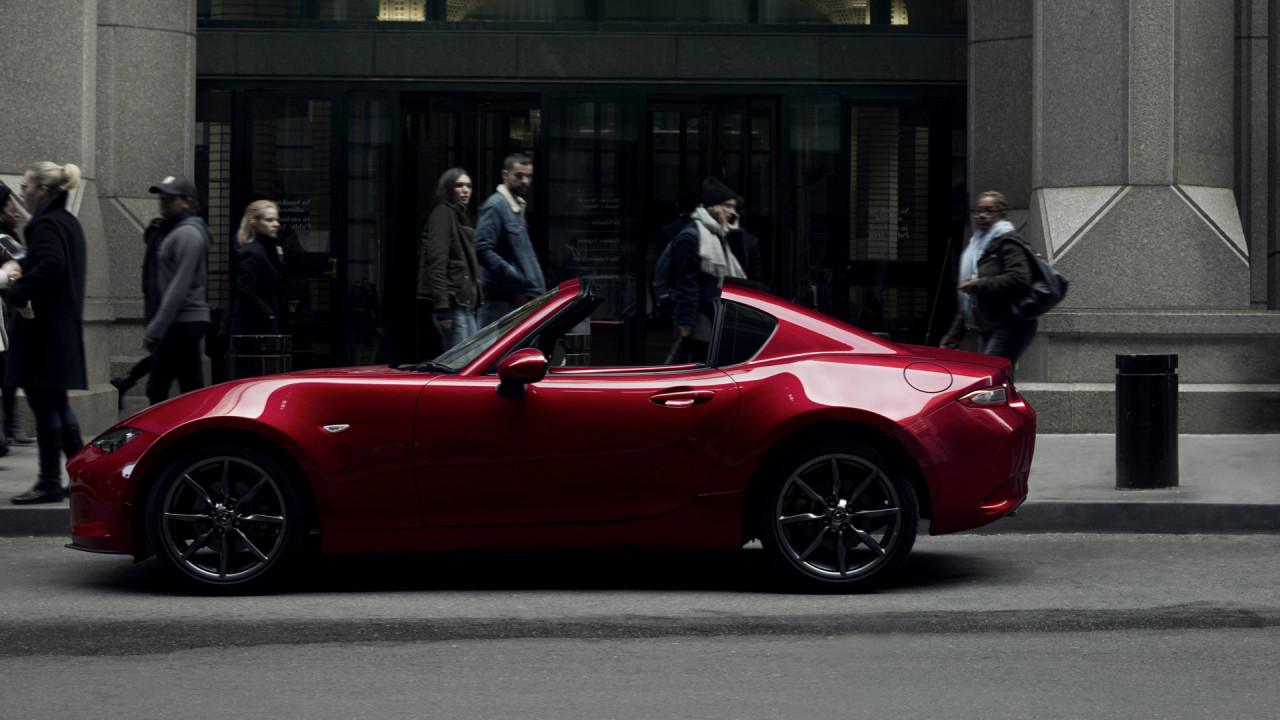
When they unveiled the ND RF, my first saying was “oh man, why did I buy the soft top”… and the more I saw them, the more envious I was about that car. Mazda literally marketed the car as more of a refined ND (for city driving?) rather than the open top sports car. That photoshoot from Mazda just made me want one so bad…
(Credit : Mazda Corporation of USA)
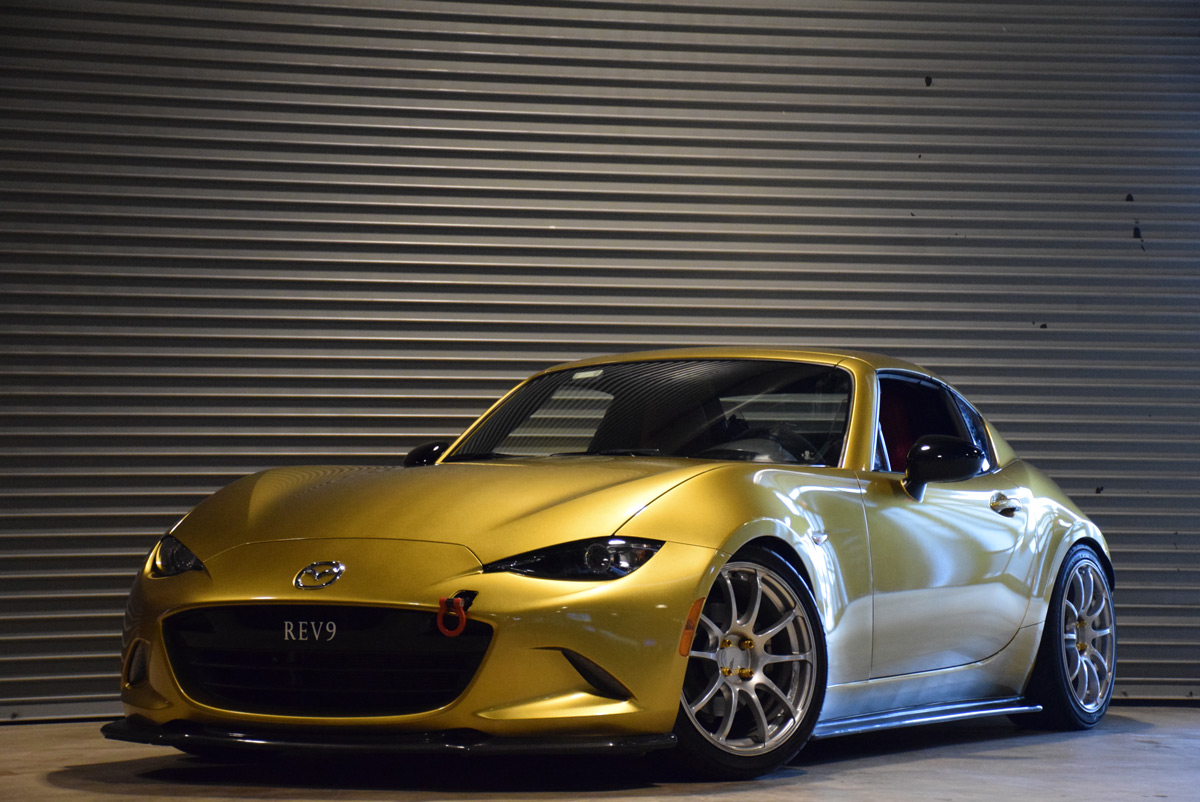
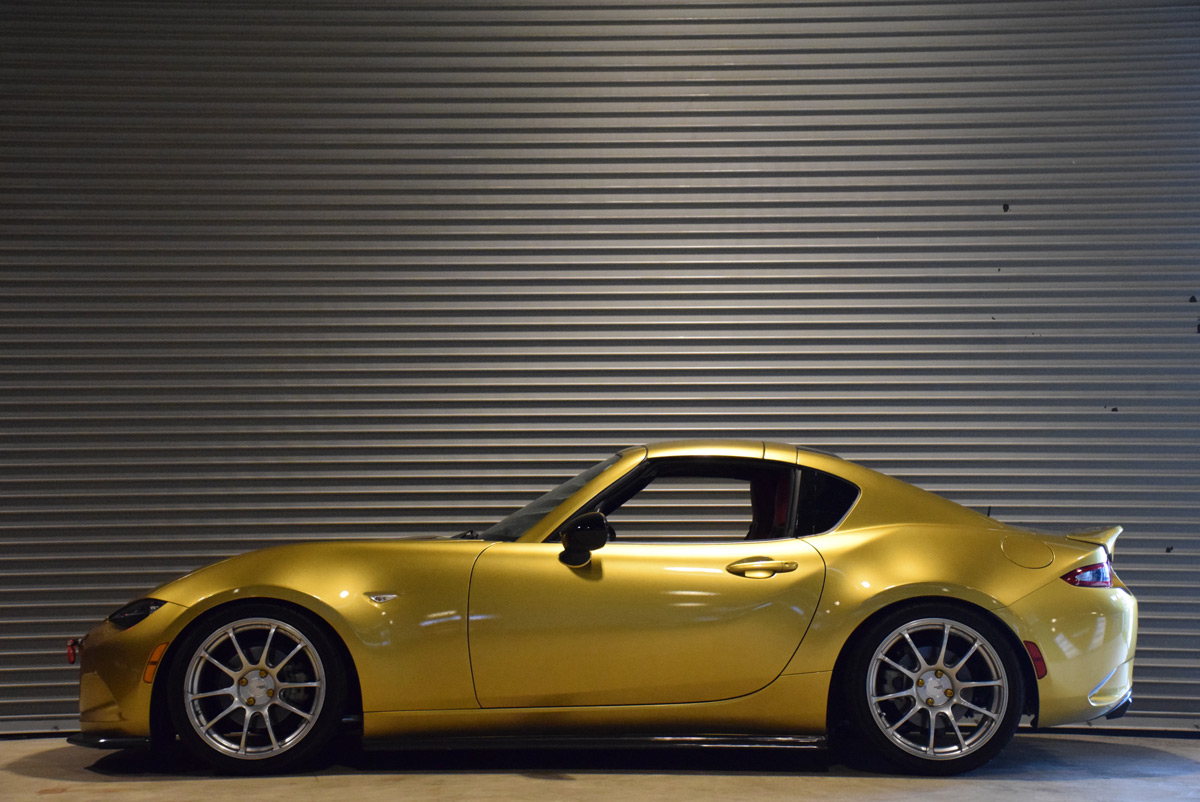
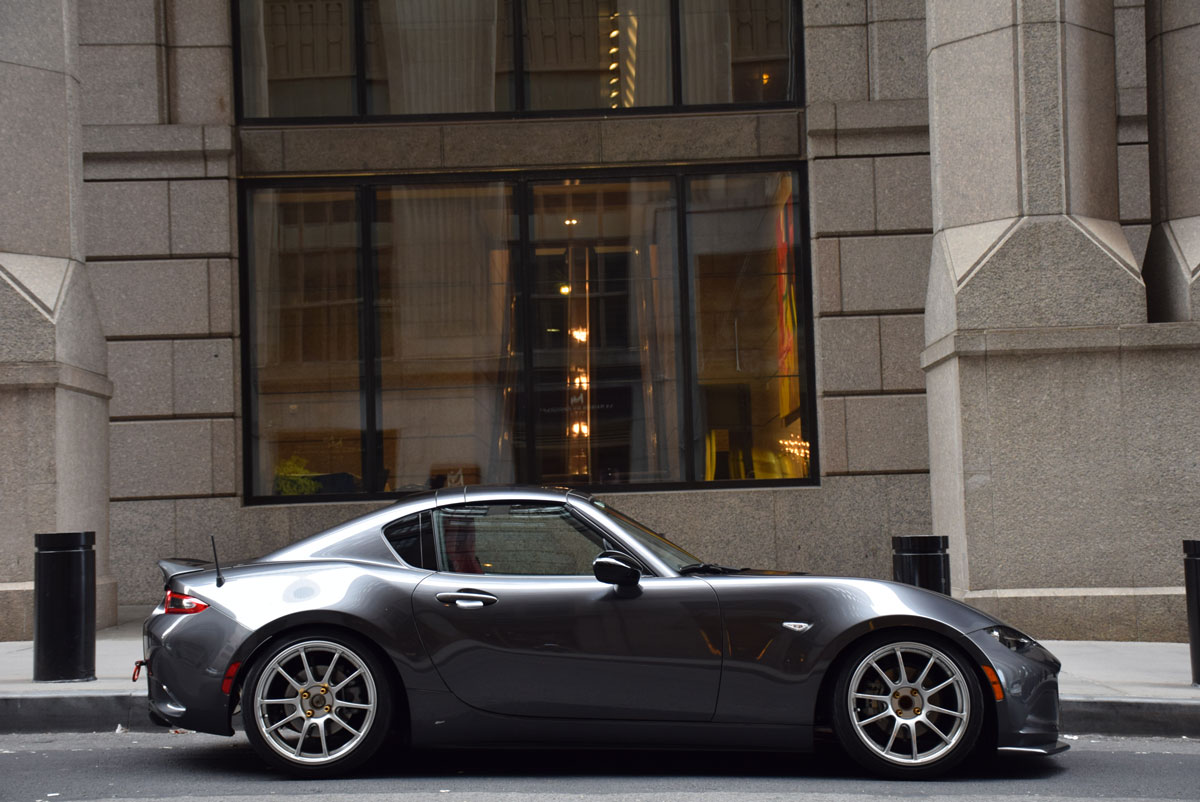
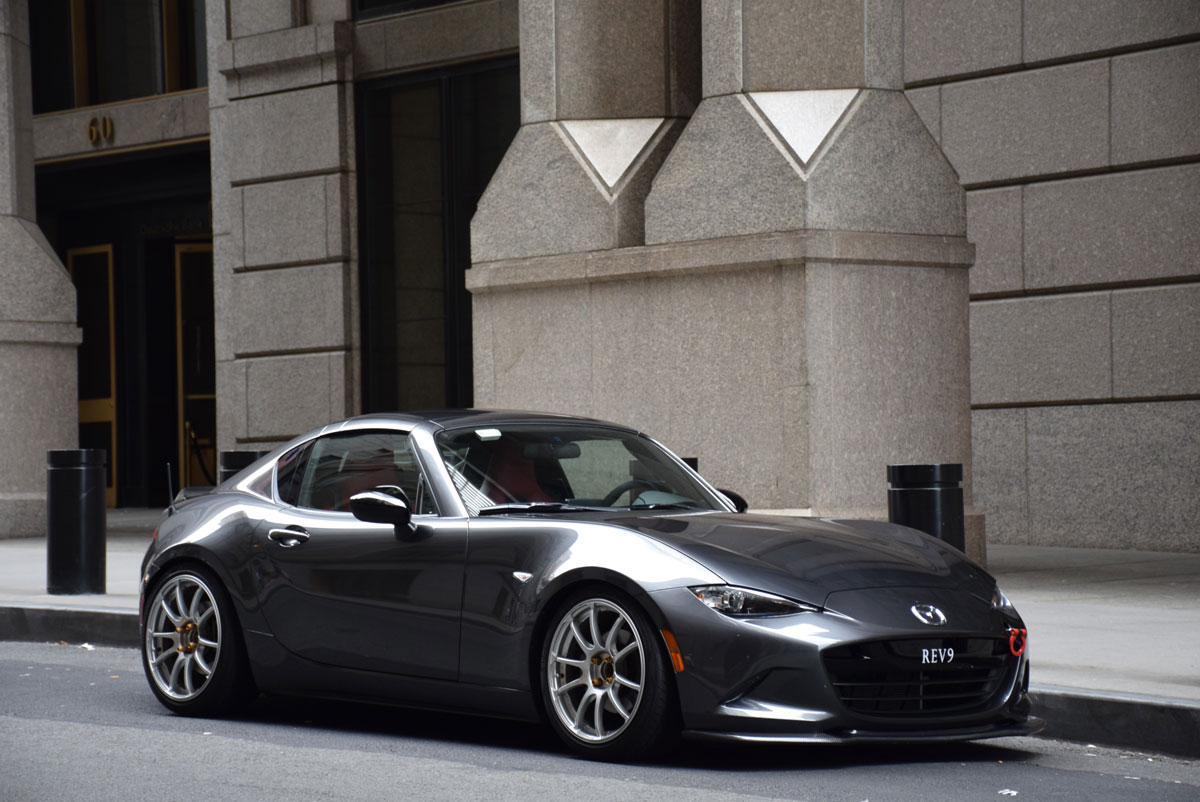
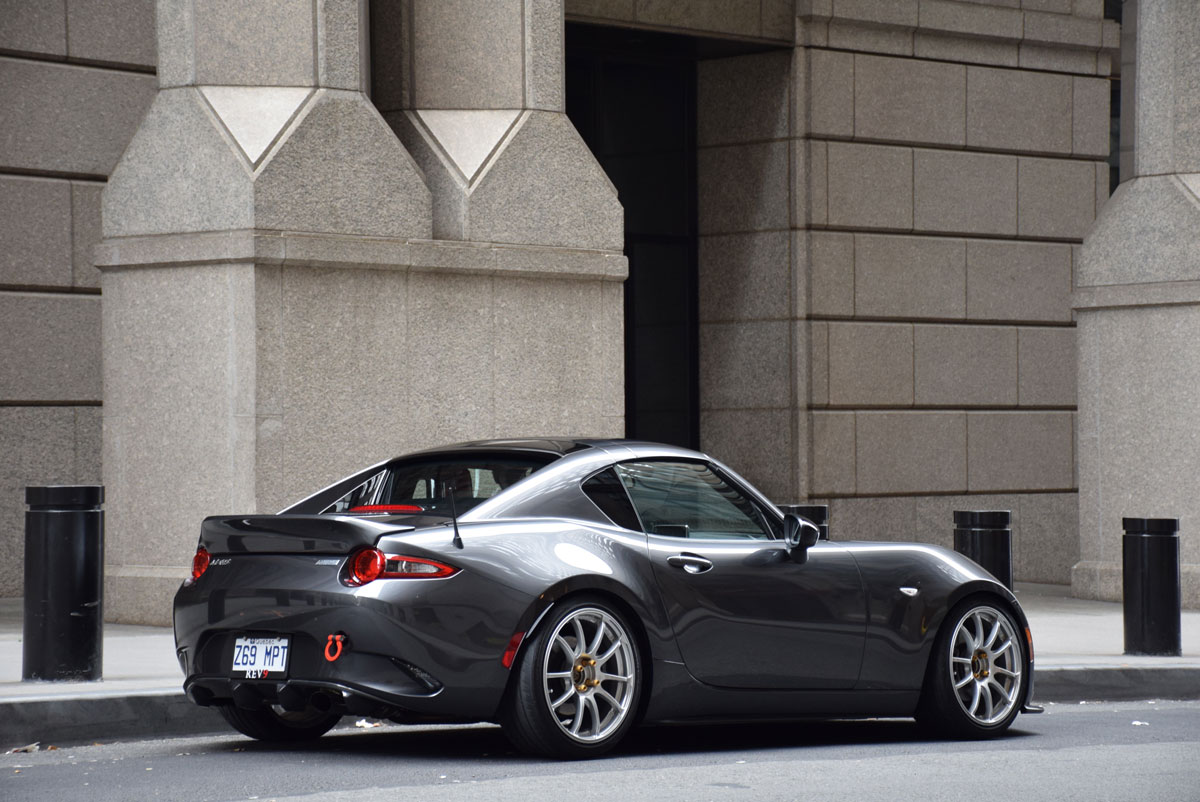
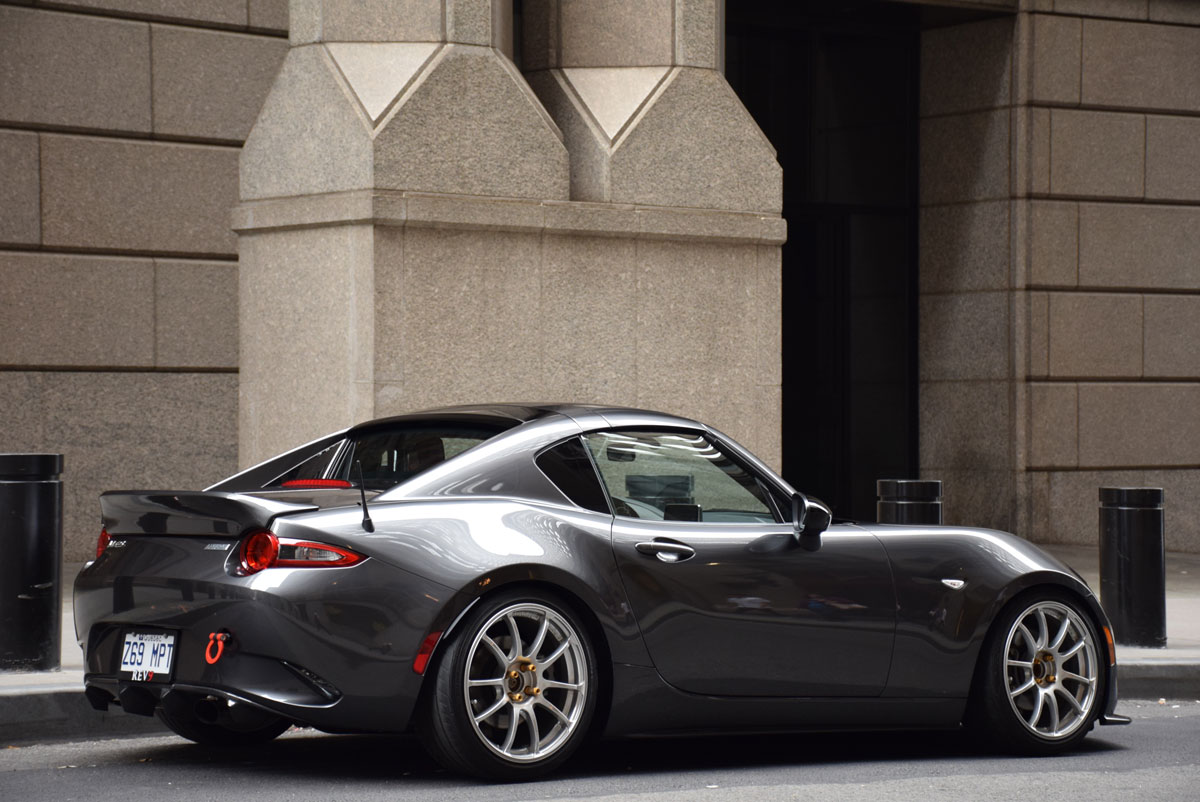
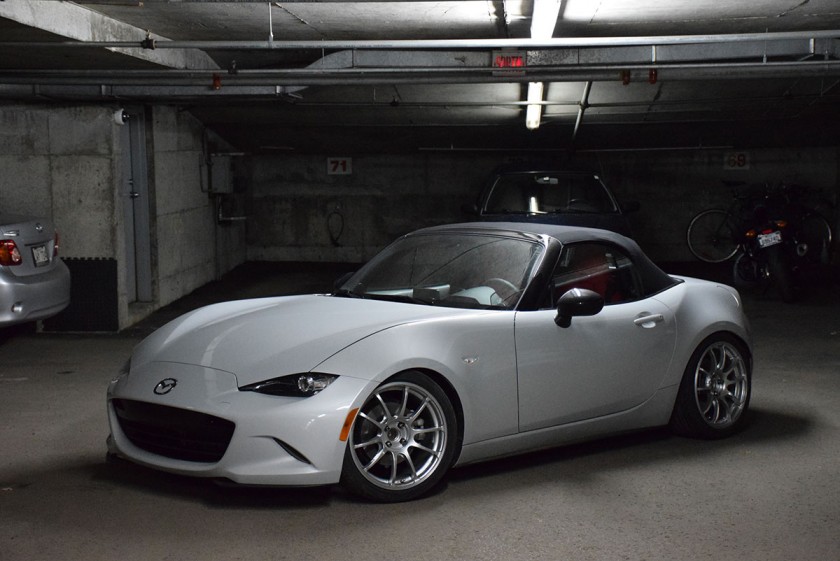
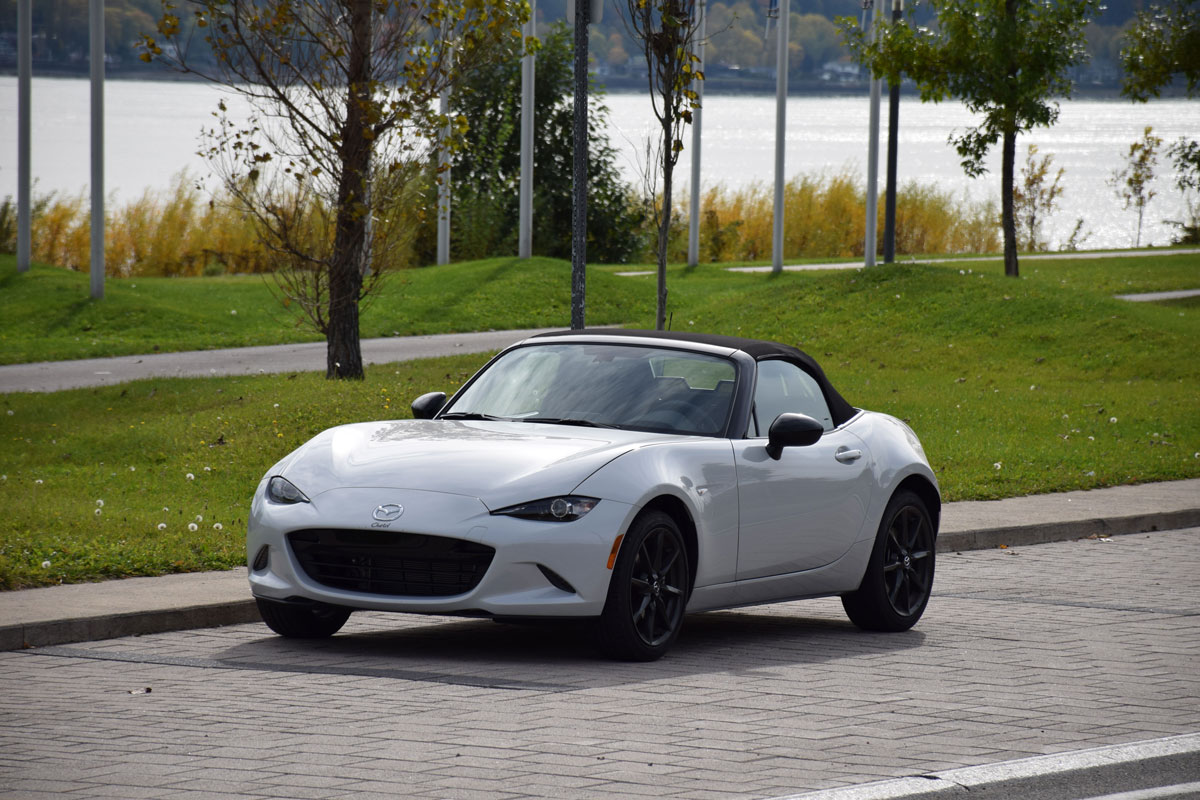
So, a few weeks ago, I decided to pull the trigger on a brand new 2017 ND RF and give back my ND Soft Top to the dealership. It was a pretty good decision if you ask me… and I’m proud to be able to unveil the car on my blog, with photos taken at the (almost?) same spot as Mazda did about a year ago!
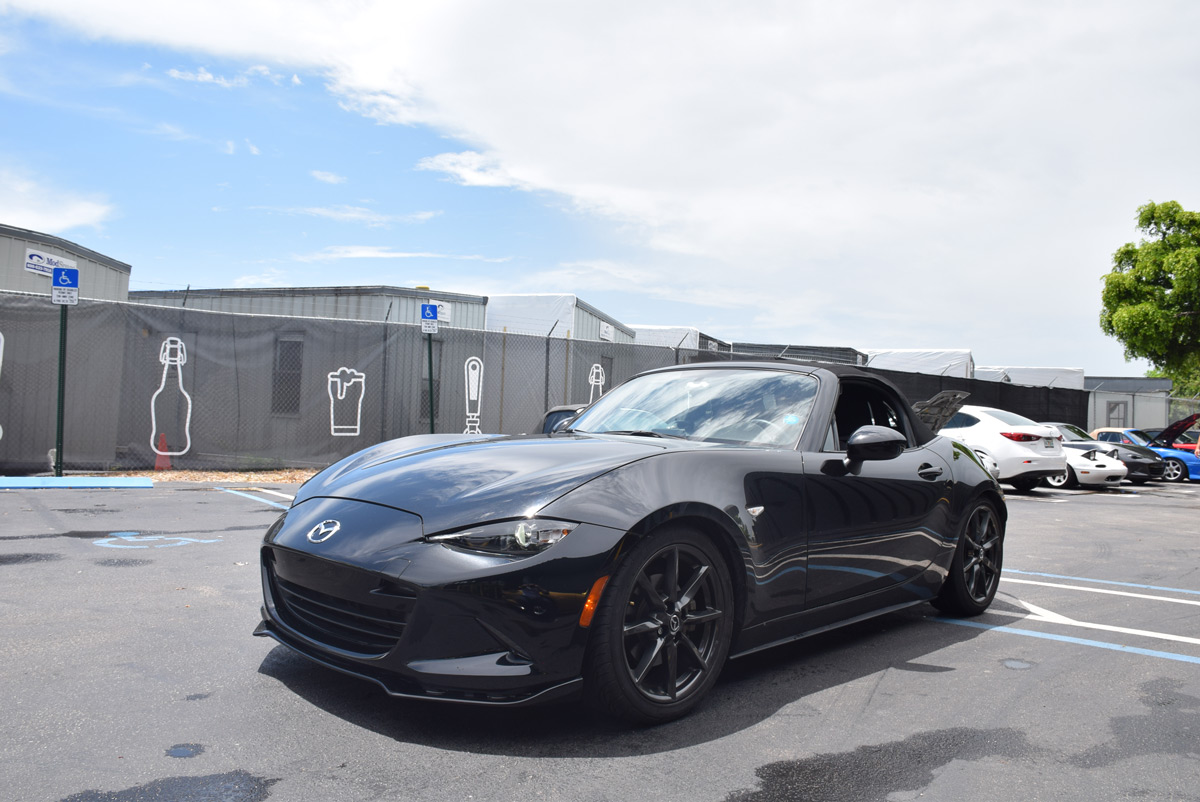
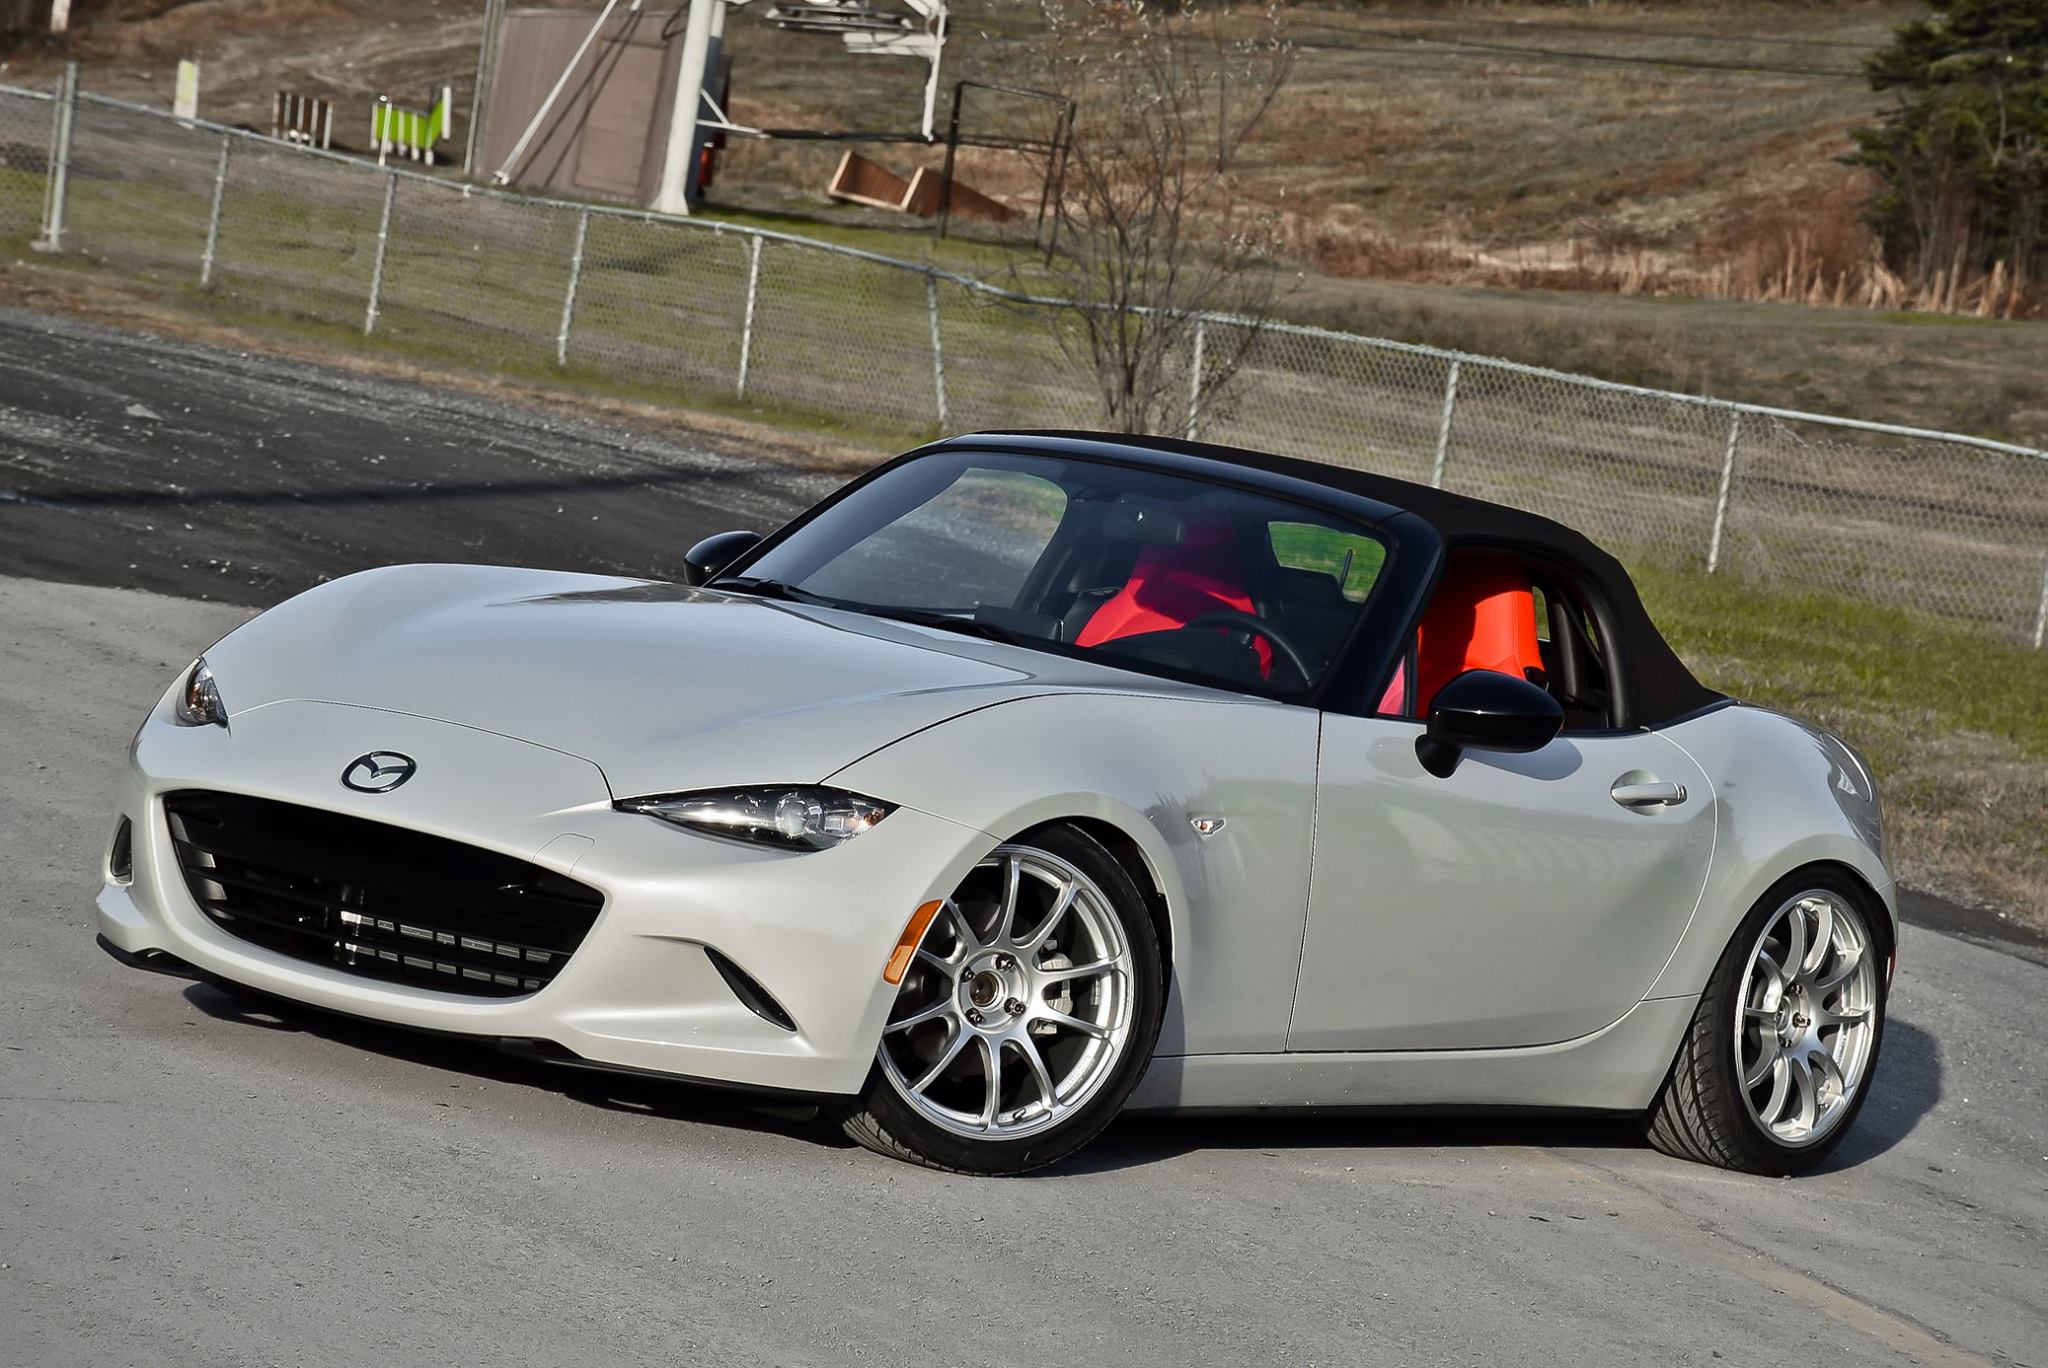
I called this demo car The Project Classy, because it made so much sense. The color is beautiful and really makes the car look “high class”. I’ve had the car just for 2 weeks, but I’ve made it up to my taste already and only a few mods will be done to it in the future. The goal is to make one perfect street car that almost looks like it came that way from factory.
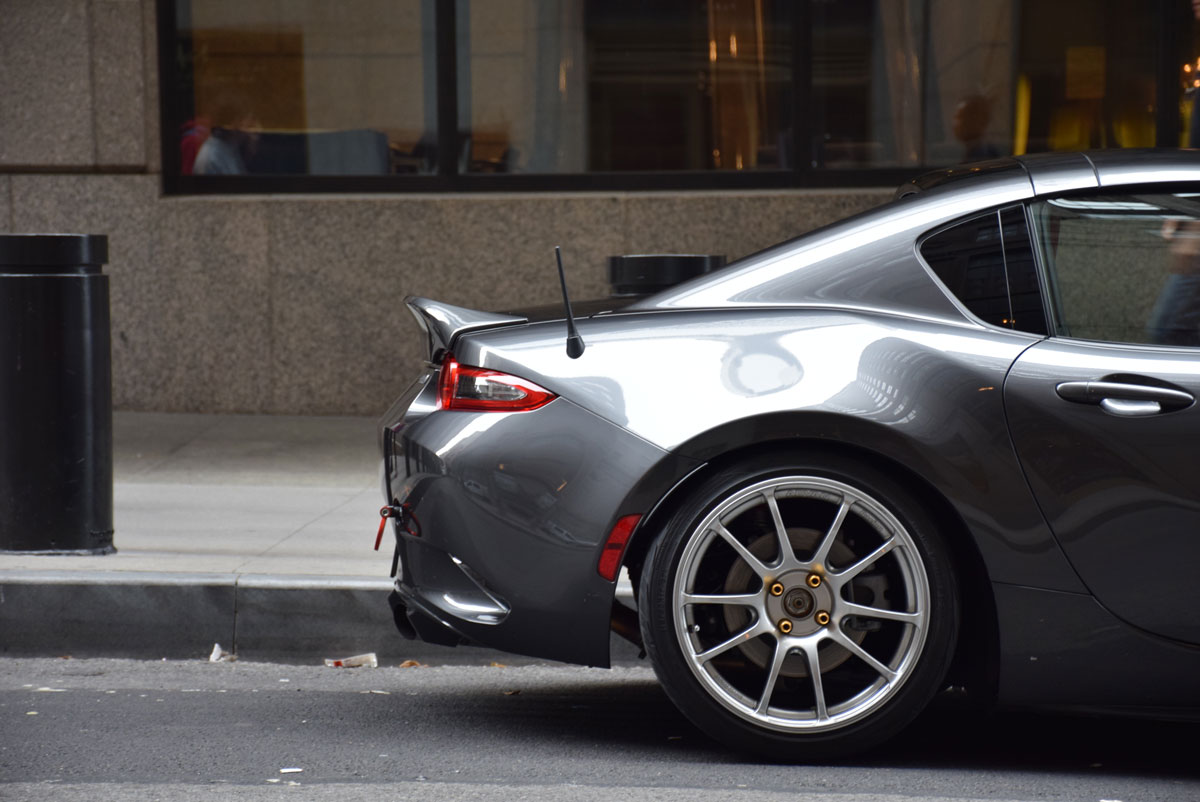
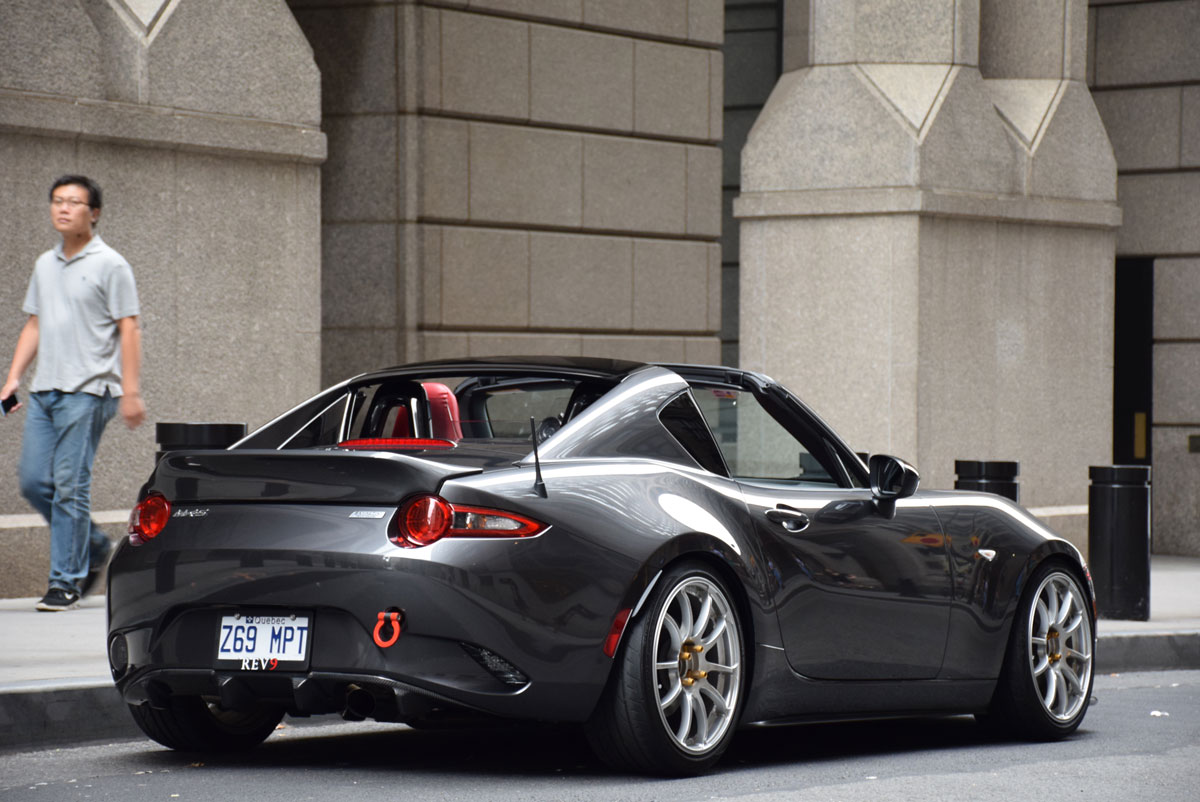
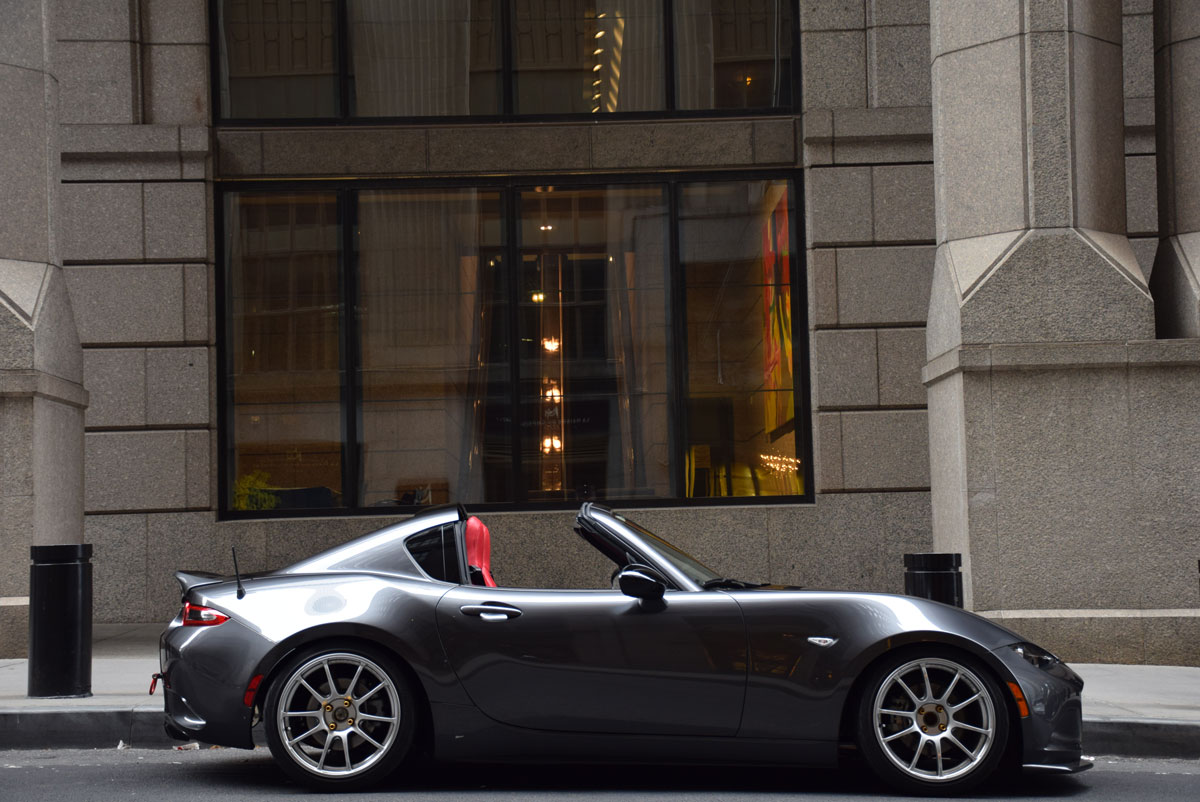
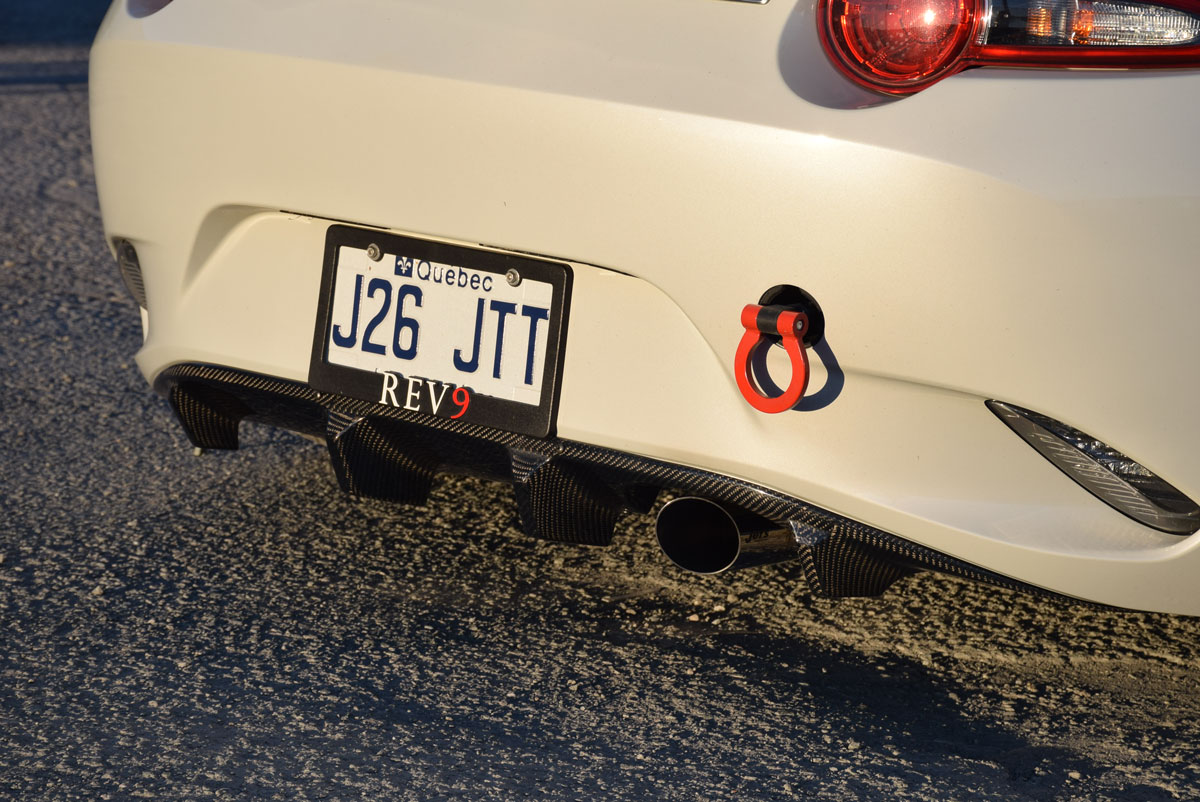
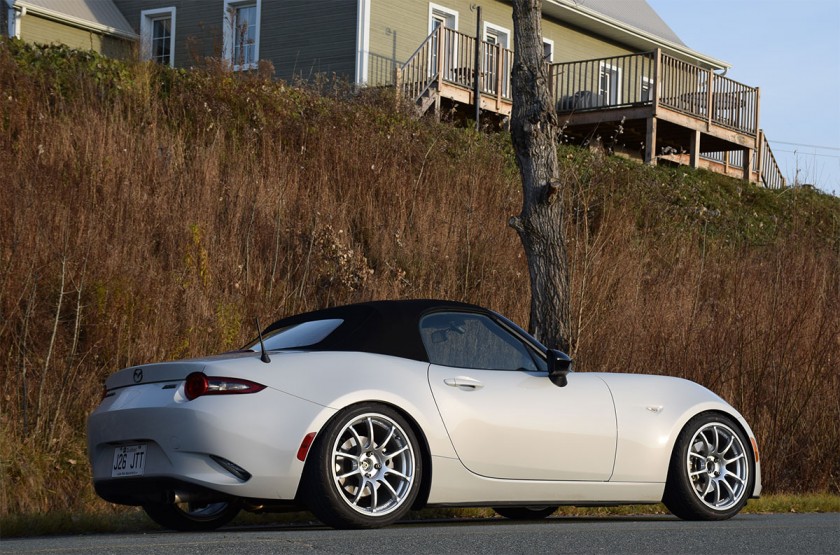
This is probably my favorite mild-wild ducktail spoiler for ND. When Rallybacker released it, I knew this one was the one I would run on my ND. It looks great on both the Soft Top and RF! It’s so neat looking that most people who don’t know much about the ND think it’s a factory option.
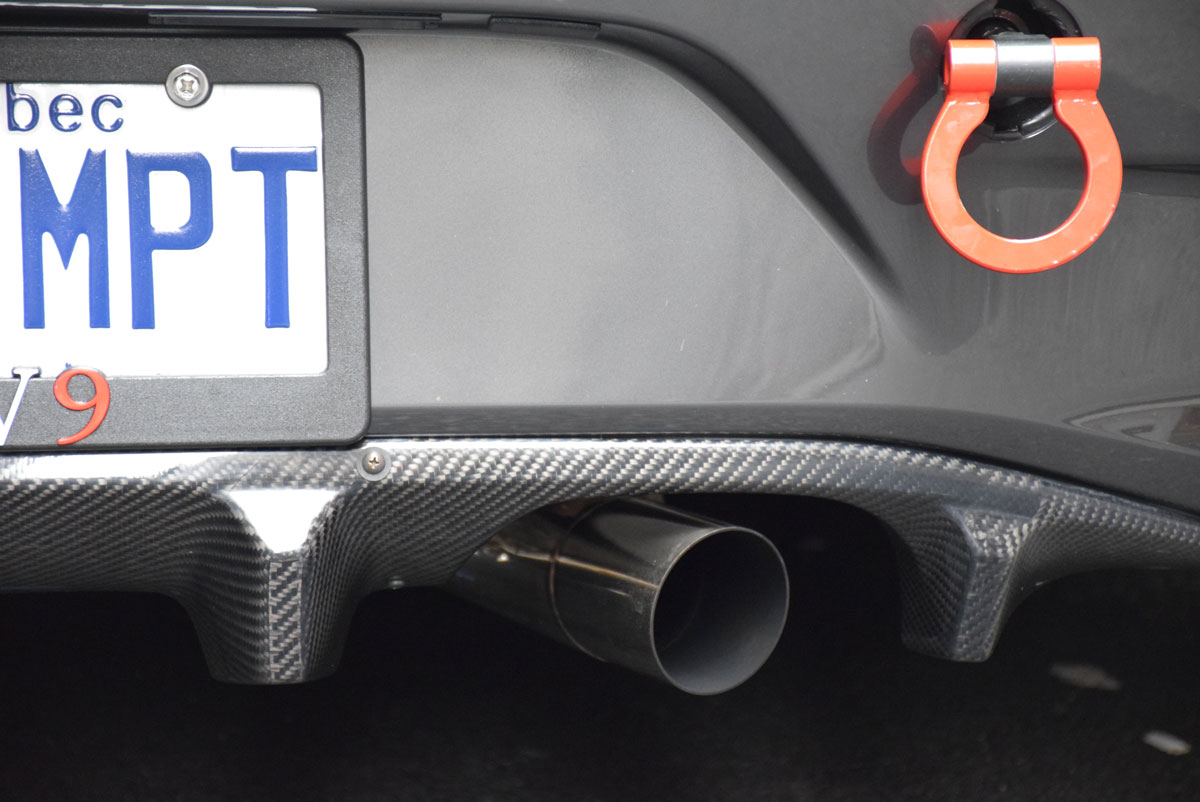
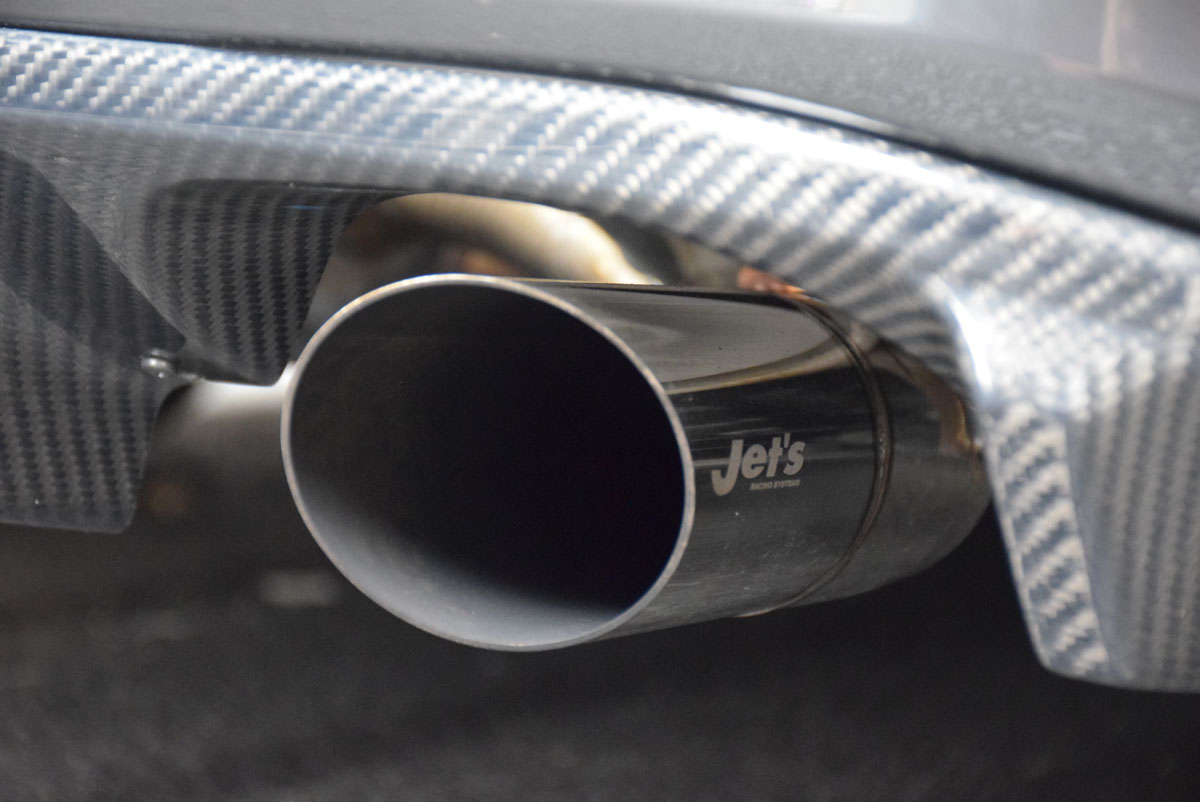
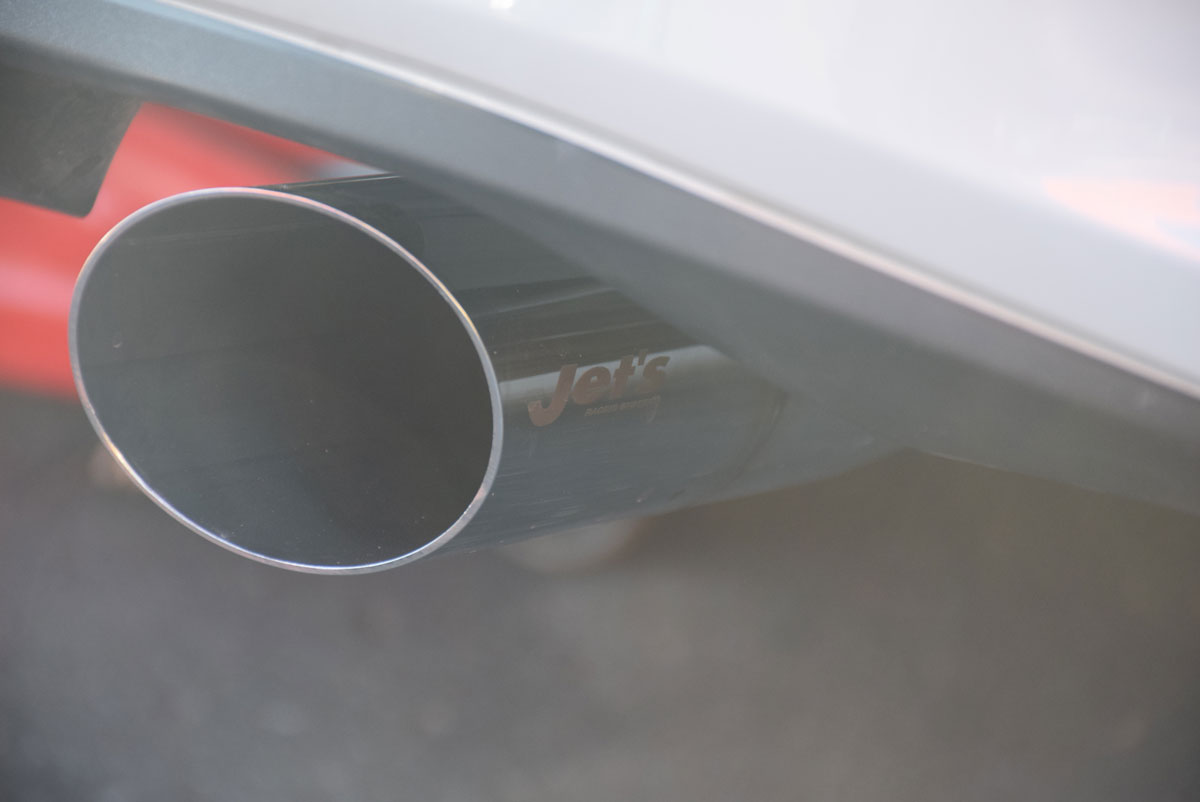
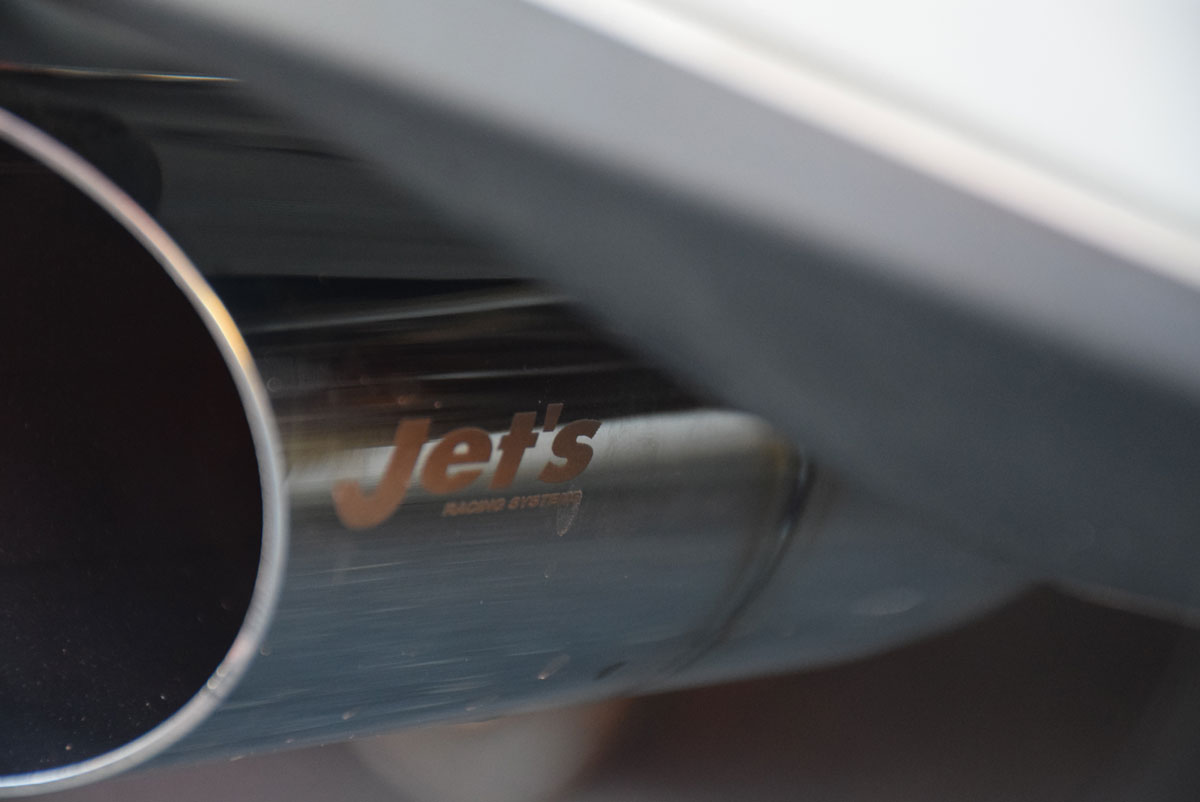
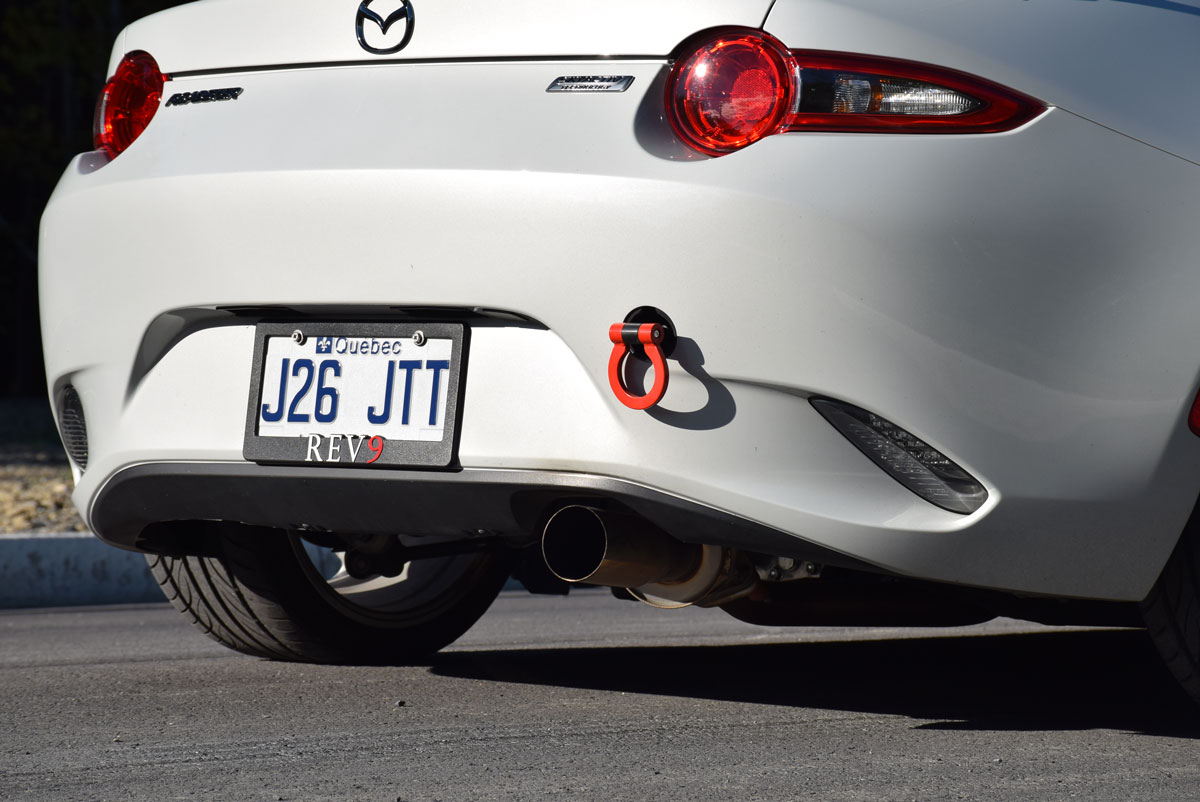
This exhaust is not legal in Japan. It’s because it is *just* a little louder than what is allowed (and they reduce the allowed level every few years). It is literally the best sounding exhaust I ever saw for the ND and couldn’t be more pleased. It is silent on highway and when you open the throttle, it unleashes the awesome sound you’re looking for. The tip also has a very unique look which I like more and more. One (also) neat feature is the engraved Jet’s logo!
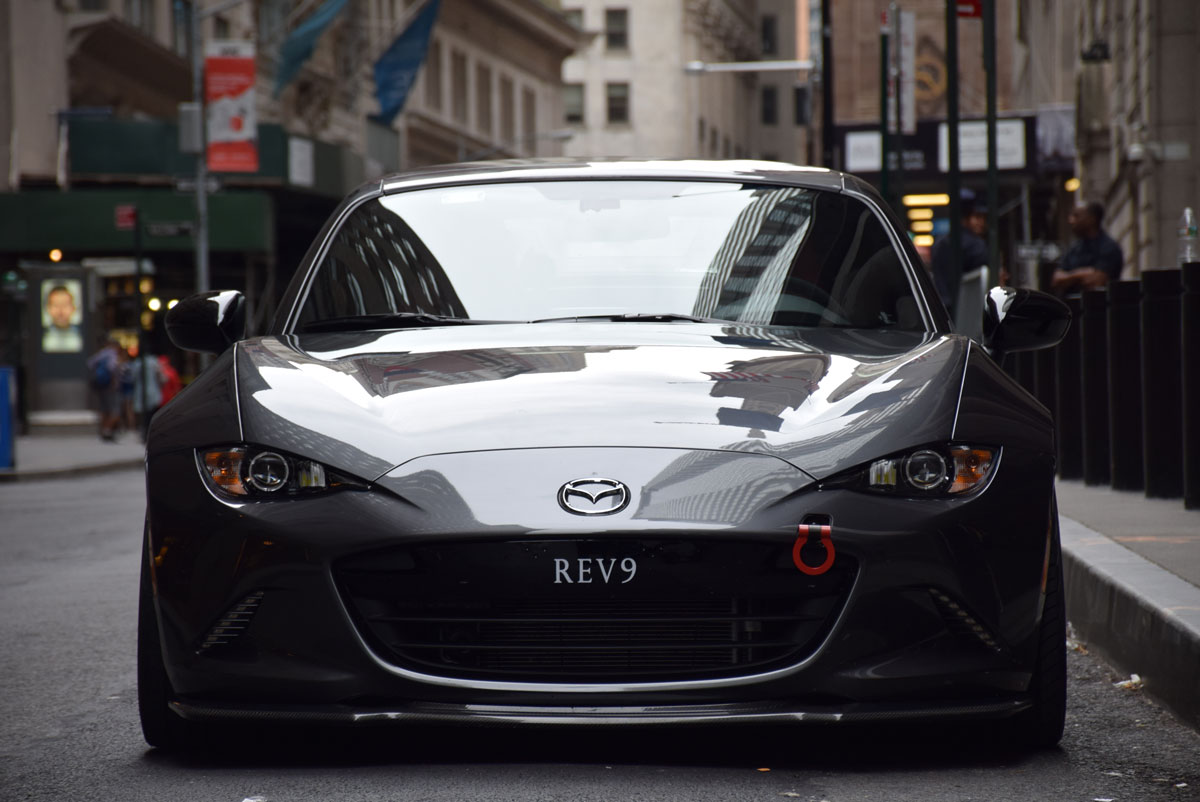
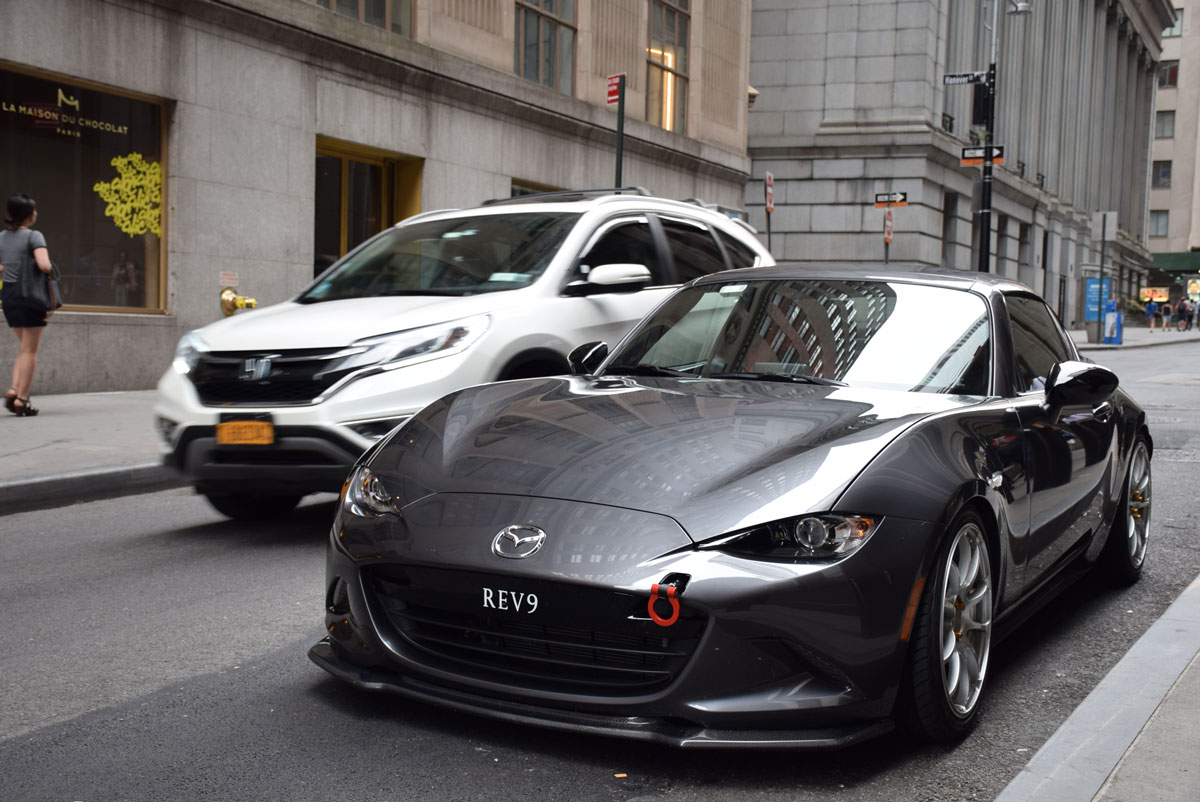
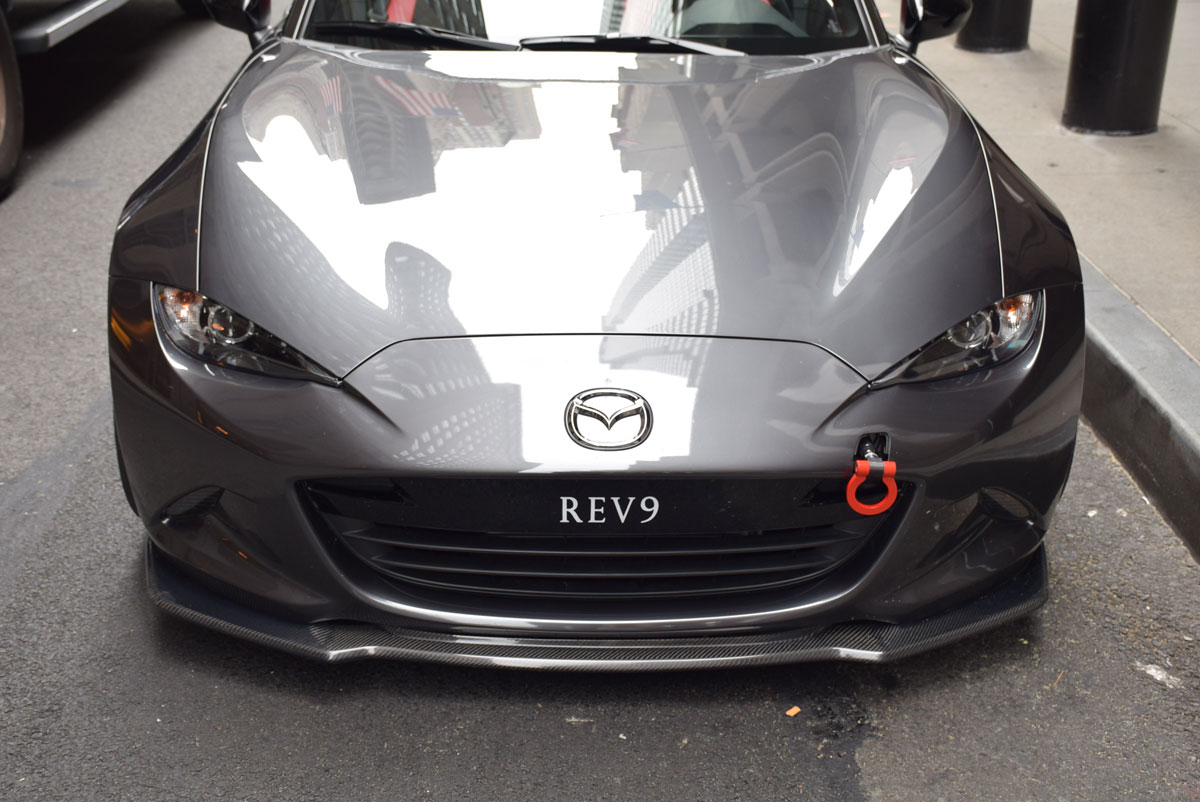
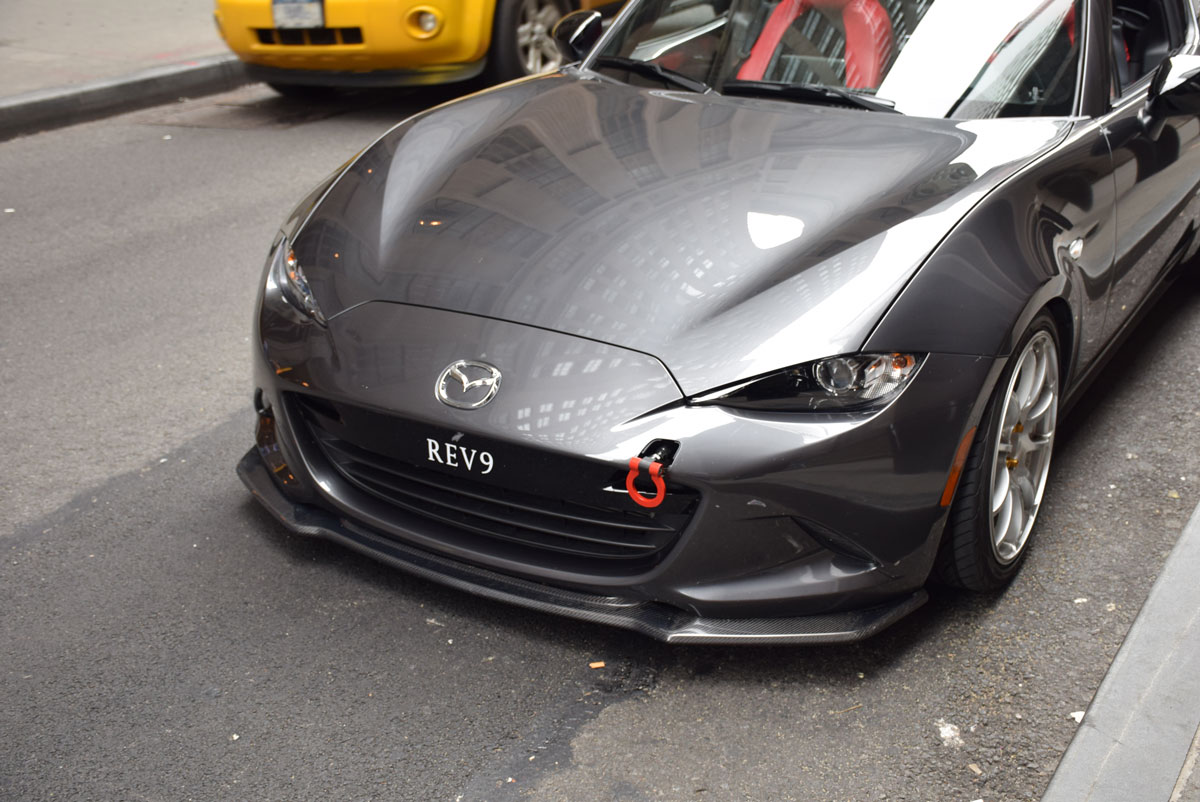
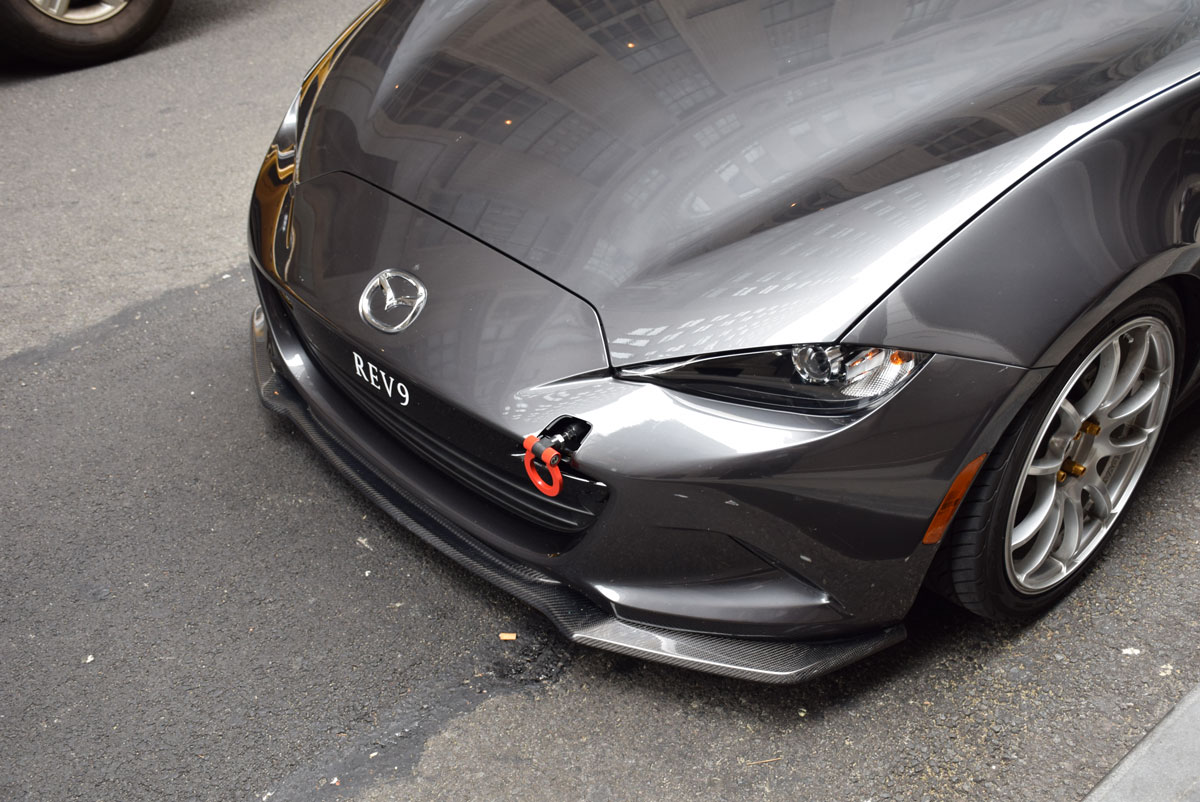
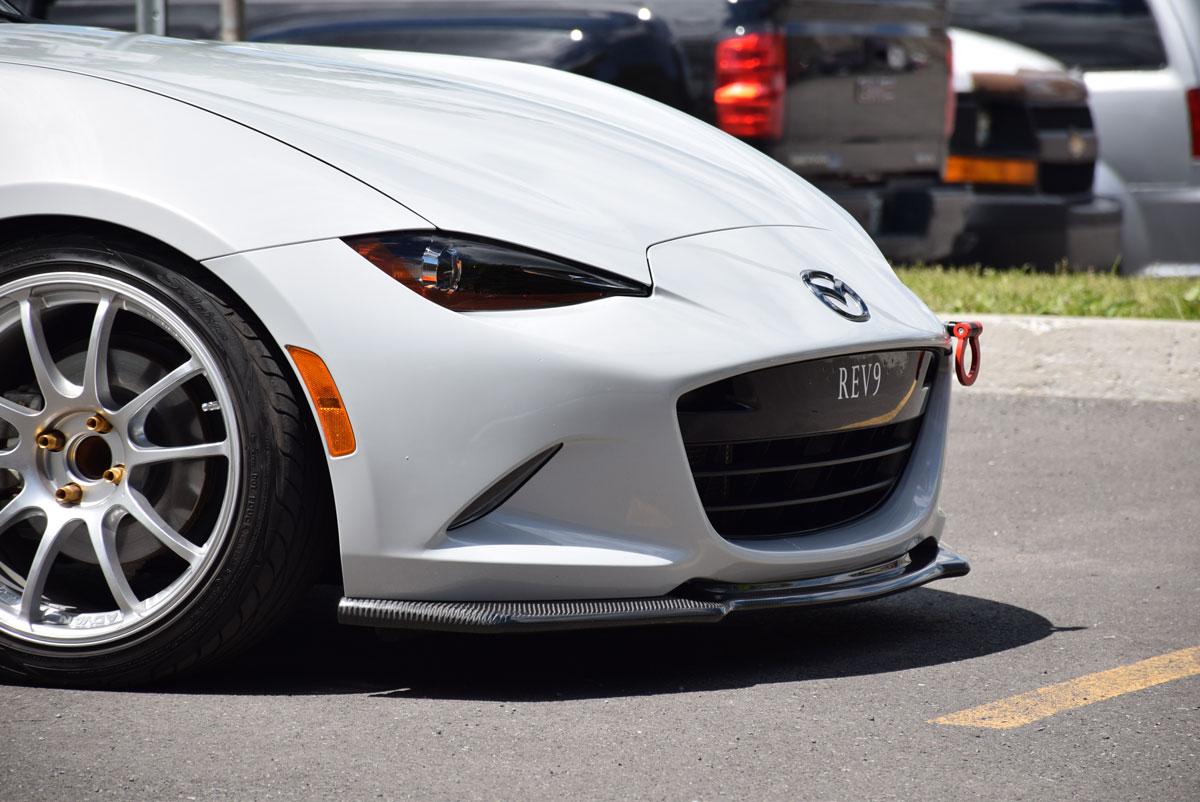
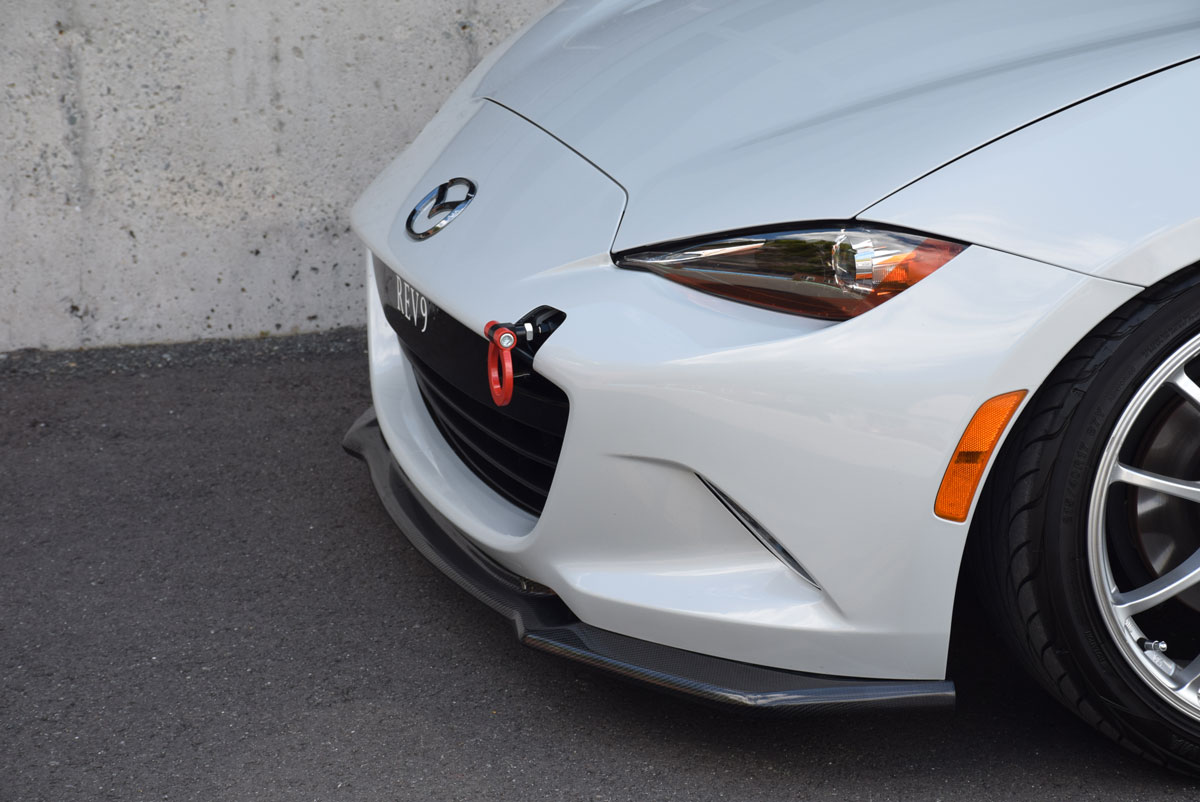
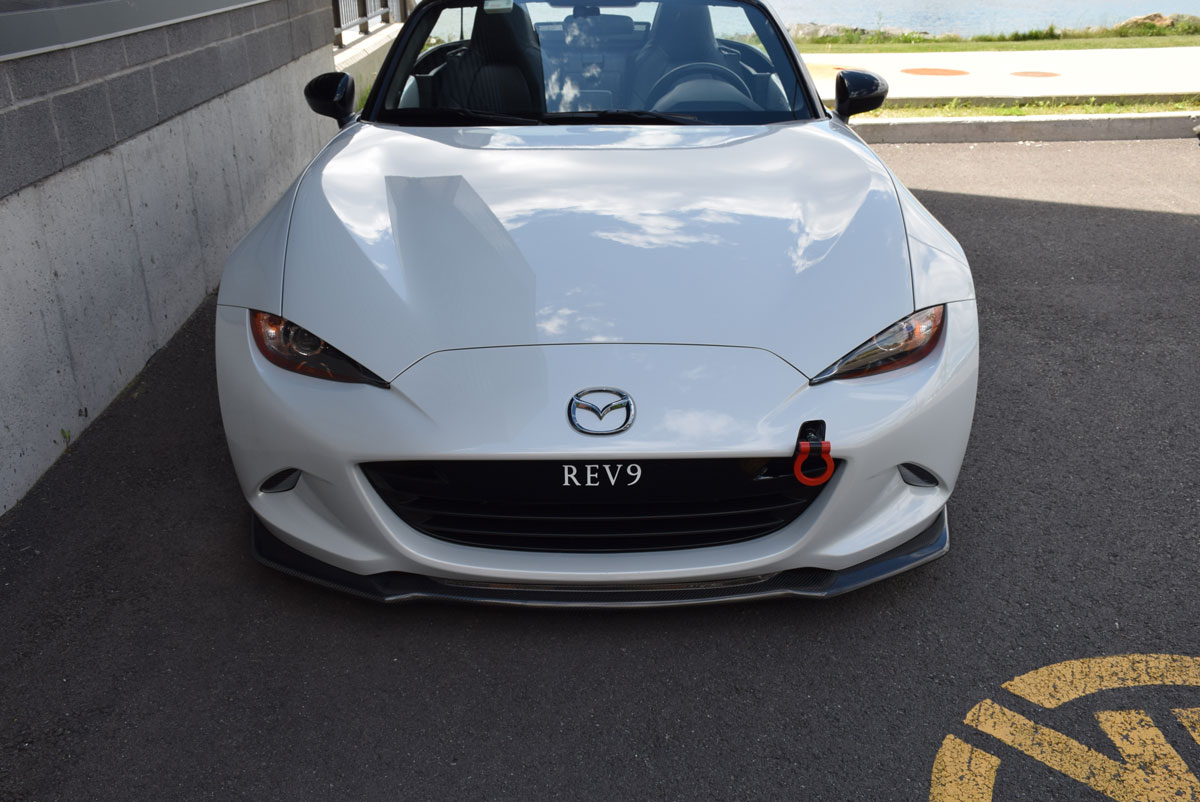
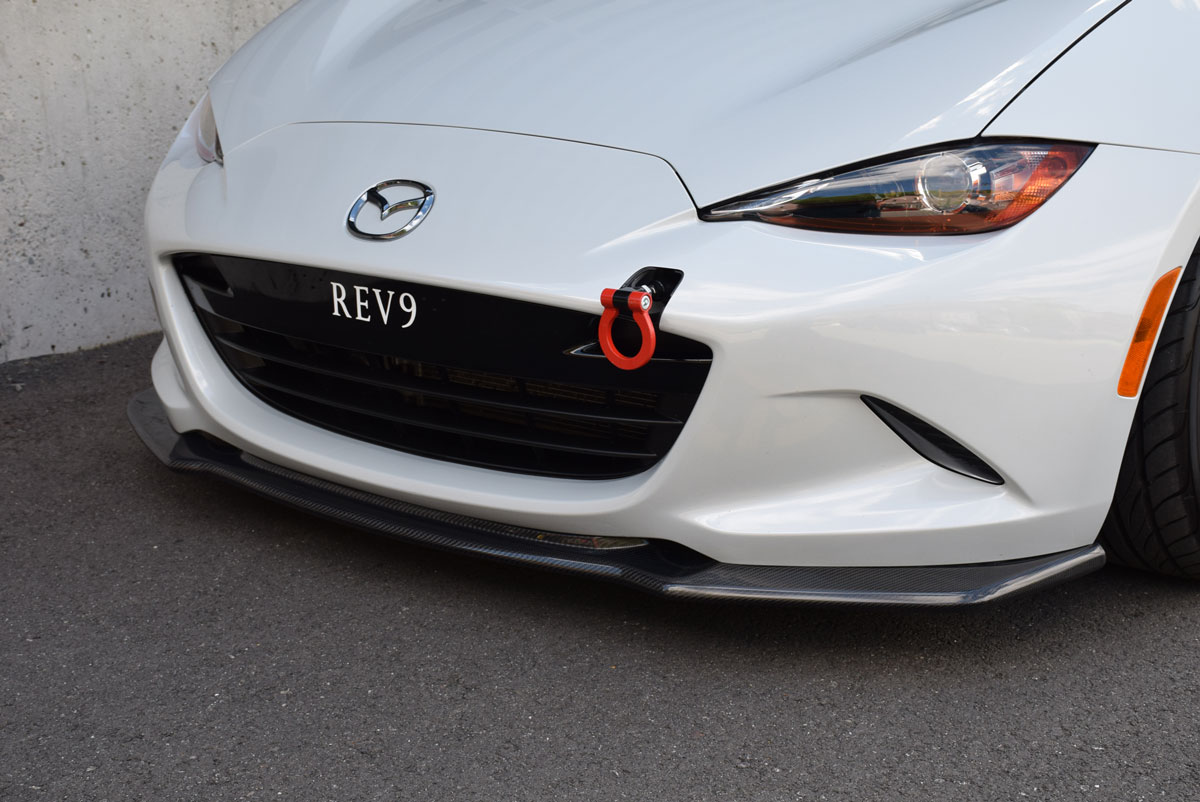
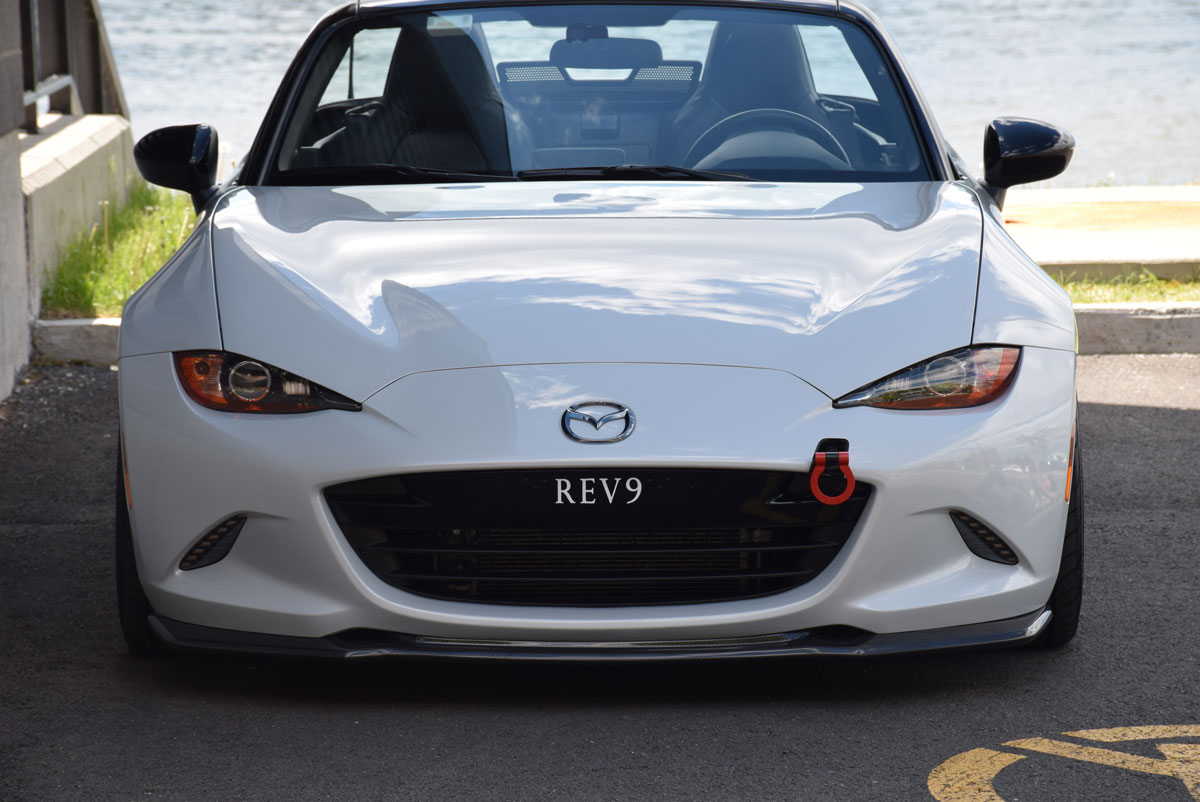
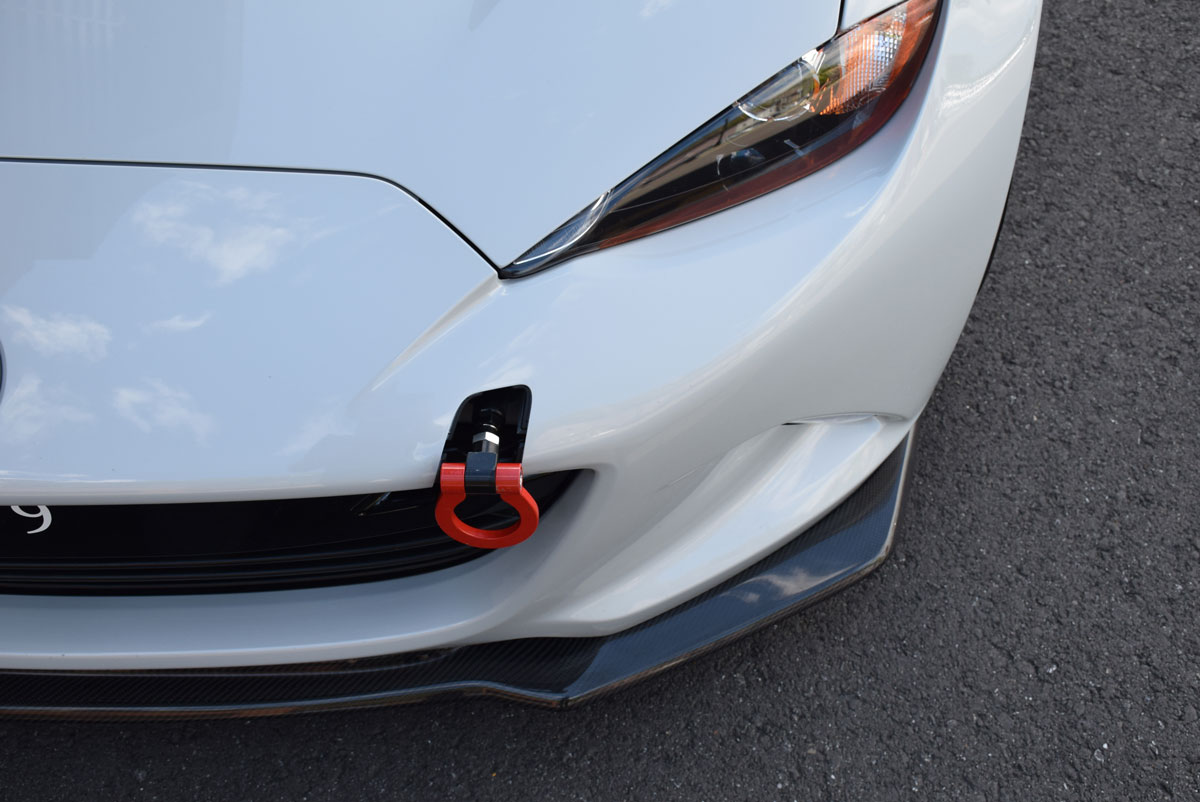
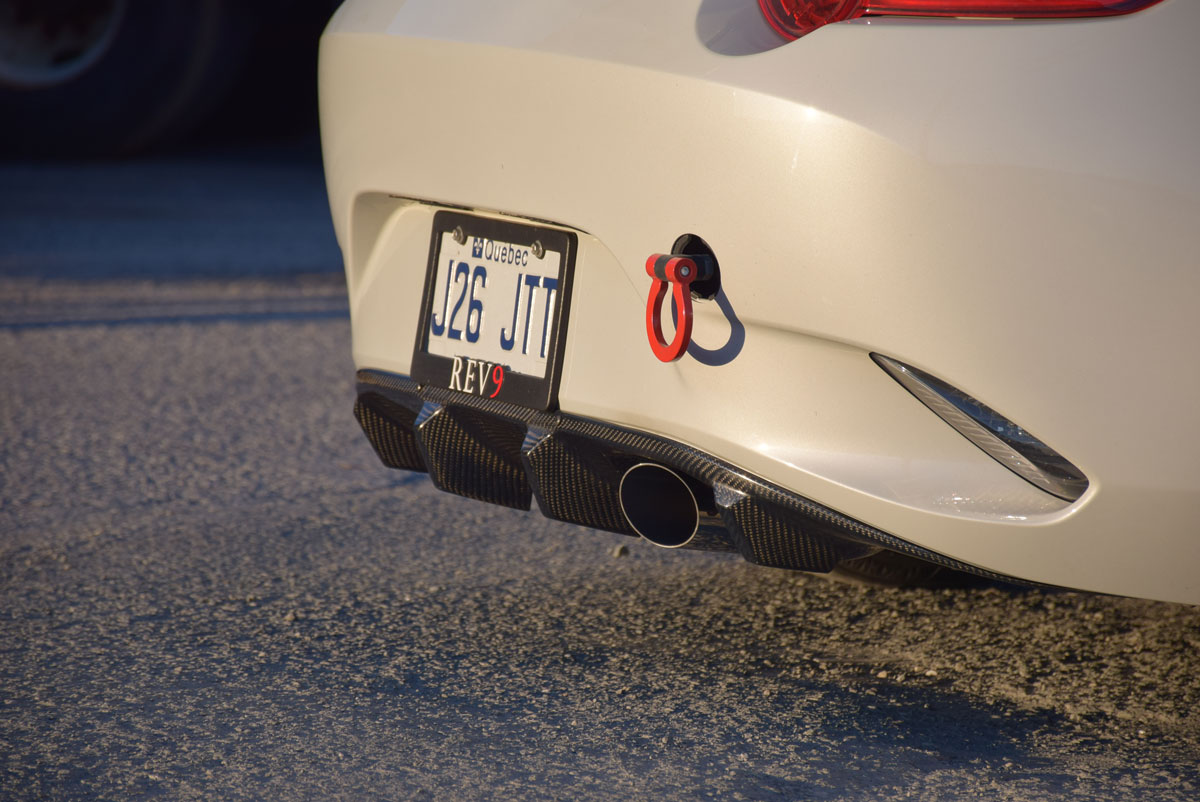
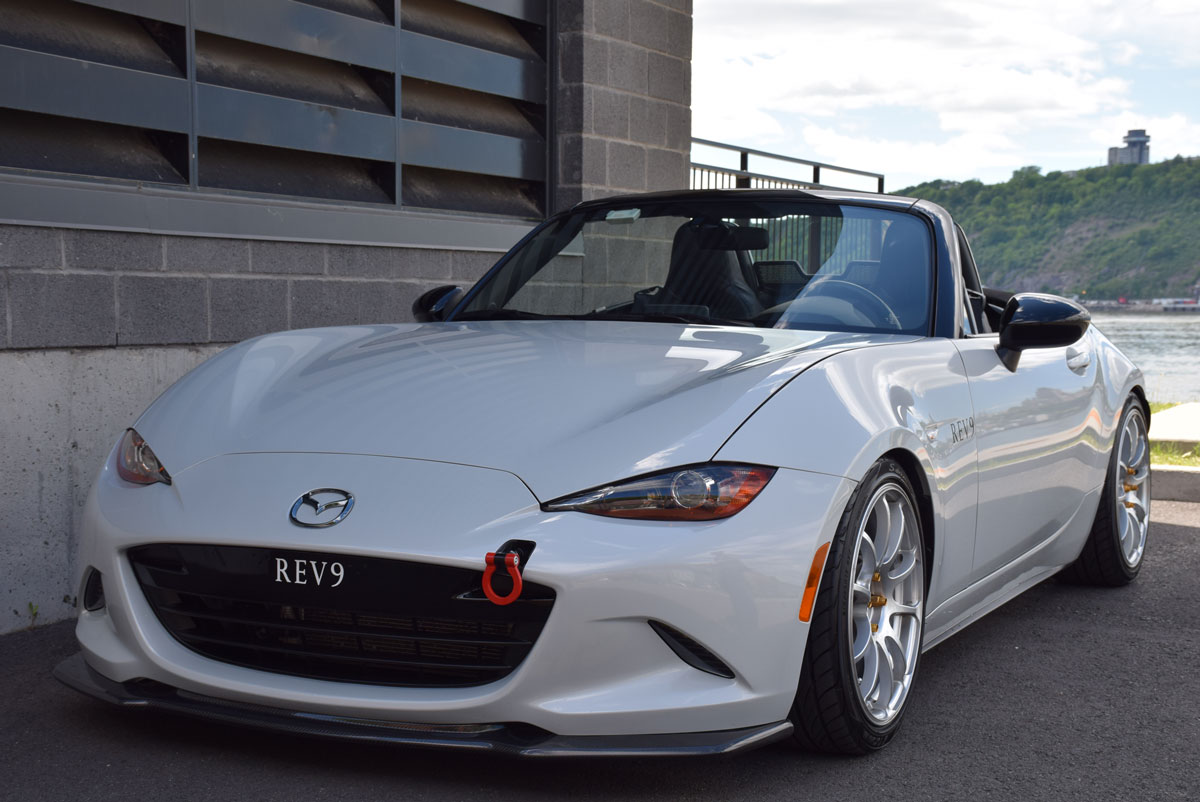
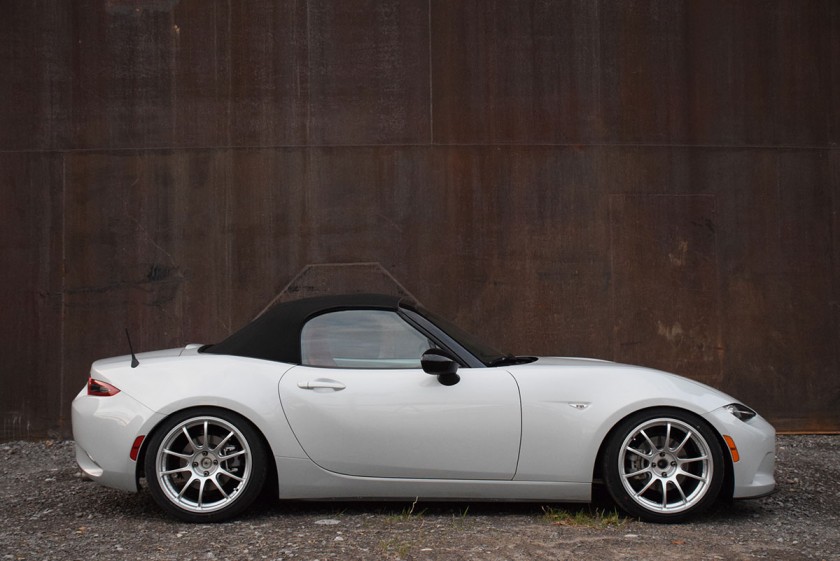
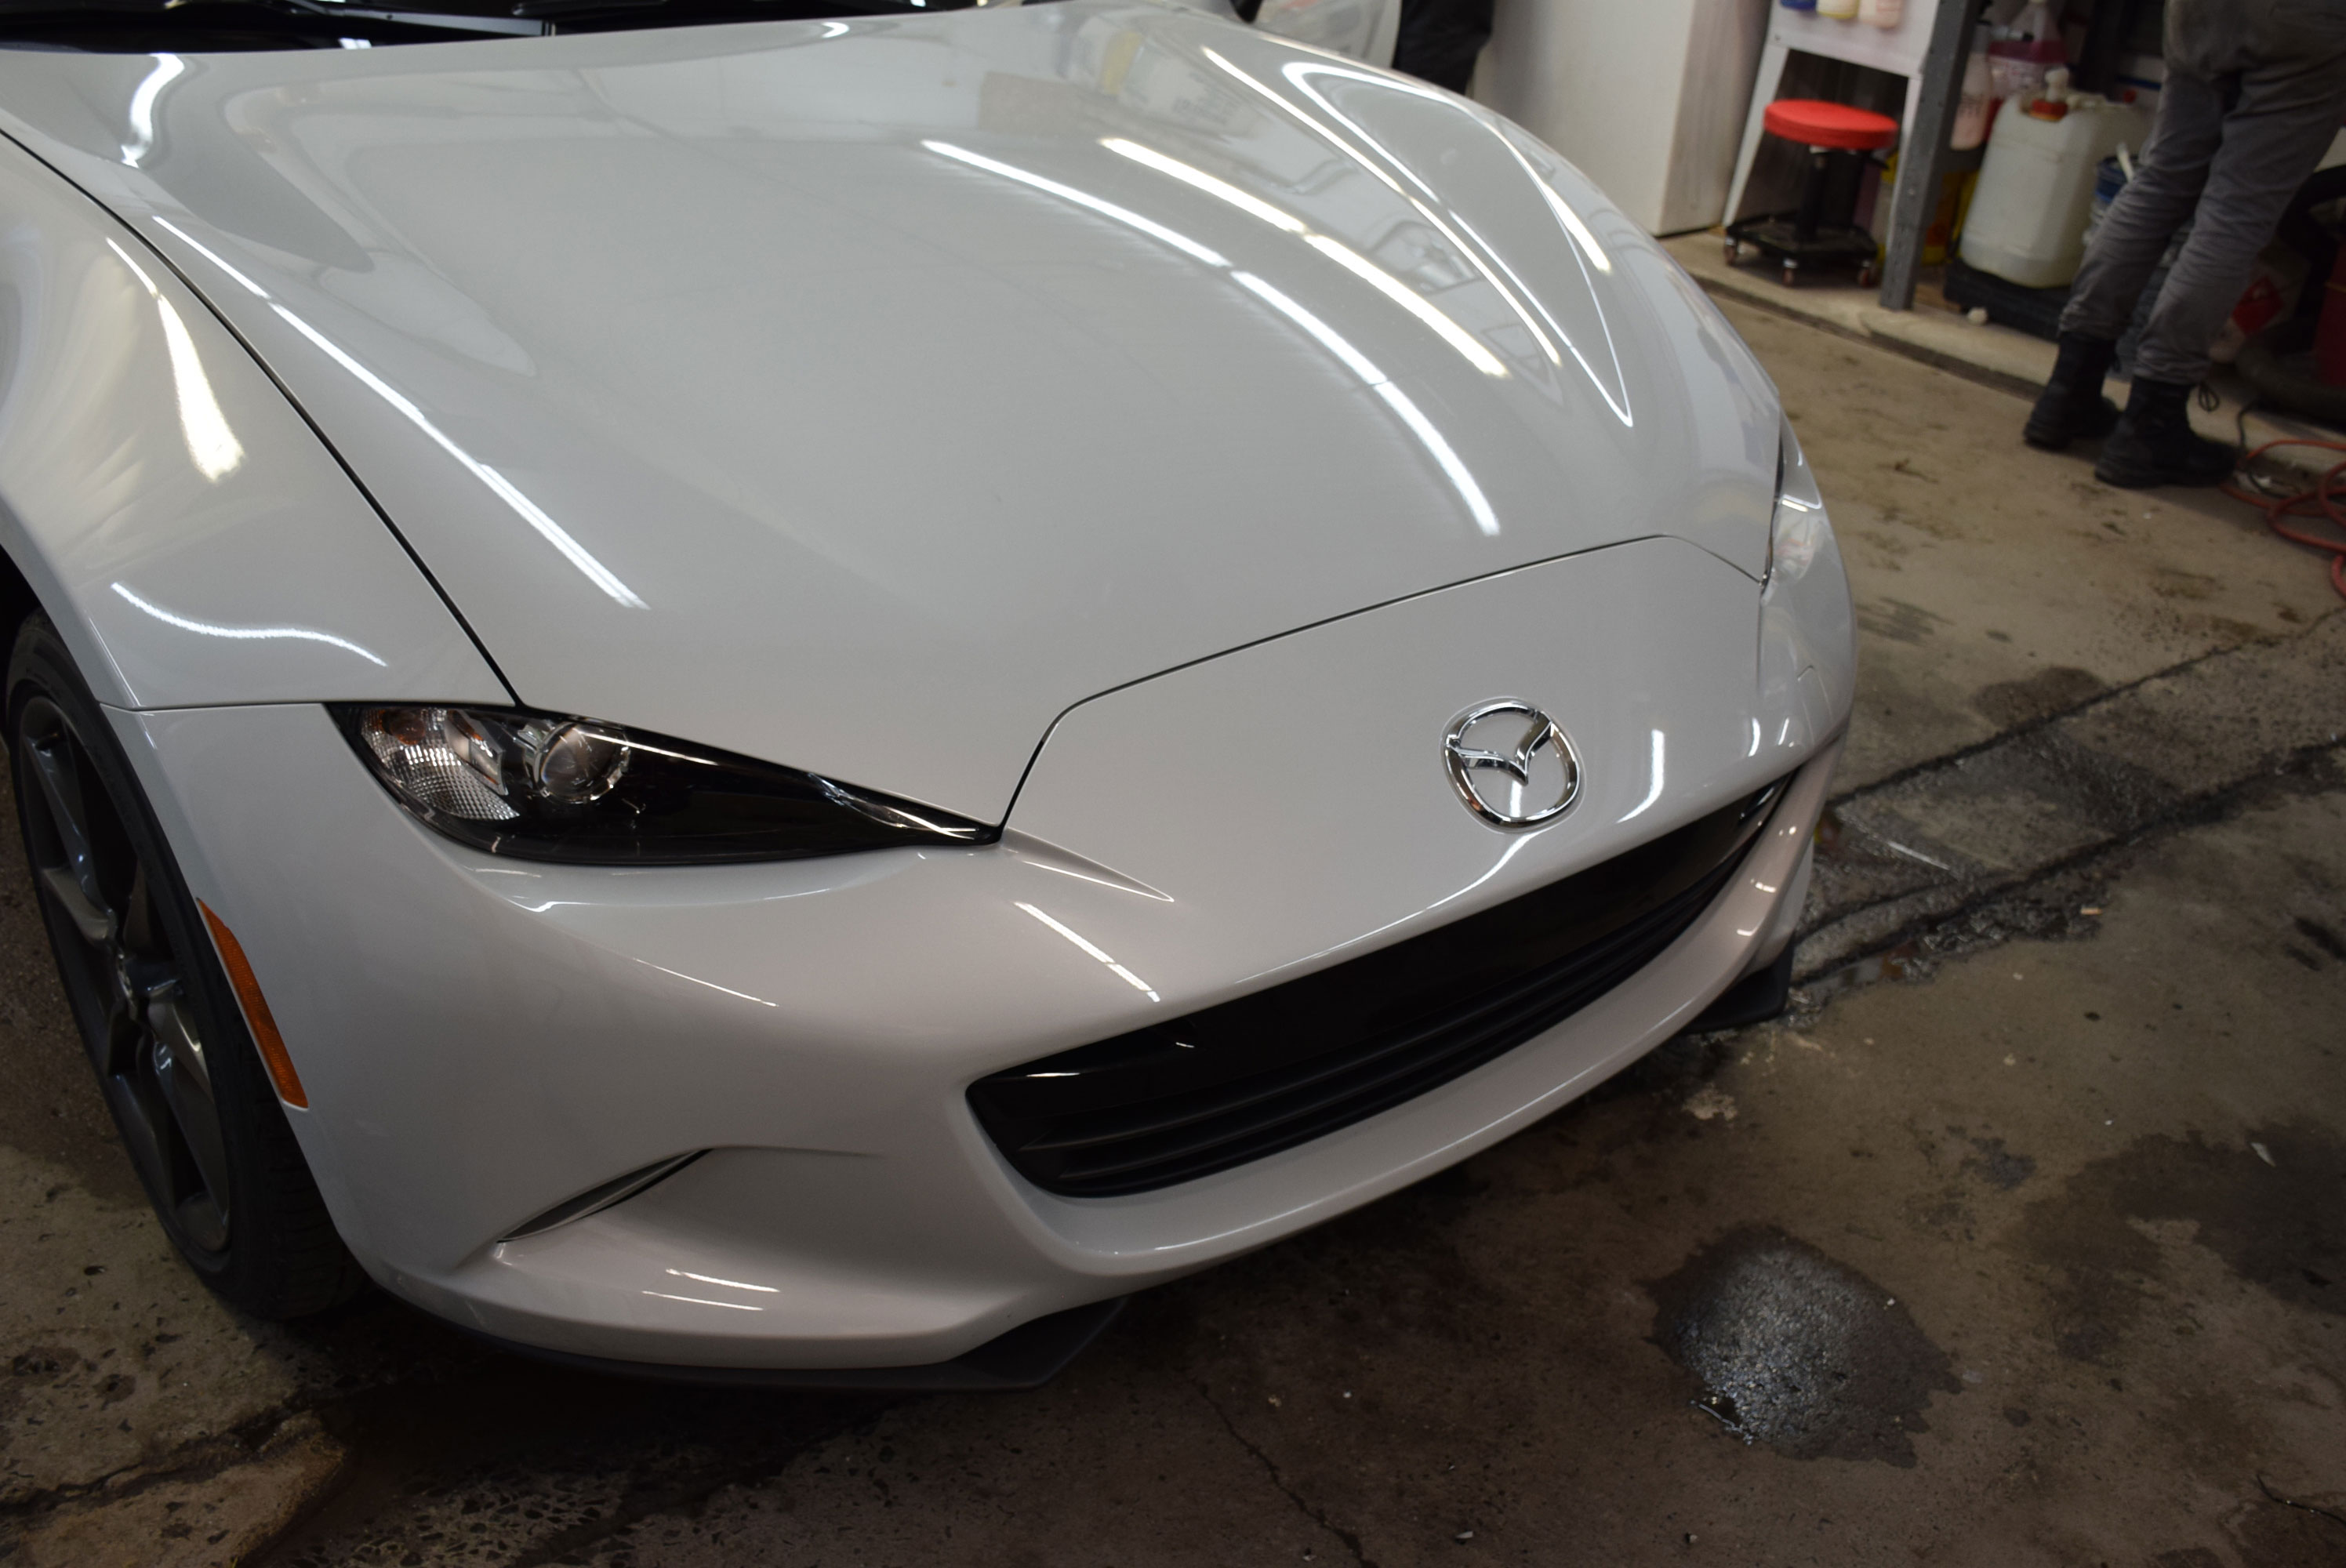
This is pretty much the only front lip that I can run without bottoming up every 5 minute at my current ride height. I also love the fact that the carbon fiber merges so well with the Machine Grey paint color. It follows the lines of the car so well, it almost looks like it’s an OEM option! TK Style is not a replica, it’s the name of the company based in Japan…
So this was the first photoshoot & blog post of the new ND Classy Project Car. I hope you enjoyed… as I can’t stop staring at these J. I also just remembered that I forgot to post the ‘’before’’ pictures… another blog post will follow! I’ll also do another blog post for the interior as there are way too many pictures already! If you are in the USA and want to see it in person, follow my USA Road(Ster) Trip, maybe we’ll meet!
I always enjoyed seeing cars with nice front lips. With my current ride height, I needed to make sure I had a front lip that would allow me some clearance and was looking for a clean look.
I opted for a new front lip that just got released not long ago, the TK Style Carbon Fiber ND Front Lip. It installs over the OEM front diffusers and just required a bit of drilling at hidden bumper spots to fit. You can install it within 30 minutes and it looks amazing :
Many people think it’s the Mazdaspeed ND Front Lip, but it’s got a different shape and lays flat with a slight raise in the middle to provide with more clearance.
It completes the look of the front end pretty nicely.
And, as you can see, it follows the shape of the front bumper, too!
This piece took about 10 minutes to install, it only requires drilling at 6 different points:
It’s pretty hard to take good pictures of it, due to the high contrast of the Ceramic Metallic light color.
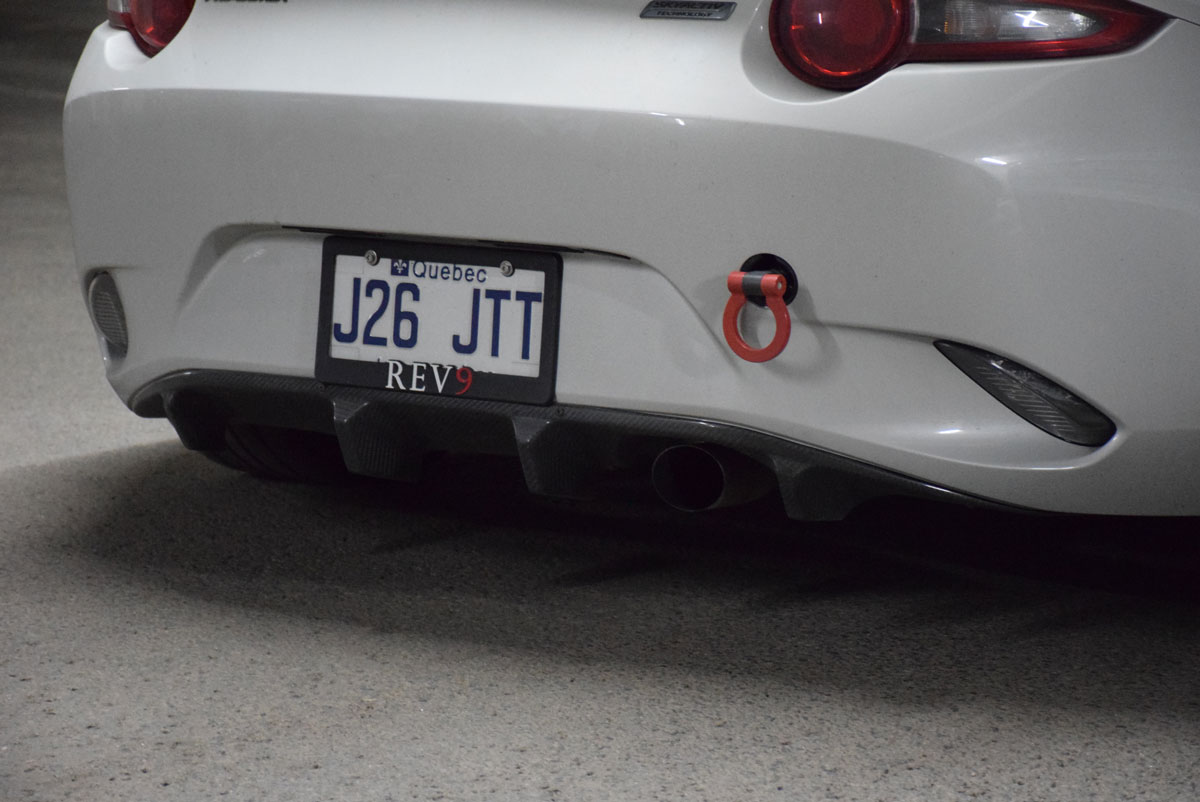
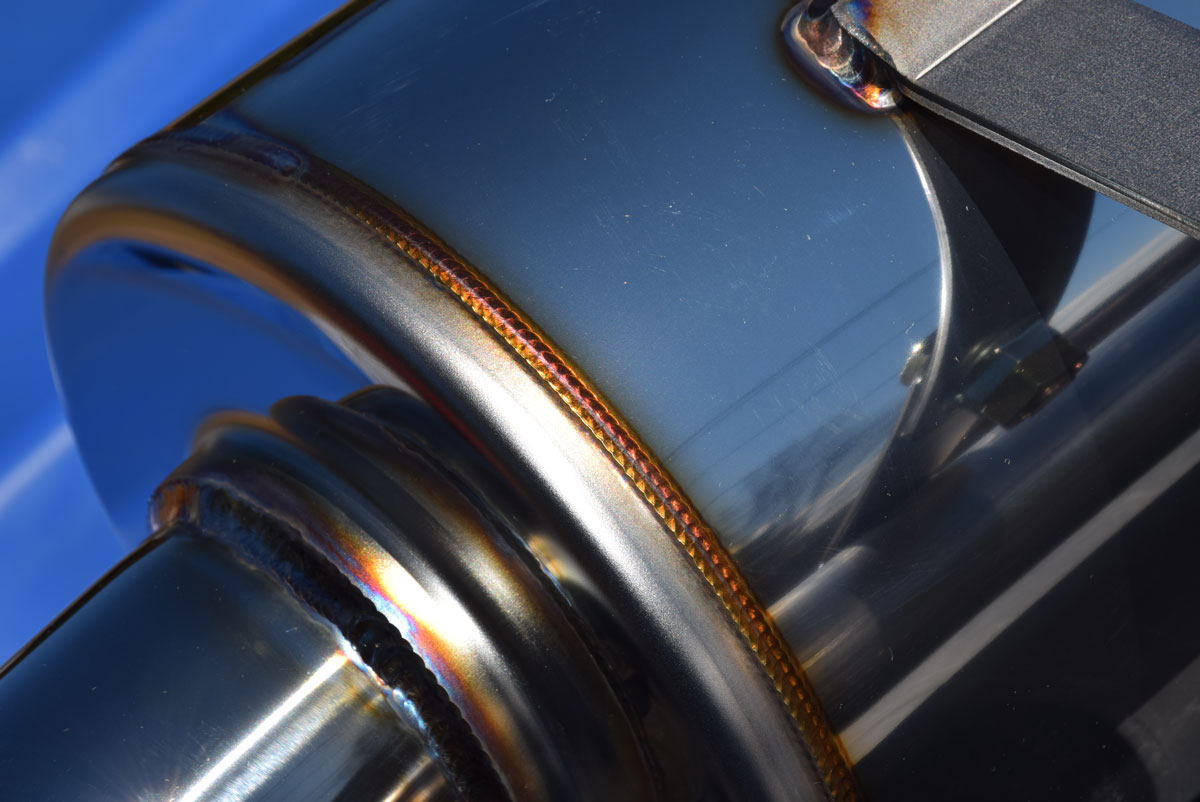
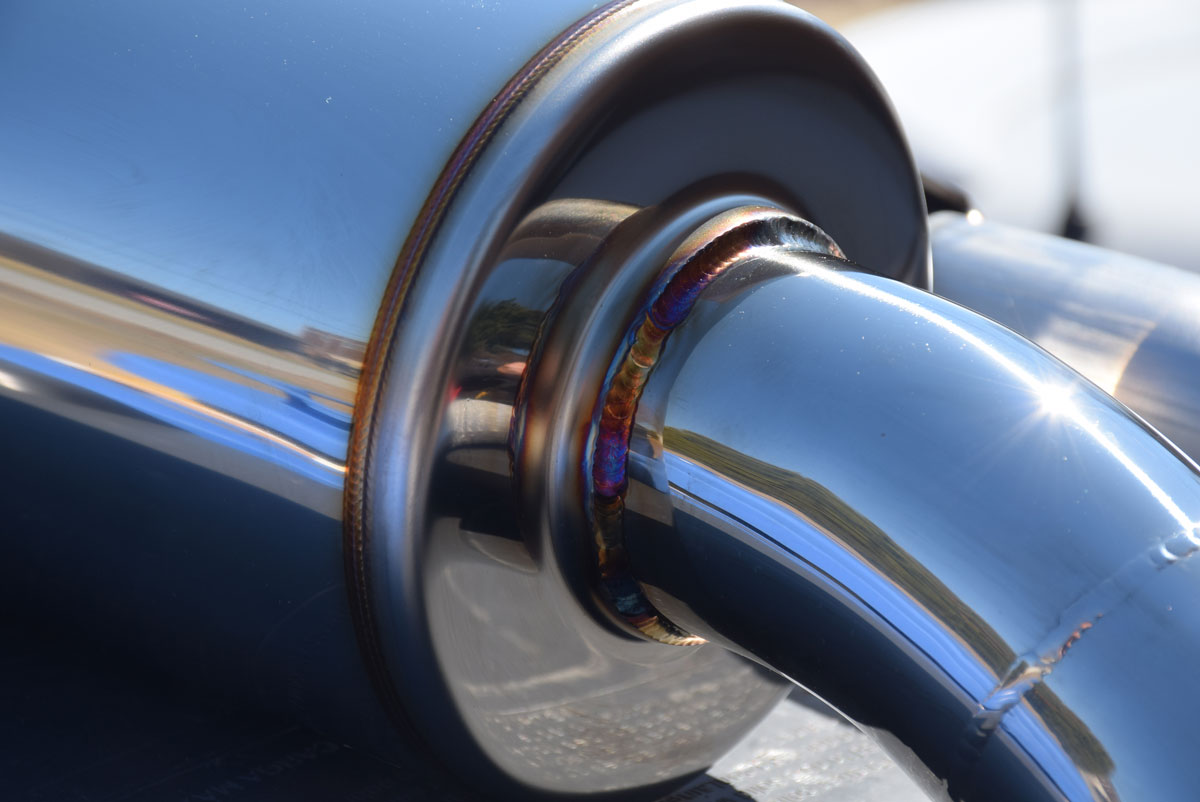
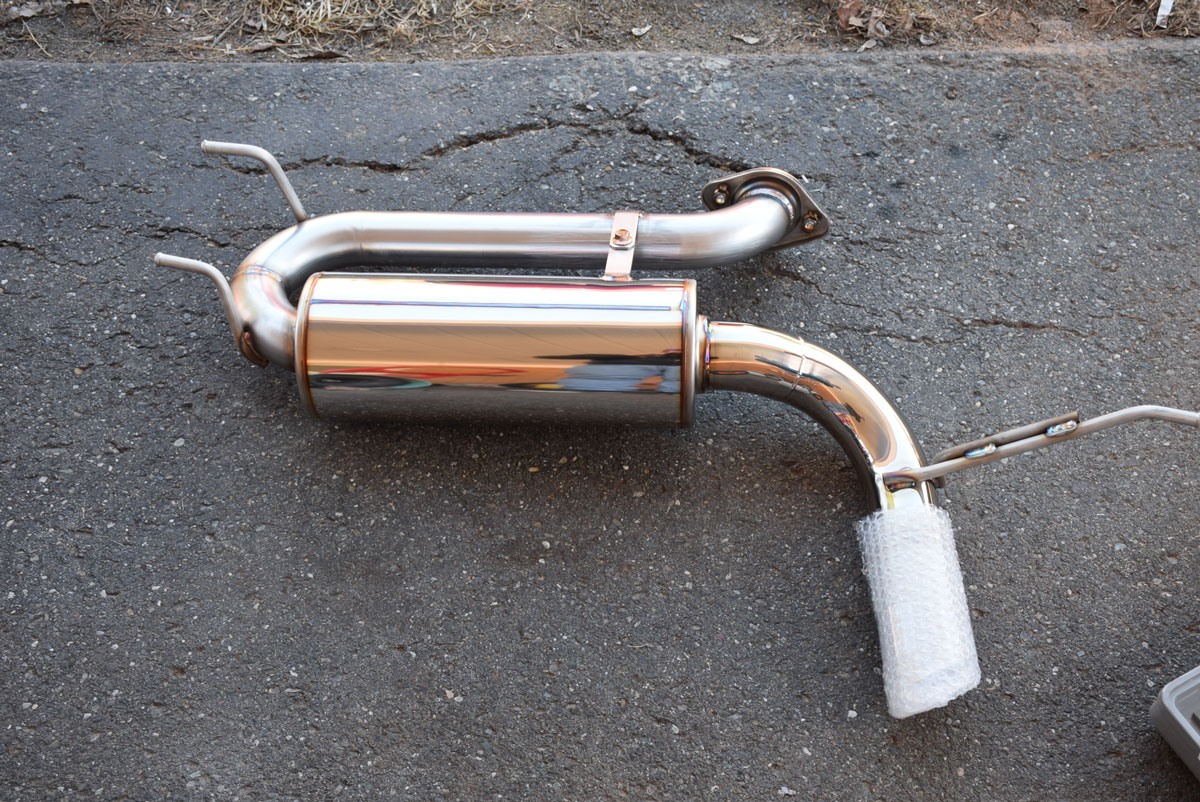
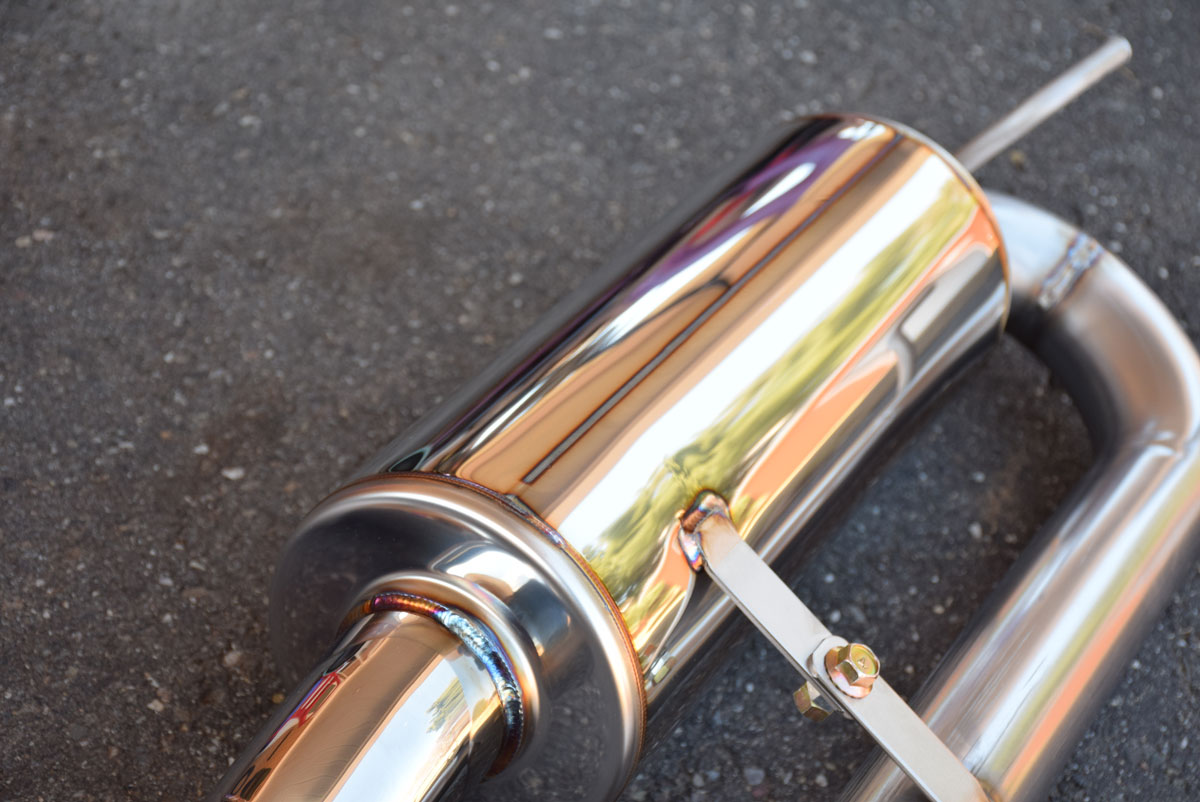
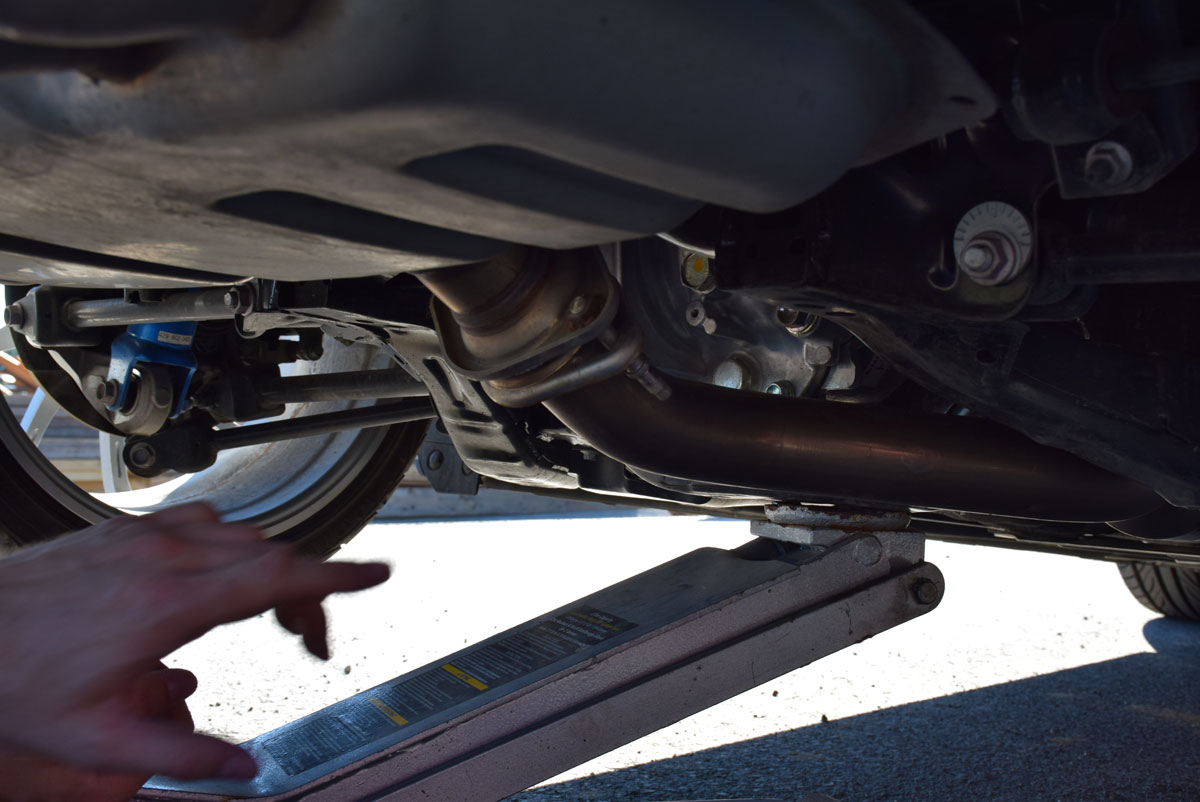
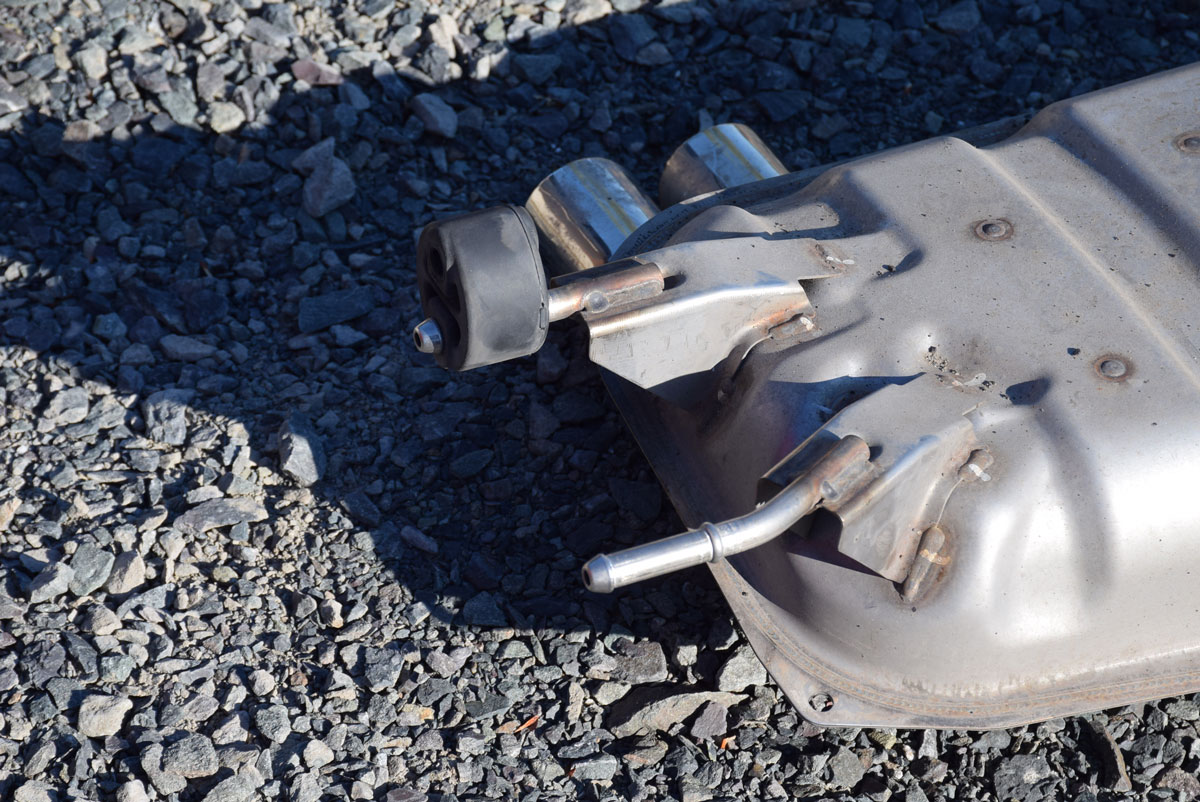
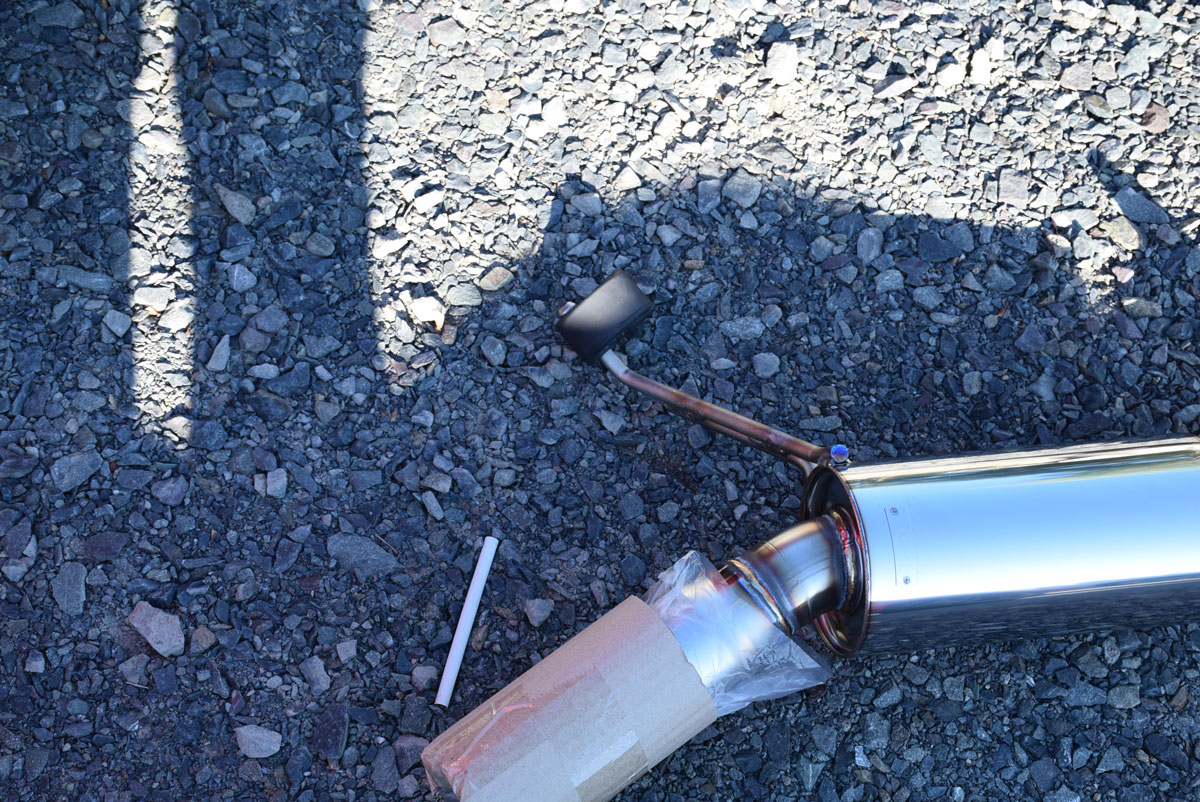
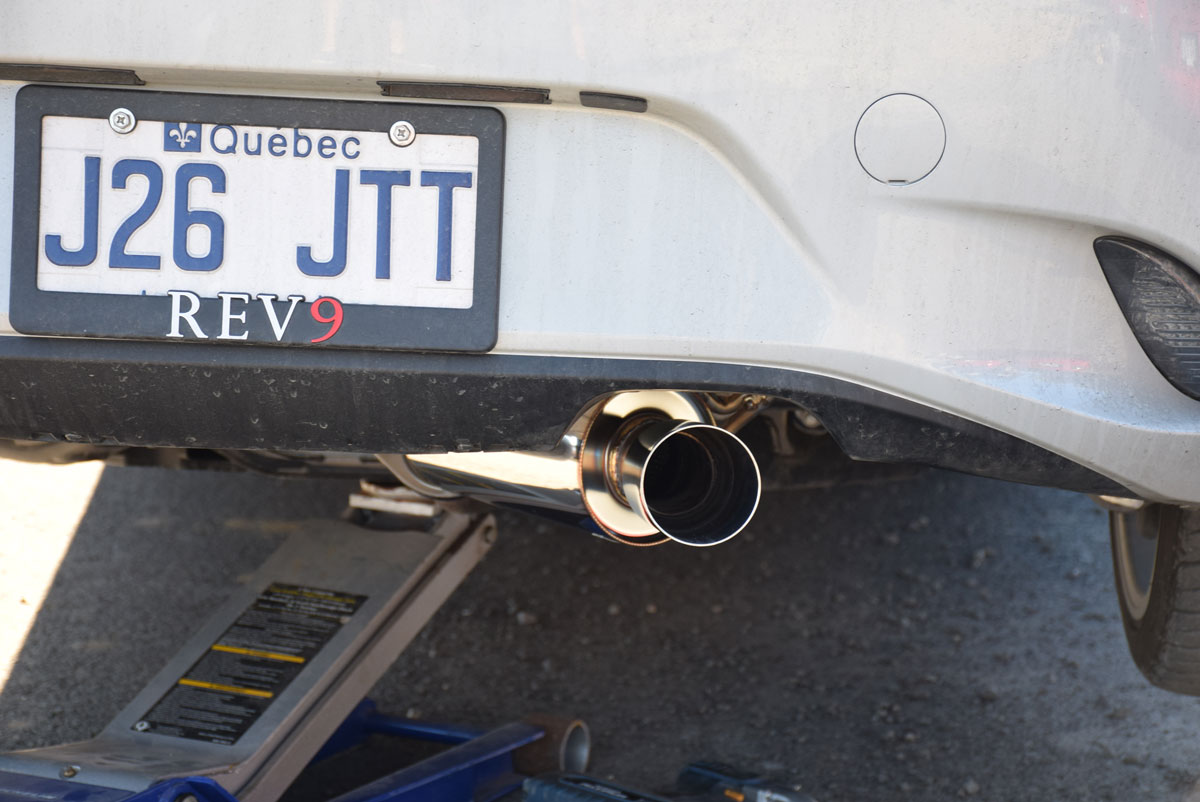
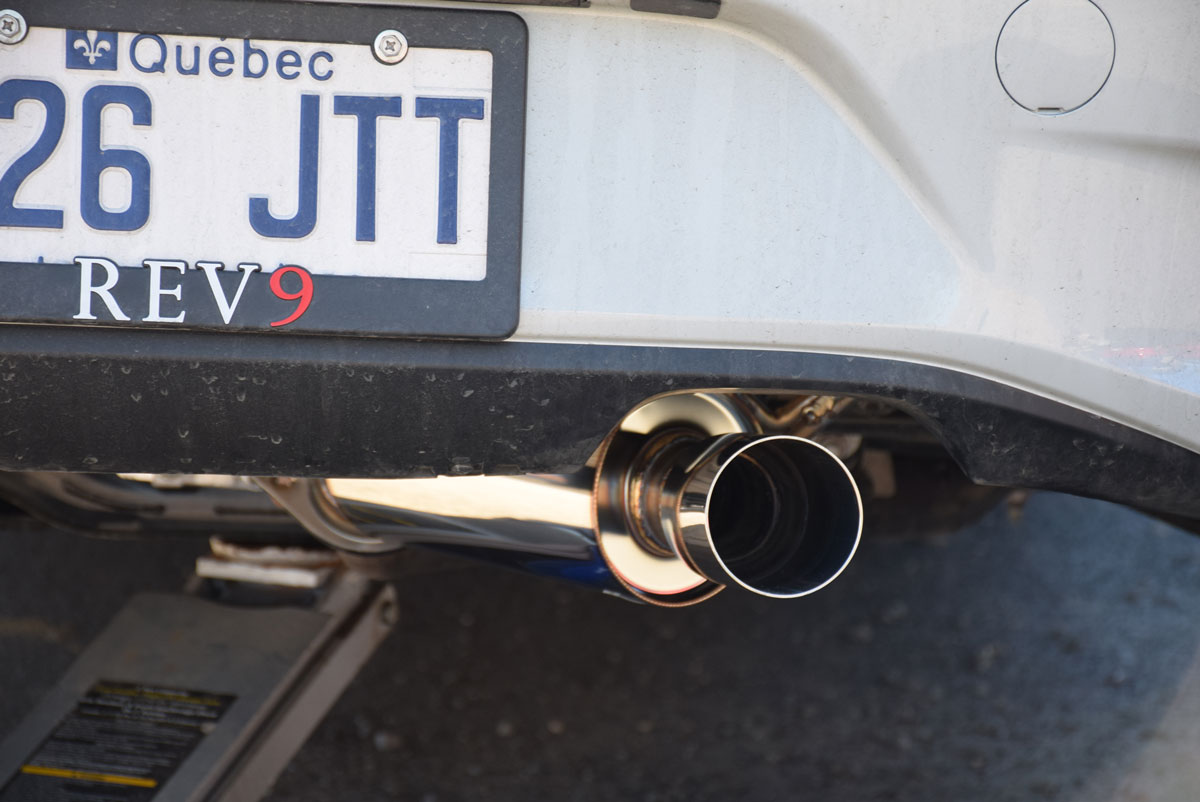
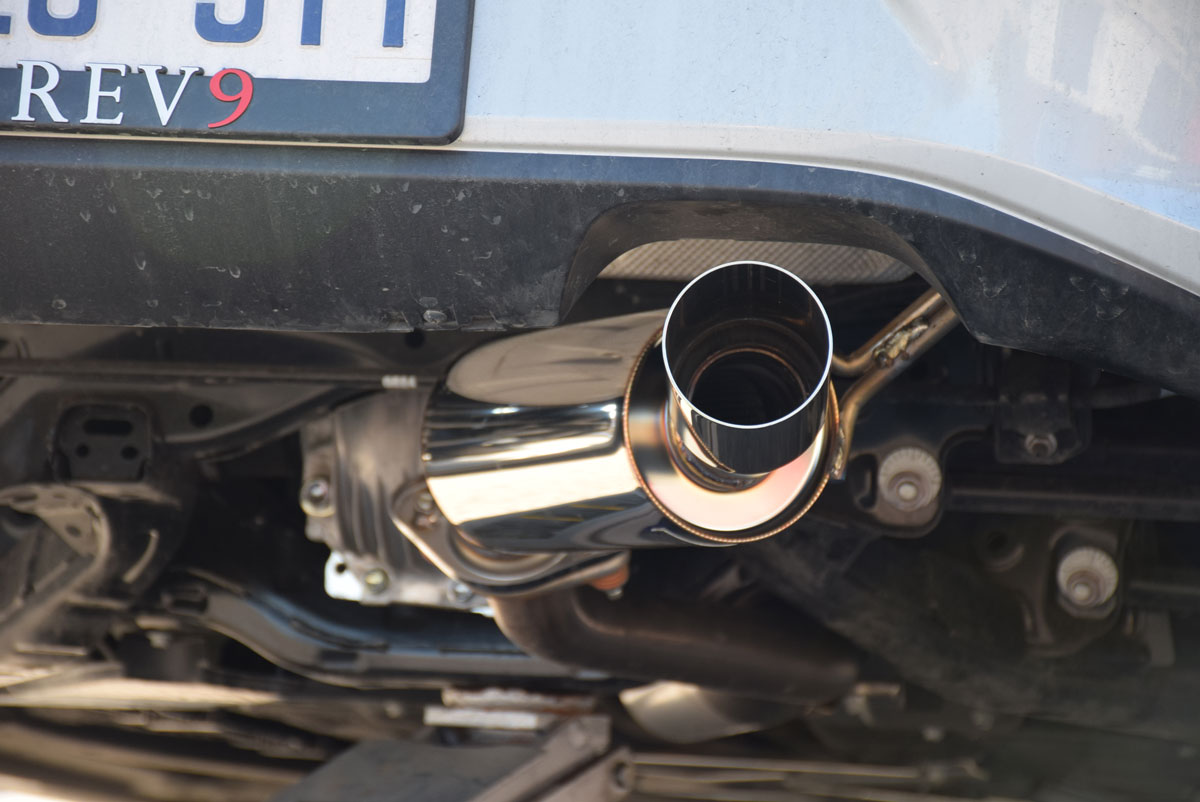
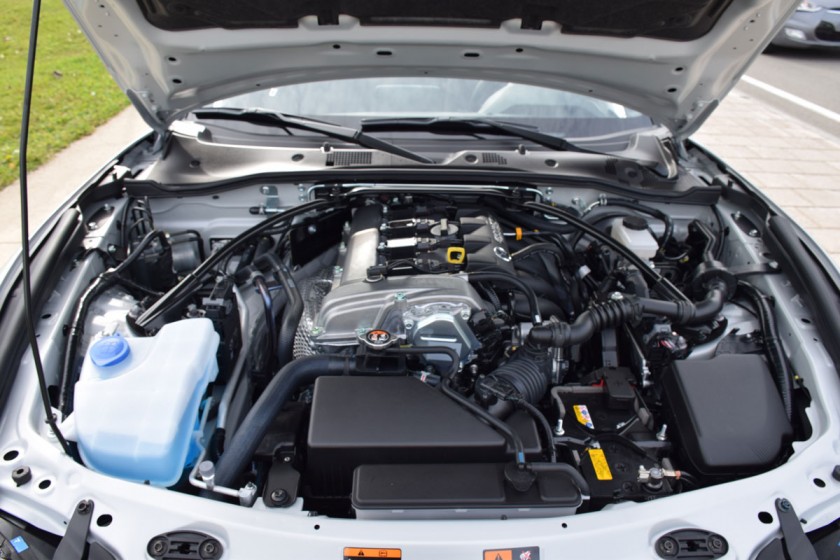
Lastly, I installed a muffler from my friend at Integral Kobe : the Integral Kobe Type-US ND Exhaust. This is called Type-US because it’s aimed for the overseas market since it’s not legal in Japan (sound level). It’s not overly loud, and in my opinion, it’s just perfect.
Look at the quality of the product :
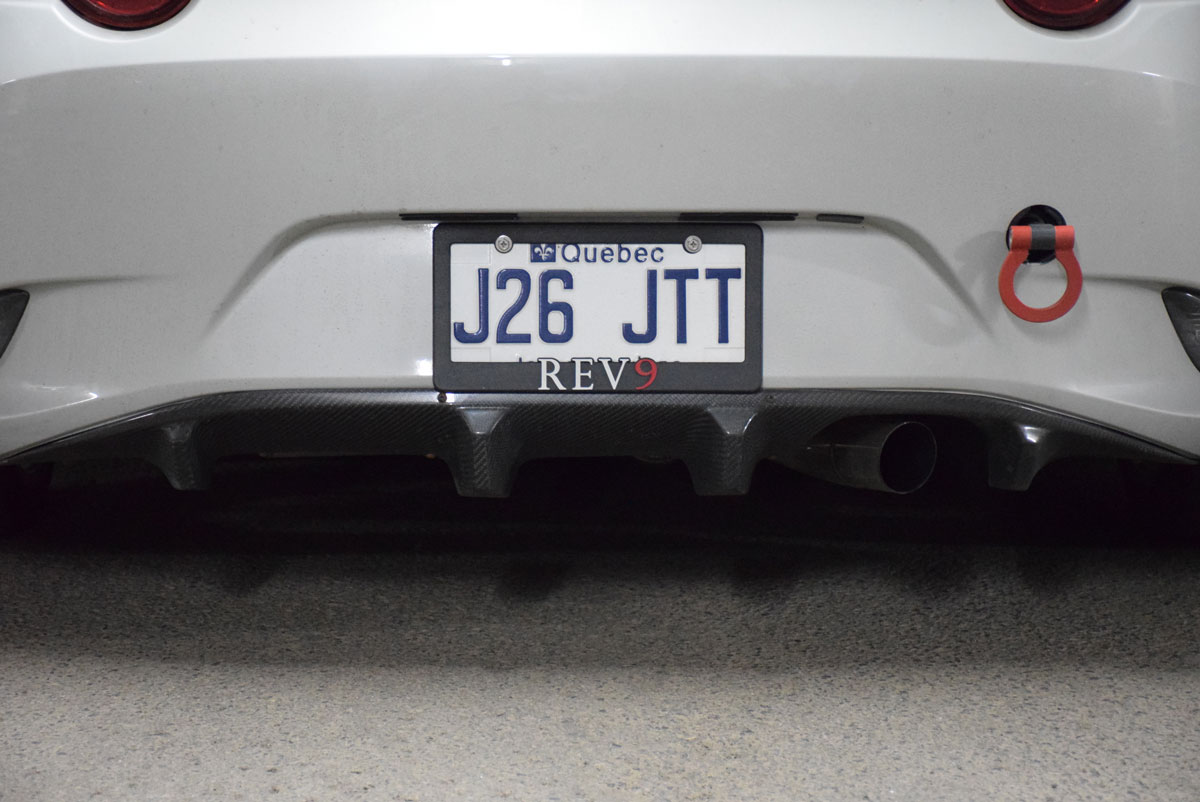
It has a very unusual angled tip but looks pretty cool once installed with the laser cut logo:
I do not have a sound clip yet, because when we tried to do it, we hit a nail on the road and got a flat tire. Now, we will be able to do a sound clip about it very soon, but we have to warn you, it sounds extremely good. A full review of the muffler will be done soon!
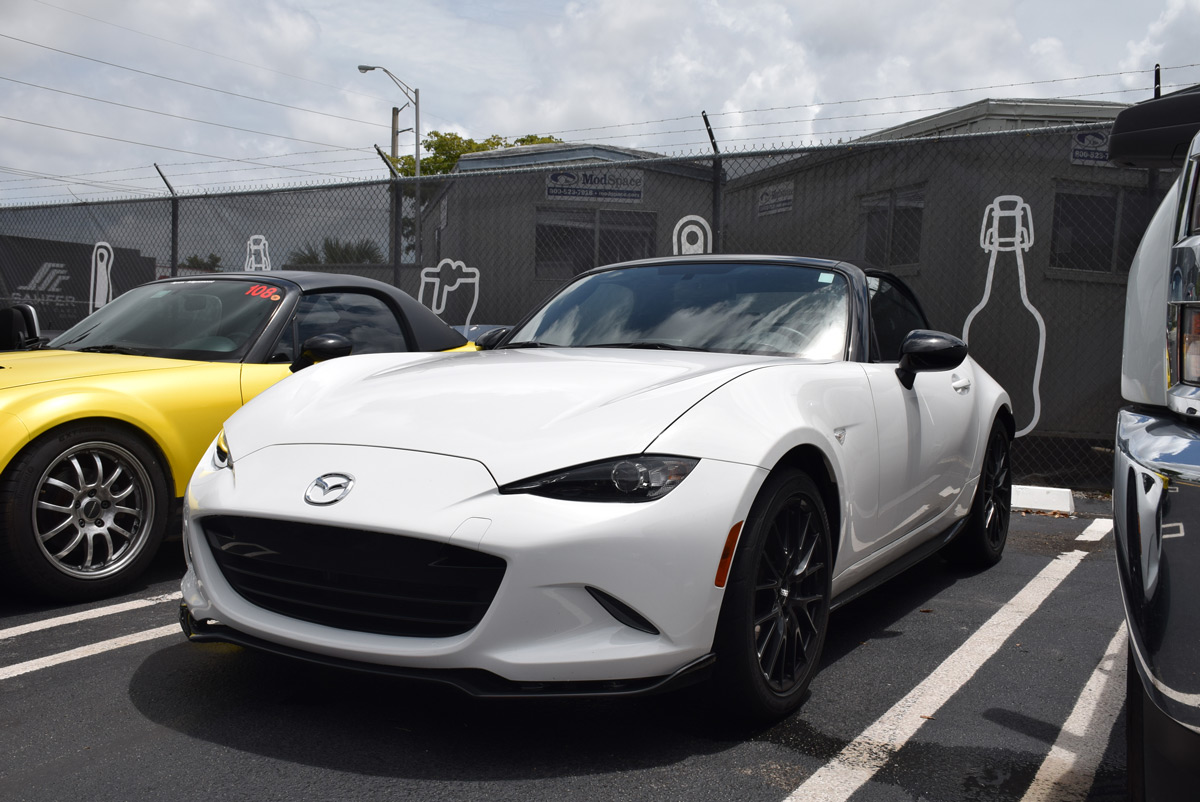
It was sad to do, but the ND Soft Top is now back to stock and for sale at our local dealership.
Here is one last picture in all its glory:
This will be the last blog post about our Soft Top ND Demo Car (Project Clubman) because the car is now retired (back to Mazda dealership) and we now are working on our new ND RF Project Car (Project Classy). More updates coming soon!
For a long time, I dreamed about “doing the USA” by car. This year was REV9’s 10th Anniversary and I thought it would be the perfect opportunity to live a life long dream and meet with customers and enthusiasts!
Last year, I did a Road(Ster) Trip and went all the way from Quebec to Texas (Houston & Austin) and drove back home. I made many friends and had lots of fun.
(Picture from Houston meeting)
This year, I’m planning to travel across most of the USA (except some states as I cannot be everywhere, unfortunately) and come back by Canada!
I’ve created a facebook group called Road(Ster) Trip – North America that I suggest you to join if you’re from USA or Canada so you can get access to information about meetings before others~
Since many people asked me about my schedule and the organized meeting, here is the tentative schedule :
ALL DATES ARE POTENTIALLY CONFIRMED! Just locations need to be chosen now.
If you are wondering why many meetings are held at breweries, it’s just a personal preference. I am a big fan of microbreweries and enjoy seeing and trying new places. Also, they usually have good food and big parking lots.
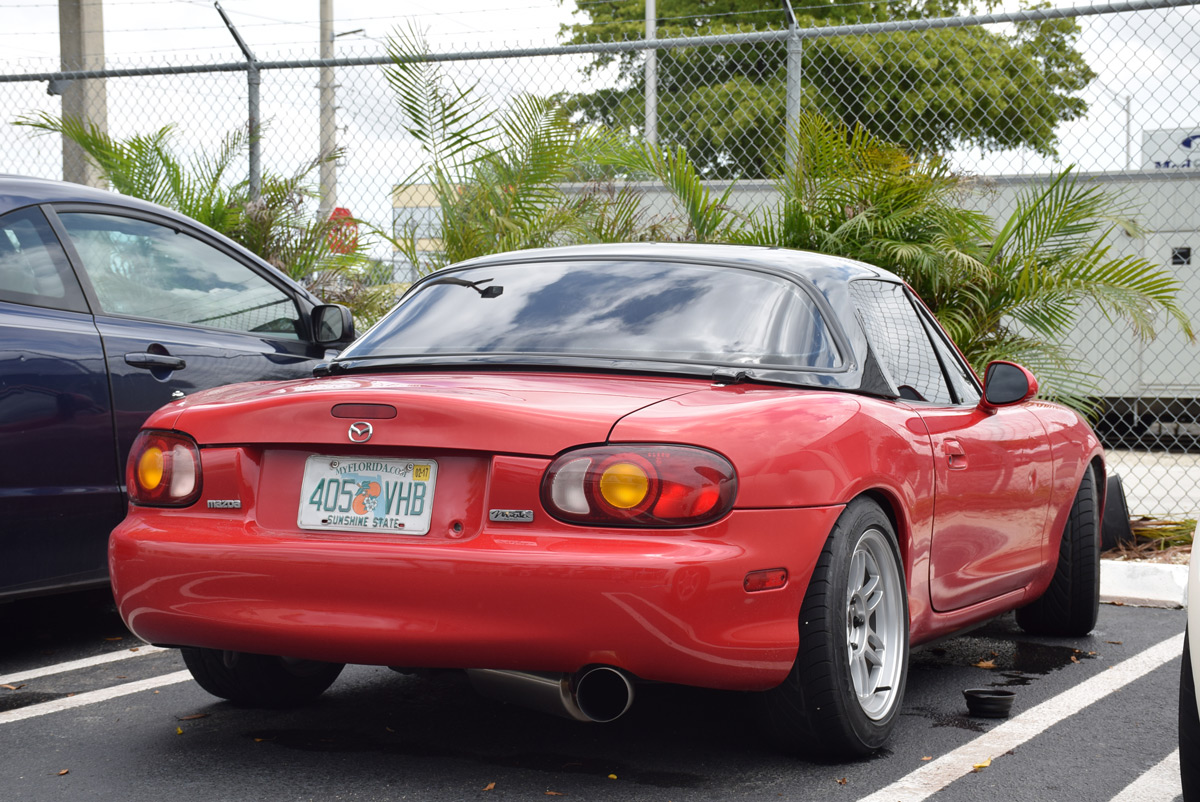
There is an ancient proverb that says: “Loud Pipes Save Lives”. This is particularly true when your car looks invisible to most truck drivers. I’ve always had Miatas with aftermarket exhausts and never liked them to be ultra loud. In my NA, I was rocking the RS*R Invidia Exhaust (which had a slightly louder tone than stock, but with a much sportier sound). In my NB, I had the RS Factory Stage N-Zero2 Exhaust which was pretty silent until you hit full throttle. Those were some nice “feeling” mods as you could hear the engine as you pushed it.
When I first got my ND, I sometimes had difficulty hearing the engine because it was so quiet. Mazda did an awesome job at making the car SUPER silent. By good job, I mean, you can literally run the car without its muffler and it does not sound *that* bad (try it when you change your exhaust, you’ll see). The stock catalytic converters and mufflers coming from the mid-pipe make the exhaust noise almost impossible to hear (this is also why they include a sound enhancer, otherwise you really can’t hear the engine).
I had the choice of a variety of awesome exhaust setups, but I decided to go with the least expensive and probably most “extreme” exhaust we sell. I went for the Fujimura Gentle Sound Muffler. Ironically, it does not sound gentle at all. It sounds mean and awesome. Don’t worry, there are video clips later in this post.
So, here’s my complete review:
Installation:
Installation couldn’t be easier. The stock exhaust is held by 2 bolts and 4 exhaust hangers.
Just remove the 2 bolts and then play with the hangers to get the exhaust out. Do this when the exhaust is cold… otherwise you might hurt yourself. I suggest doing this with someone else, as, otherwise the exhaust may fall on your face or on the ground while you’re trying to remove it.
After that, just take 1 of the OEM exhaust hangers and put them on the Fujimura exhaust. The exhaust is so light (3.3KG) that it only needs to have one mounting point.
Voilà, your exhaust is installed!
If it takes you more than half an hour to do this, you probably should not work on cars. It’s that easy to install.
Looks:
The Fujimura Gentle Sound Exhaust is pretty subtle. It’s a single-tip exhaust that has a slightly angled shape to make it as direct as possible. When the exhaust is not installed, you can basically see right through. The muffler and tip is polished for a neat look.
As with any shiny part that’s just a few inches from the ground, it gets dirty. At some point, if you are as careless as me, the finish becomes more silver than polished. It can be brought back to its original glory, but I didn’t get round to it yet.
Still, could we say that after a while it’s less of a “cop-magnet”?…. Maybe.
There is also a fancier version of this exhaust: the Fujimura Limited Edition Exhaust with a beautiful titanium tip. I didn’t want to go too fancy for once and took the regular one.
Noise:
This is the important part, isn’t it? The Fujimura Gentle Sound Exhaust is made to give the car a deep and sporty sound. The president of Fujimura Auto tests various muffler setups until he finds the perfect tone. In addition, he created (possibly) the lightest exhaust setup available for the ND Miata.
When you start your car (going from stock exhaust), the first thing that enters everyone’s head is, “Oh my…”. It *sounds* really loud at first. The reason is simple: the stock exhaust is VERY silent. When driving, you’re like, “this is going to be annoying”. But after a while, you really enjoy it. I have to say, you really get used to the super quiet OEM exhaust. When I had both my NB and ND, if I went from my ND to my NB it felt like it was ULTRA loud. However, compared to other sports cars, it was just normal. When I went to Miatas At The Gap and saw tons of NAs, NBs and NCs, I understood that my ND was not even close to loud compared to other muffler setups. Still, everyone (and I mean everyone) loved the sound of the ND with the Fujimura muffler. It does not sound like a cheap racing exhaust; there’s absolutely no raspiness, which I love.
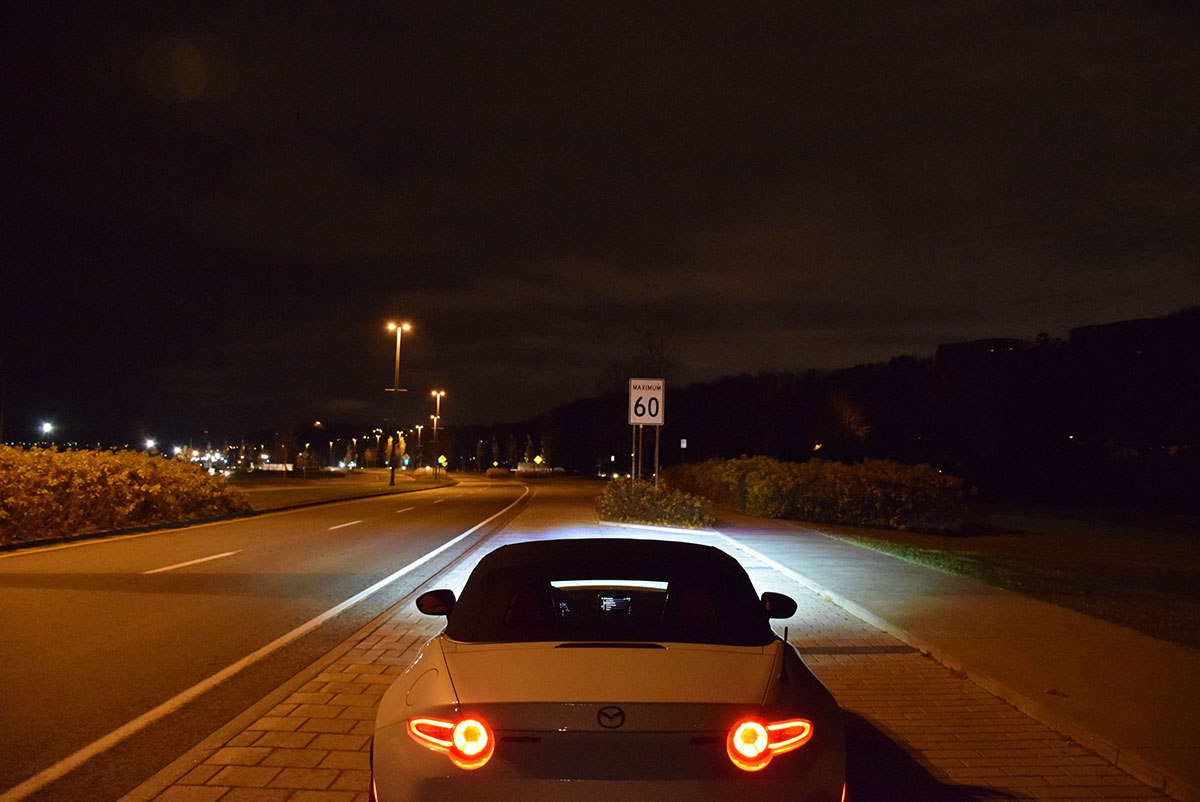
I took quite a long ride with it. I did over 5000 miles of driving through the USA and the exhaust never annoyed me. At full throttle, it has a sporty tone. When going slow, it has a deep drone. When driving on the highway with cruise control, it’s silent. I’m not kidding — you can’t hear it at all, it’s pretty amazing. From cruise control, when you decelerate or accelerate, then you can hear it. And that’s pretty nice, because as I said, “Loud Pipes Save Lives”. On many occasions during my road trip, I needed to let other cars on the road know I existed, otherwise they would have bumped me. That exhaust gets you noticed when you need it.
I’ve heard other ND muffler setups, but they didn’t impress me much. I like to hear my car when I drive, so I can actually “feel” it. The stock ND really lacks that feature. Now, it just feels like I’m connected to the vehicle.
Alright, enough talk, let’s hear it!
Start + Drive
Coming Back + Down Shifting
Passing Through (Windy… sorry!)
Acceleration
Revving + Slow Launch
Launch
Acceleration
A lot of videos, but I still don’t think they show the real awesomeness of the noise. I used my Nikon Camera and it was quite windy. Sometimes I was too close, which altered the sound a bit.
Here are 2 more videos to show you the noise:
During Dyno :
Inside Video (Deal’s Gap) :
Overall, I’m super satisfied with the Fujimura Gentle Sound Muffler. It’s an awesome sounding piece that helped me avoid a few highway incidents. Some people might think it’s too loud, and I have to say that it’s not for everybody. However, everyone who followed me (as well as me following my very own car) enjoyed the beautiful tone of this muffler.
Here is the full information about our ND demo car called the REV9 Clubman Shop Car! This is the first time we take a brand new car and transform it into a demo car to showcase our high quality JDM products.
This build is currently ongoing and the page will be updated as we add more parts to it. You can read the whole documentation by reading all posts in our REV9 ND Shop Car category.
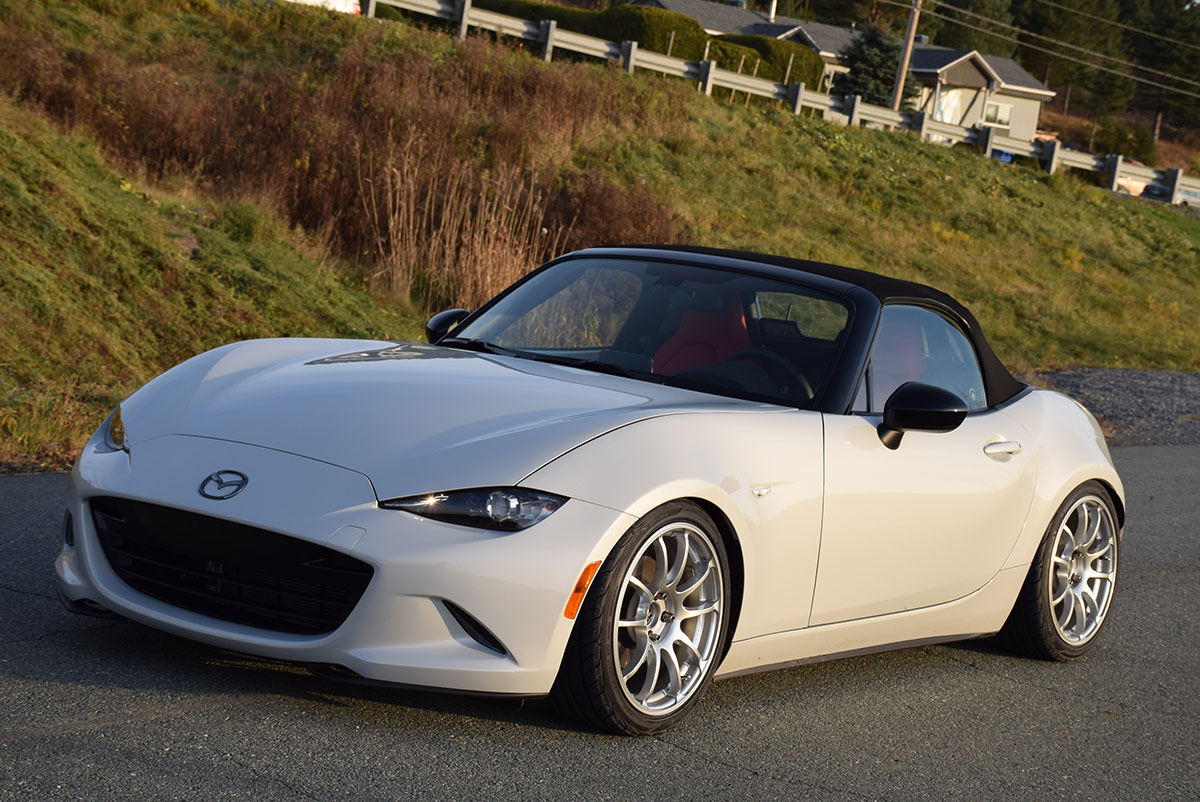
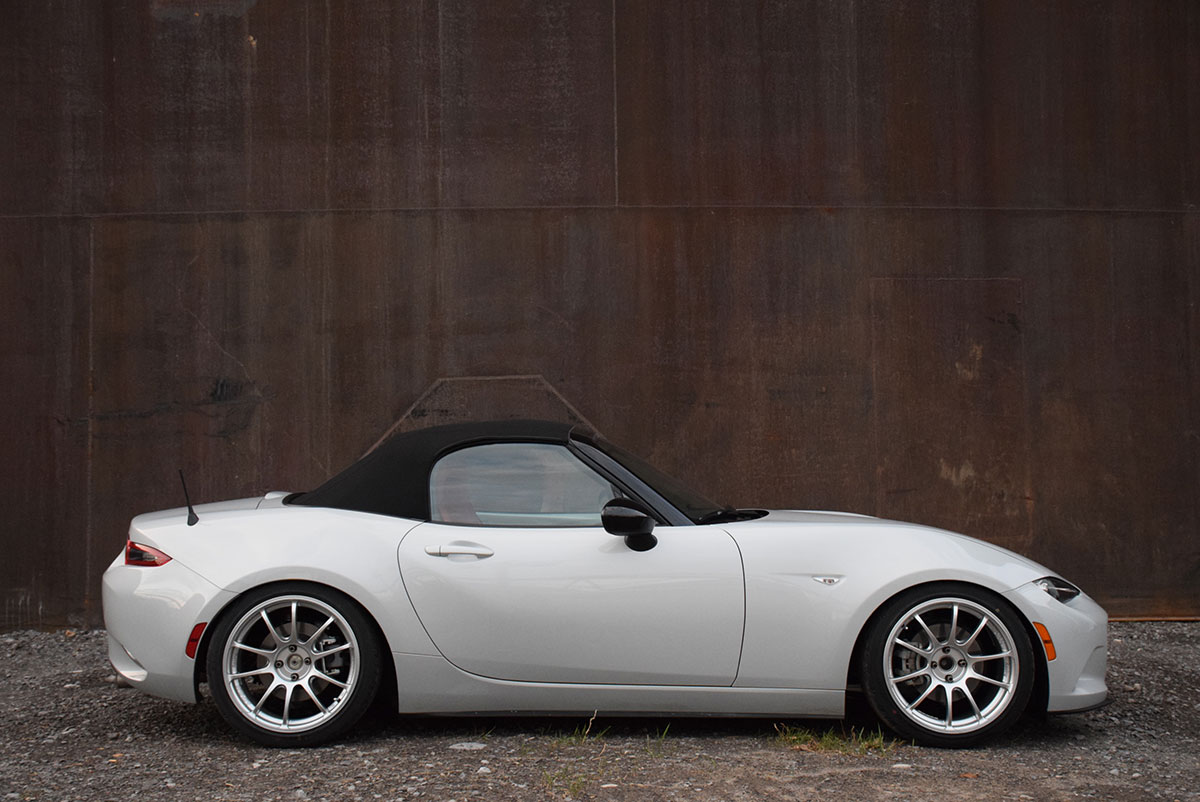
After I ordered my 2016 ND MX-5 Shop Car, I immediately knew that I would change the suspension on it because I didn’t like the huge wheel gap from factory.
As much as it was easy to drive it everywhere and not care about clearance over bumps and driving fast over bad roads, I just thought it looked bad.
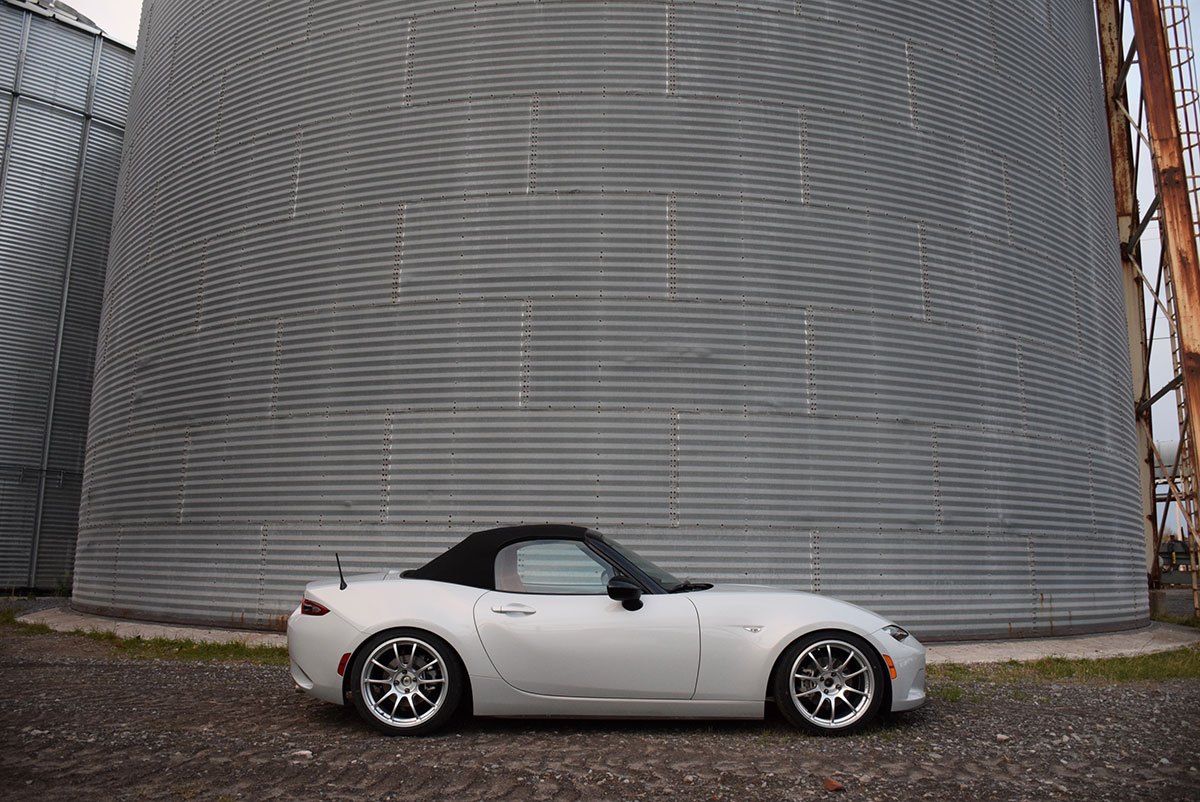
It became even worse when I installed my 17×8 Advan RZ coupled with 215/40R17 tires :
(I only took one picture right after the installation. I didn’t take other as it just looked goofy.)
Installing coilovers on the 2016 ND Roadster is really a piece of cake. Get a friend who has power tools, follow these instructions and you’ll be done within a few hours. Adjustment takes a bit longer, but that depends on everyone. Unfortunately, I did not take any pictures of my OEM wheels with the lowered suspension, but it’s easy to imagine. The wheels won’t stick out and will be very narrow inside the fenders; not the look I was aiming for.
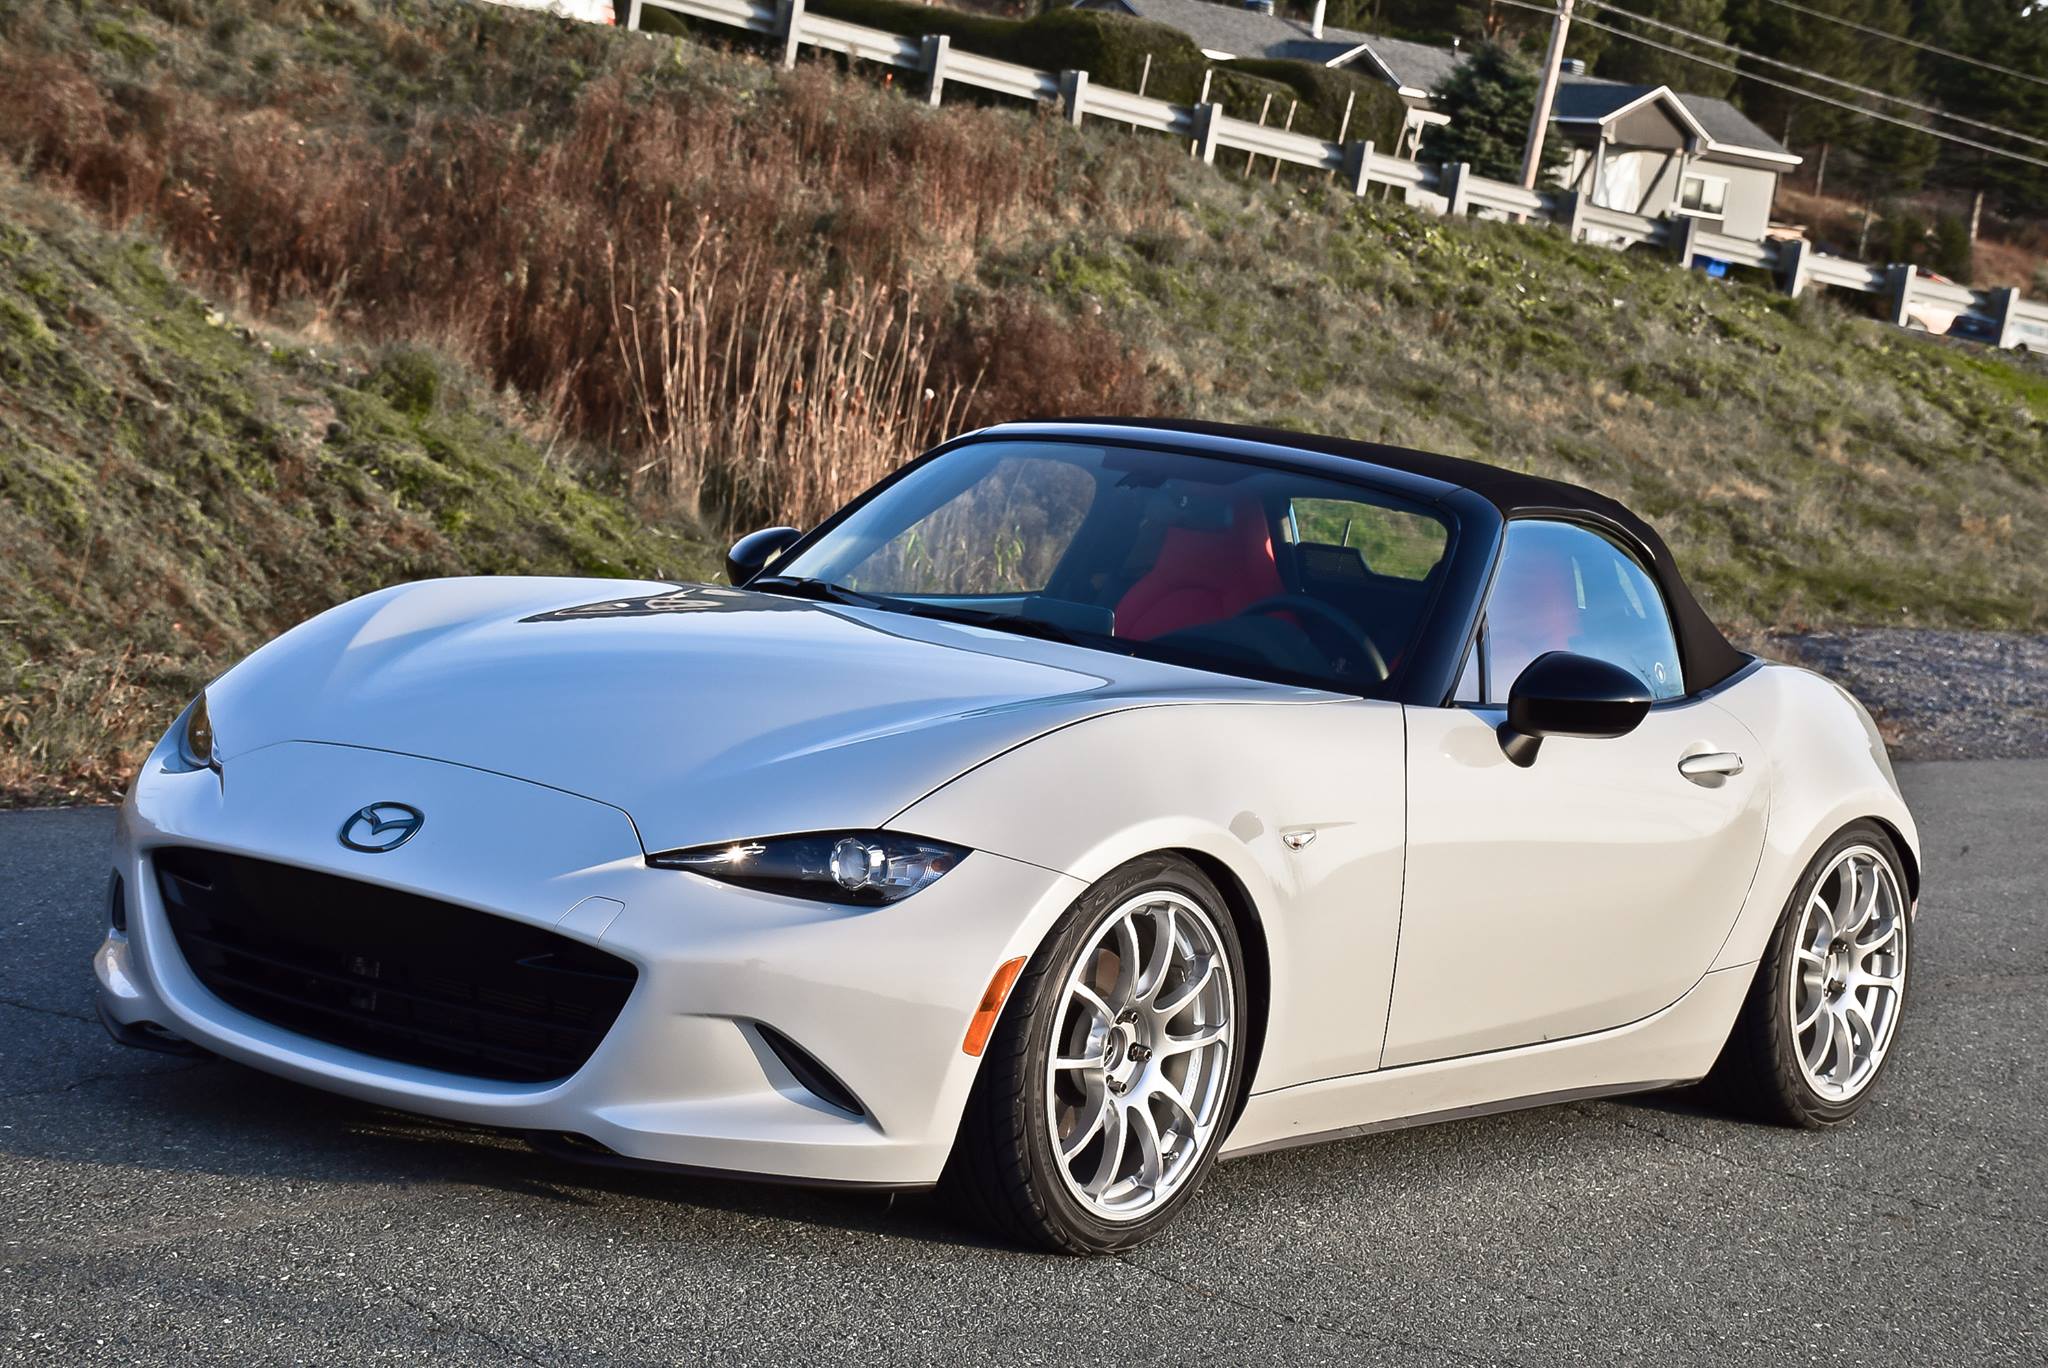
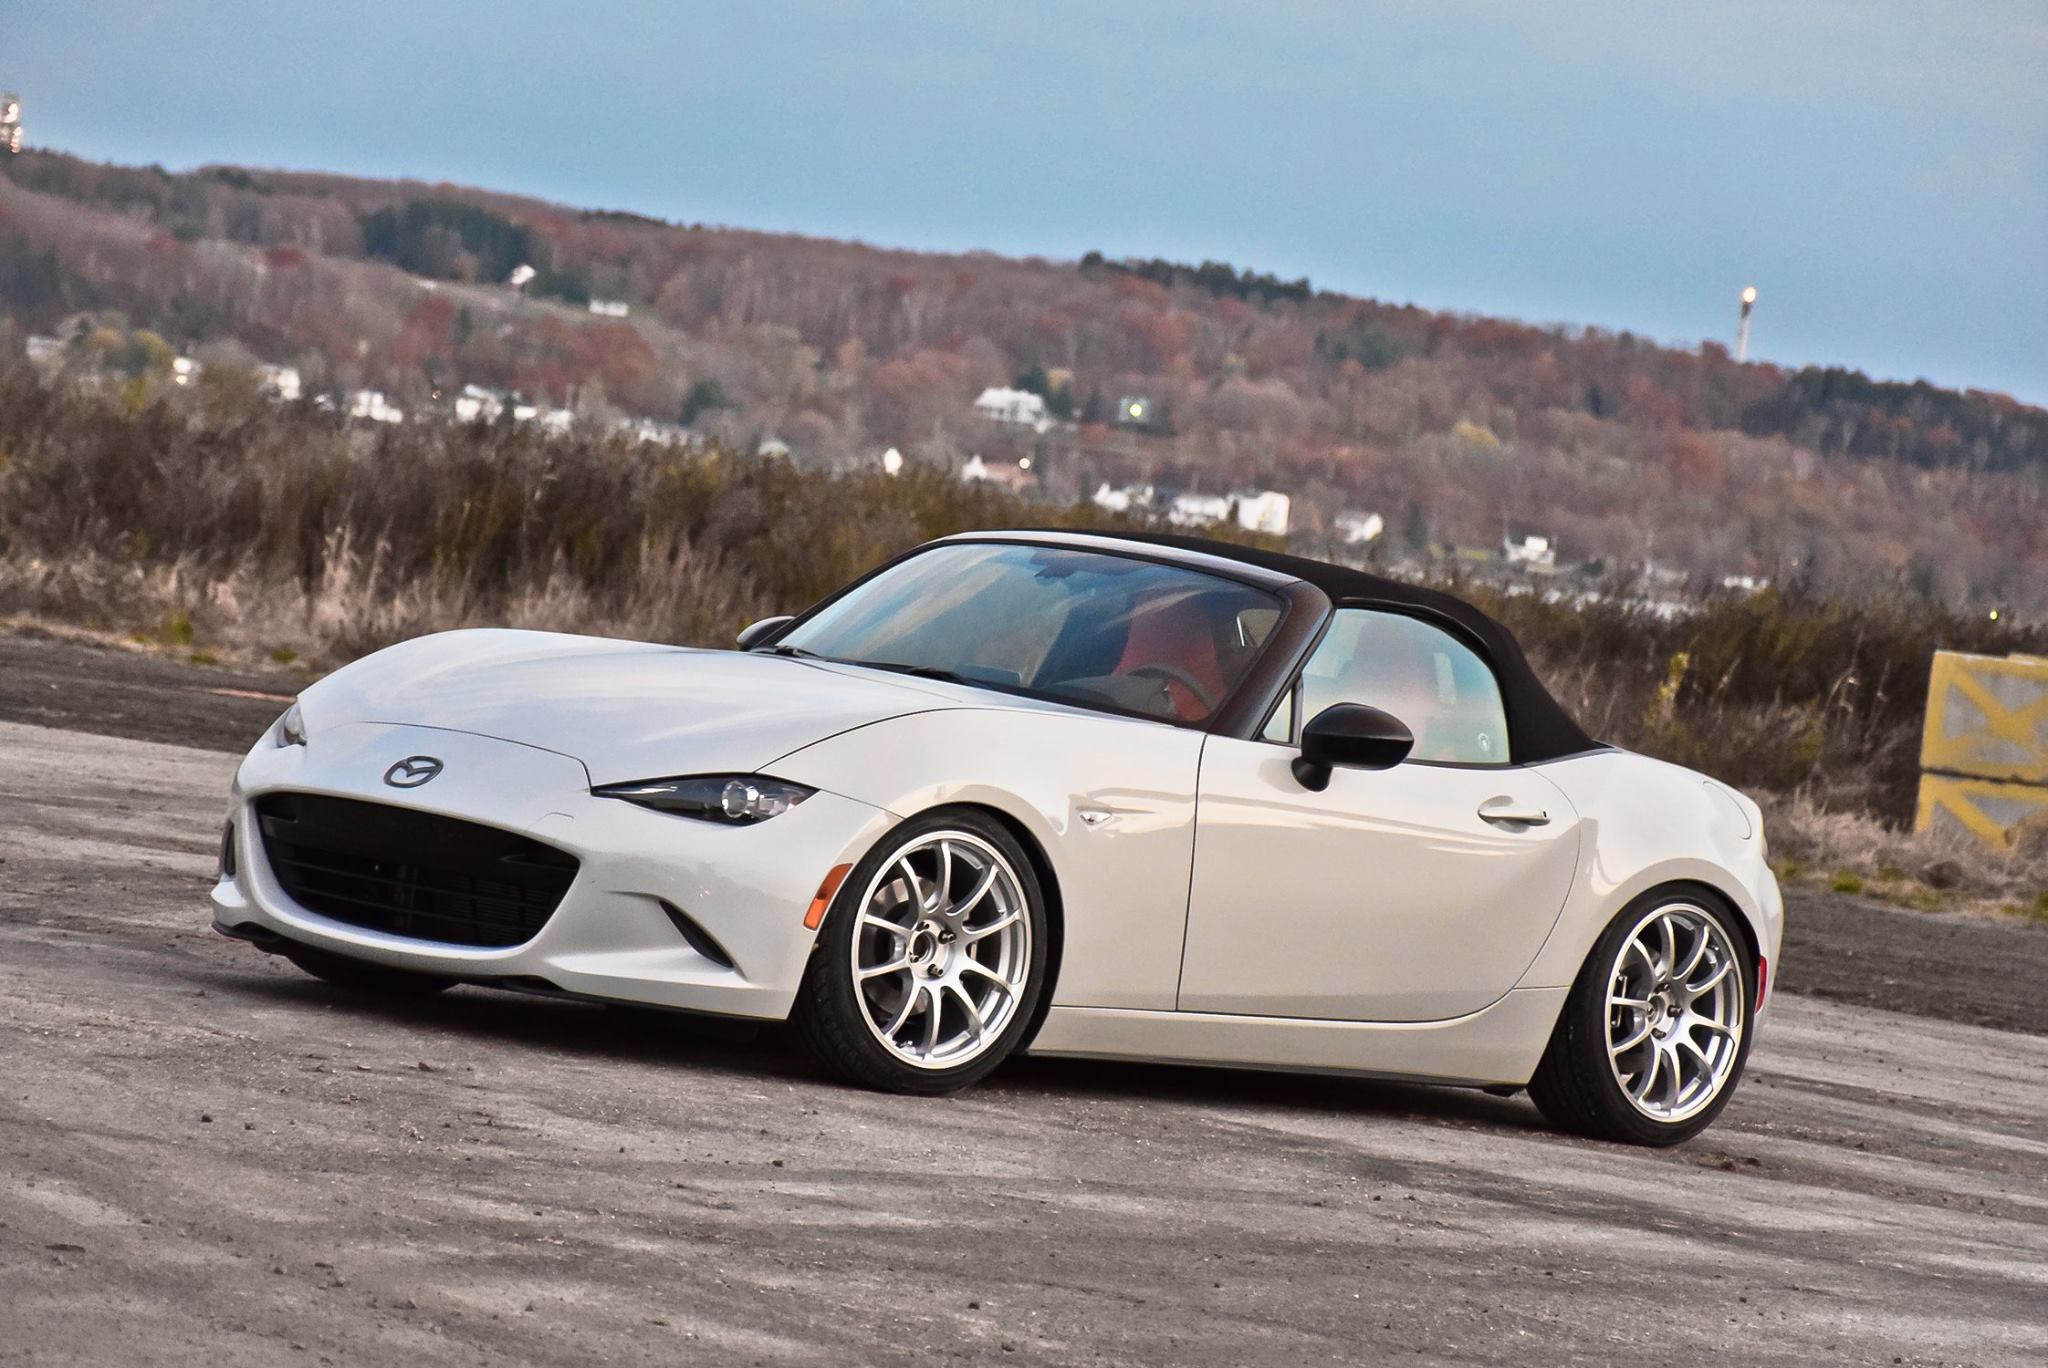
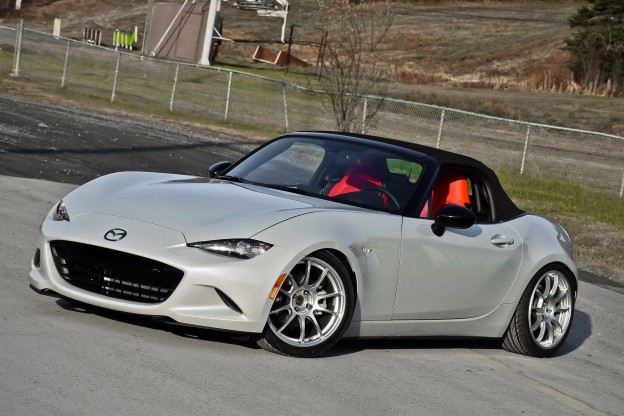
After installing the Cusco Street Zero Coilovers, everyone who saw my car first and then were just AMAZED. Holy moly, they couldn’t believe how great the car was looking now!
(I can’t believe how aggressive the car now looks!)
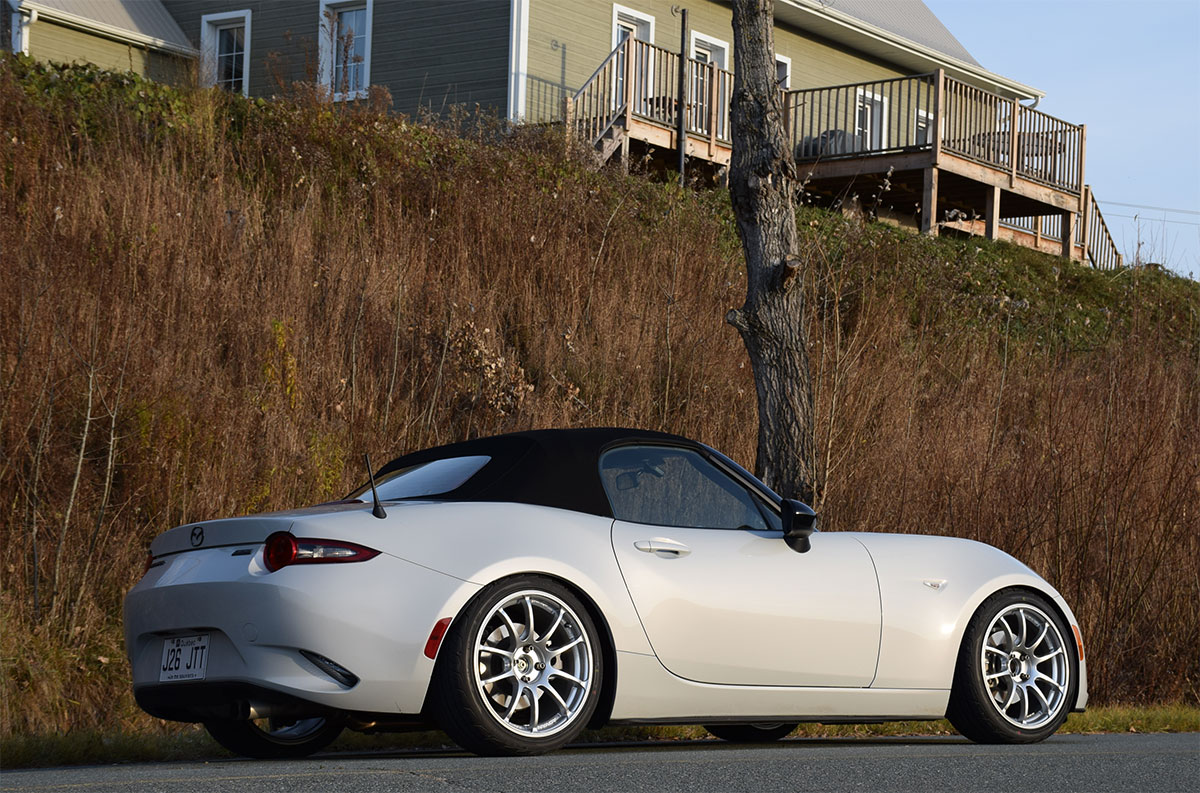
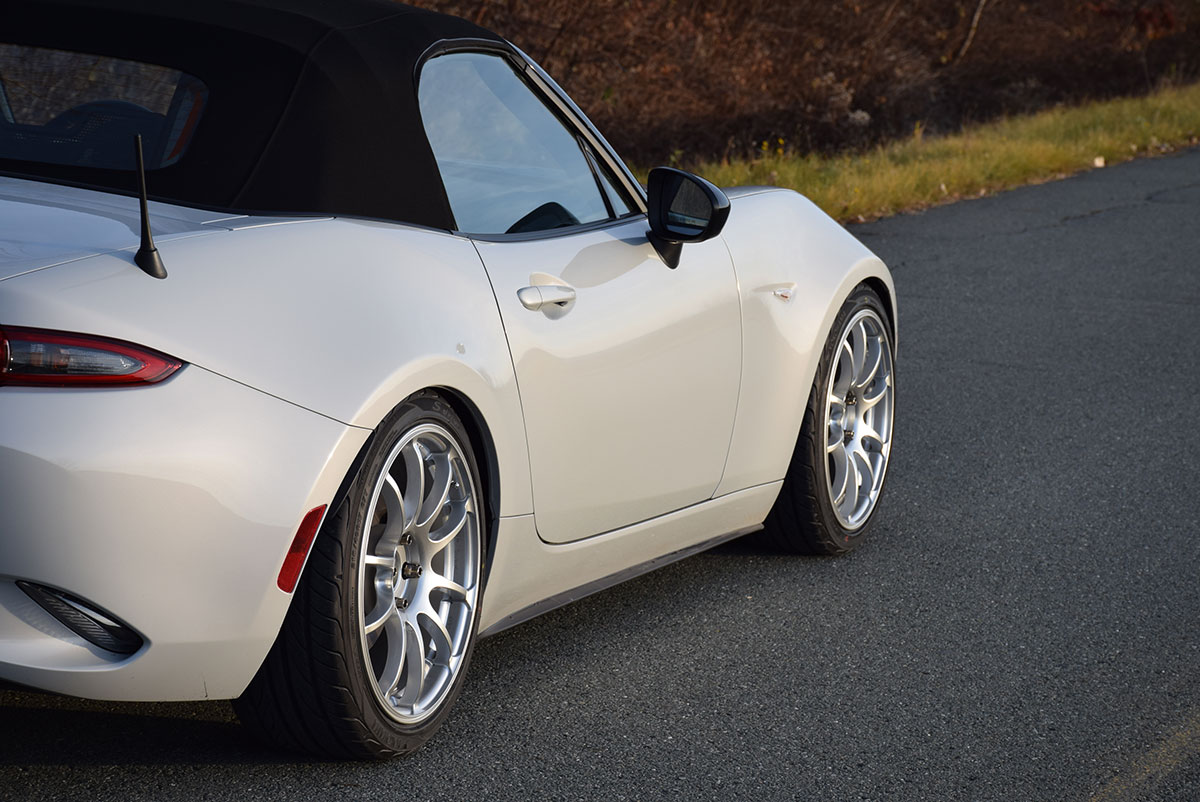
I was also pretty happy to notice that the 17×8 +35 Advan RZ & Yokohama S.Drive 215/40R17 don’t have any stretch and don’t even rub inside the fenders or anywhere during hard cornering! The wheels also sit perfectly flush with the fenders:
(It did not require any fender work, it just sits within a safe distance of the inner fender and fender “lip”.)
The car now looks much less narrow than it was :
Before:
After:(I gotta love the wide tires look with no stretch and low rear end.)
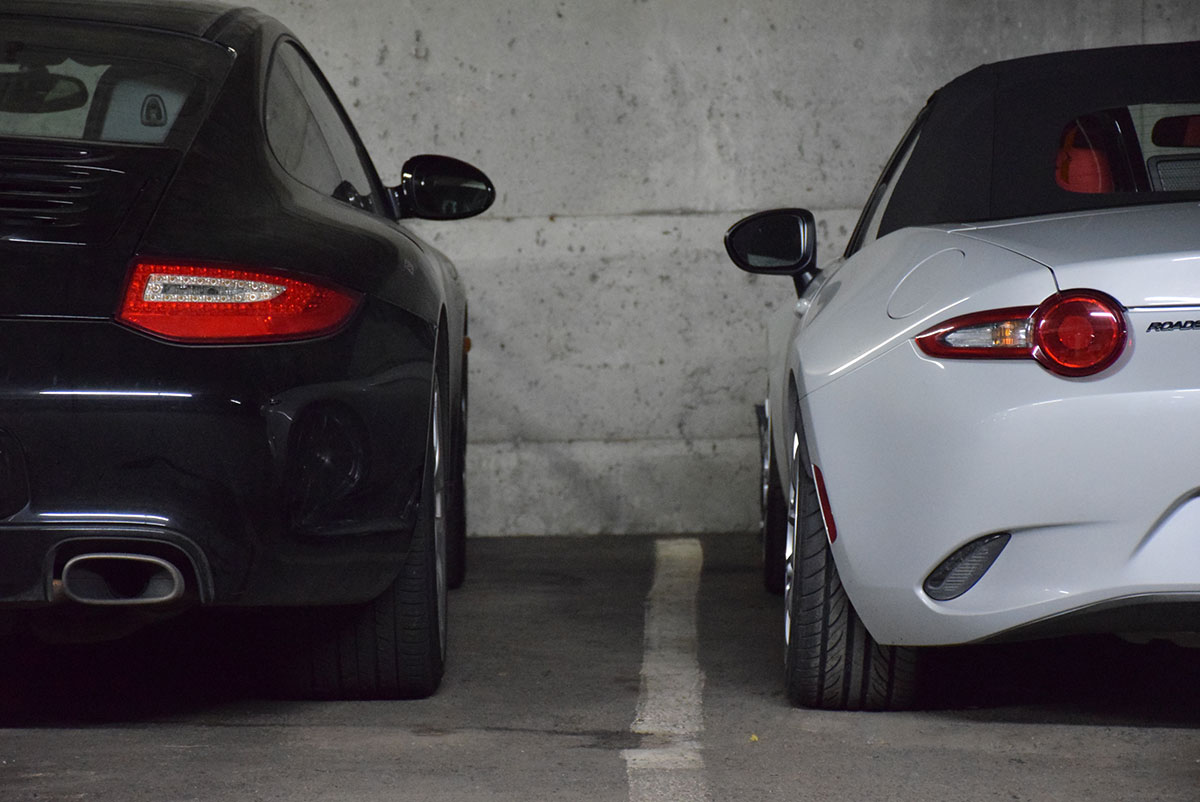
Also, I parked it next to my neighbor 2010 911 Carrera and you can see that I’m now a bit lower than he is;
As for the front, it just looks super aggressive now.
The Cusco Street Coilovers, after install, felt perfect for this car. They did lower the car a lot after we changed the ride height to our needs. After a test ride, the car felt SO MUCH more comfortable than with the previous Bilstein setup. Car now feels very nice, and less stiff suspension-wise. How is that a good thing? The car is my daily driver and the Bilstein shocks combined with the 215/40R17 tires just felt horrible. I could feel all the bumps in the road and on long-range driving, it would have been hell. The Cusco Street Coiloversreally hold their name well, they are made for street mainly and will help you obtain the look you are aiming for. I really would not use the Cusco Street Coilover is I was racing my car often; I would opt for the damping adjustable Cusco Street Zero A Coilover or any other coilover that offer more adjustability! These coilovers suit my needs for now as I am not really racing the car at all and the springs that comes with the suspension are quite soft and comfortable. It’s perfect for a daily driver or week-end cruiser, but not suitable for racers.
(The look just is incredible. Everyone looks at the car and gives thumbs up now!)
The OEM Bilstein Suspension weighted 4.3KG in the front and 4.5KG in the back while the Cusco Coiloversweighted 4.5KG in the front and 4.2KG in the rear. So, the whole adjustable Cusco suspension is 0.2KG lighter than OEM. Not much, but at least it’s not heavier.
As for the wheels & tires, I was not able to weight them, unfortunately, but I know that the Advan RZ 17×8 wheel weights only 7.5KG (16.5 lbs) and it’s a super strong forged wheel with semi-concave spokes. The look of it just made my car look much better:
(The semi-concave spokes really fit well with the aggressive look of the ND Roadster.)
Since the wheels are wider and about the same weight as OEM wheels, the contact patch to the ground is much better which provides a better handling. Also, due to the lightness of the wheels, absolutely no loss of performance due to unsprung weight is felt!
After a few days of driving, I have to give advices to those thinking of upgrading coilovers!
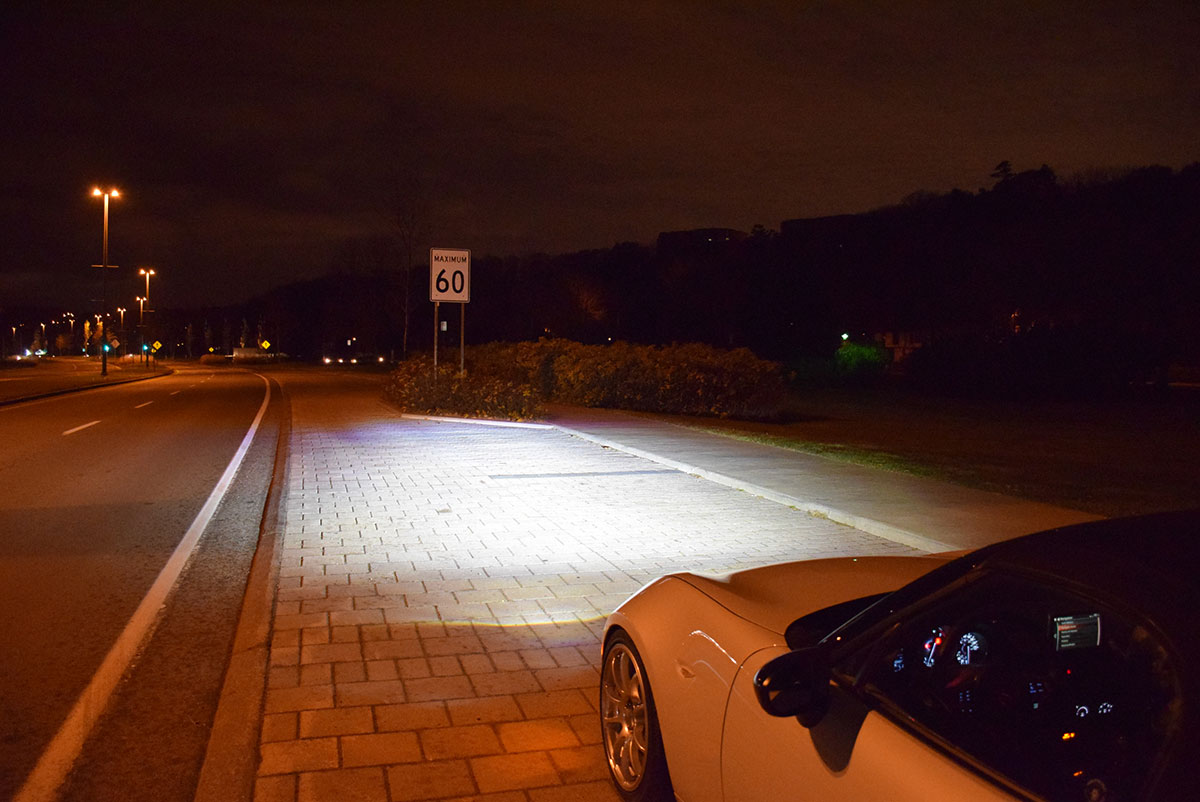
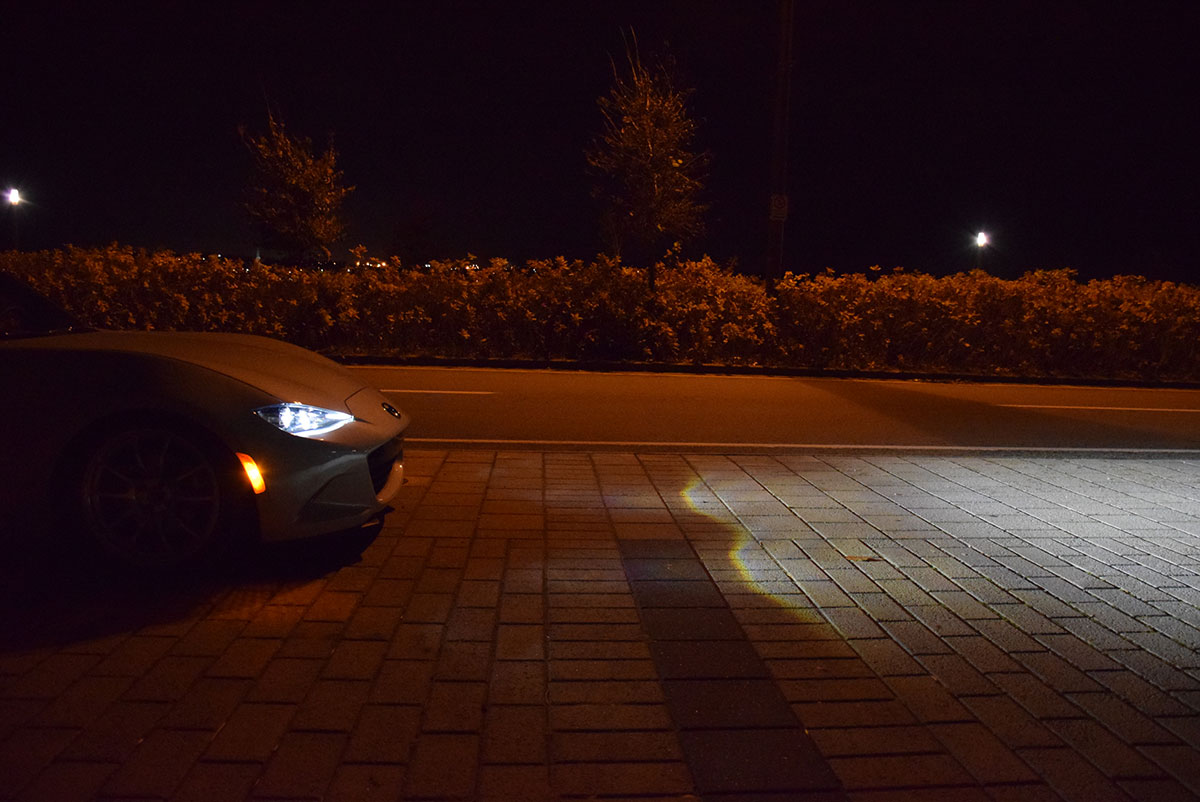
Your headlights, after being lowered, will aim much lower than they are supposed to and this means you will lose most of your visibility. If you don’t get the Levelizer Adjustment Rod, your headlights will pretty much light up to ~20-30 feet away from the car which is SUPER close and DANGEROUS as you can’t see anything on the road after that distance:
(As you can see, the beam now shoots to the floor really close to the vehicle and it’s not recommended to drive with such a low beam pattern.)
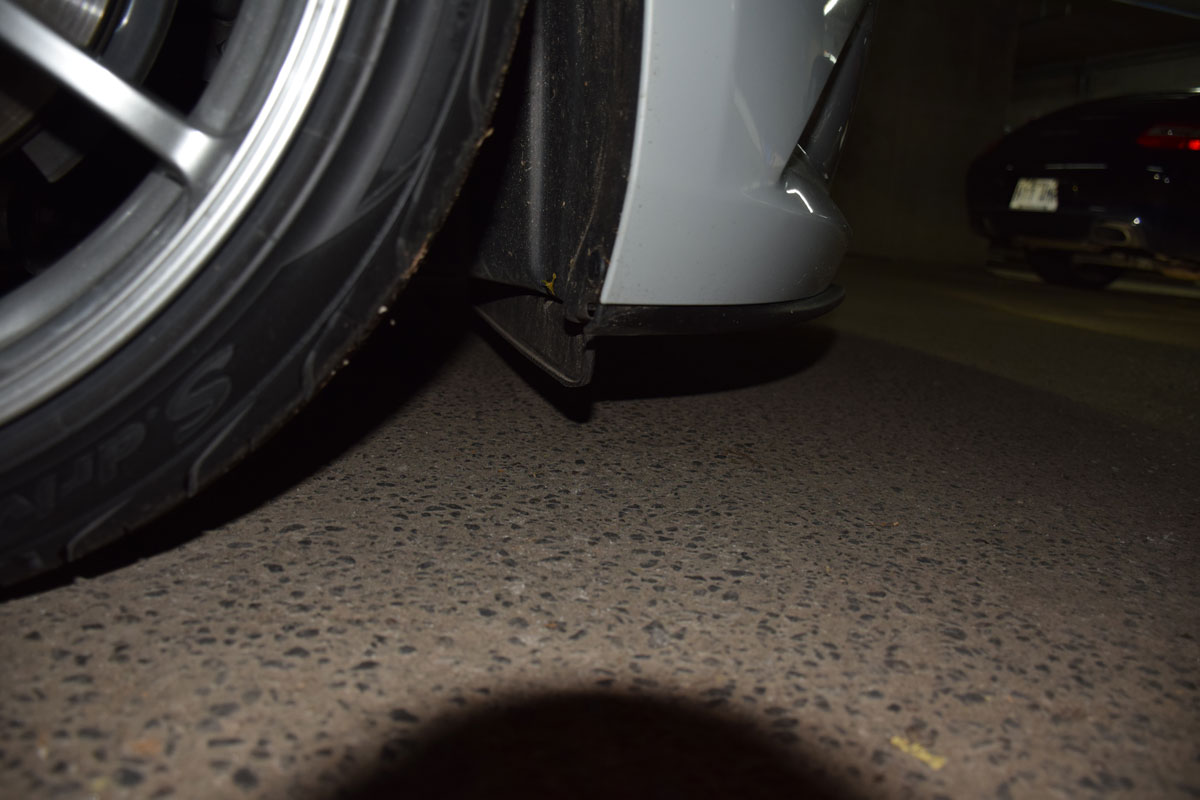
Advice 2 : Check your lowest vehicle’s point If you lower the car a lot, like I did, you might end up scraping a lot from the front. Don’t worry, it’s not from your front diffusers, but from some kind of front flap just in front of your tires:
(That small flap is about 1 inch lower than the front diffuser. It’s flexible, but will make noises if you scrape on it. I haven’t checked, but it might be possible to remove it.)
Well, I think I’ll probably raise my car about 1cm each corner to make it more “driveable”. Right now, just the small flap scraped on the ground so the clearance is actually pretty impressive considering how low the car sits. Also, if I want to add aero parts in front and side, it will be much safer to raise the car a bit, and I think I’ll still have zero wheel gap with 1 cm higher.
Here are some pictures for your viewing pleasure:
You can follow our build on this blog using this link.
The title is just for fun, I know there are plenty of GREAT looking NDs already, but I think I’ve done a really good job with the wheel choice, ride height and colours. I’ll follow with a more extensive blog post tomorrow, but I’m just letting you enjoy the view for now 😉
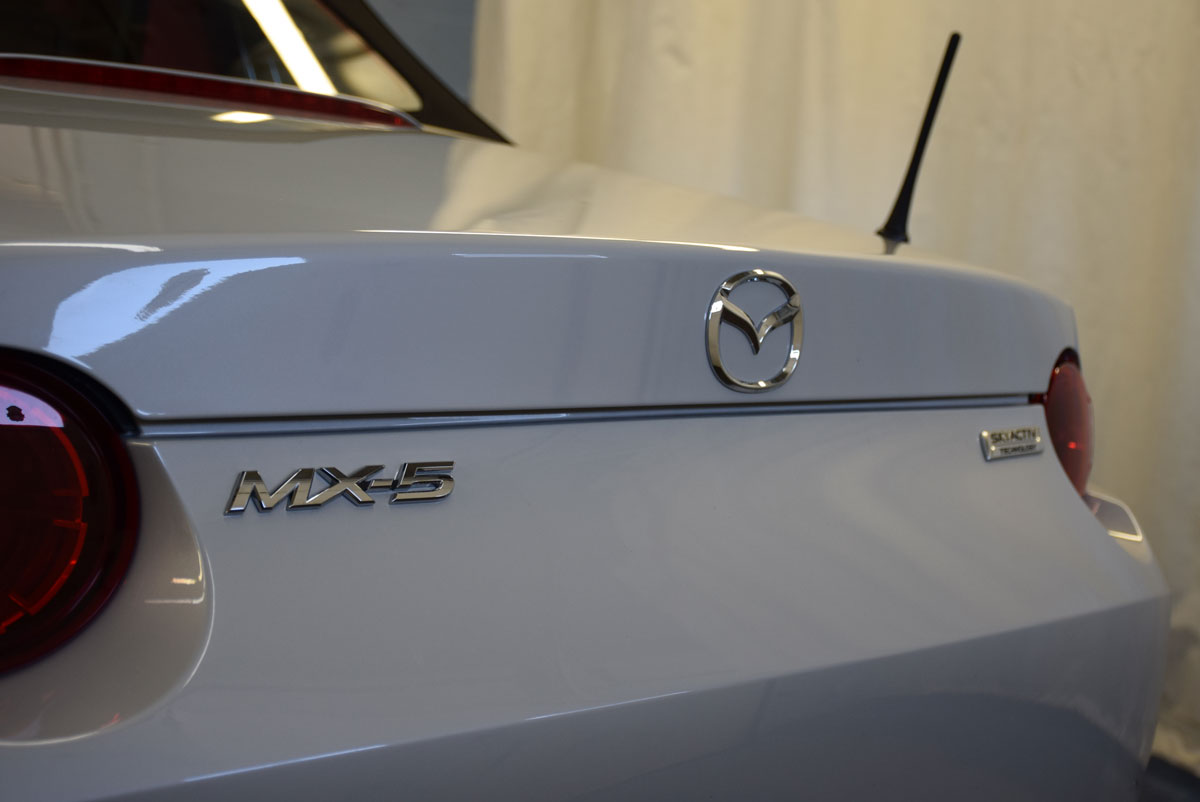
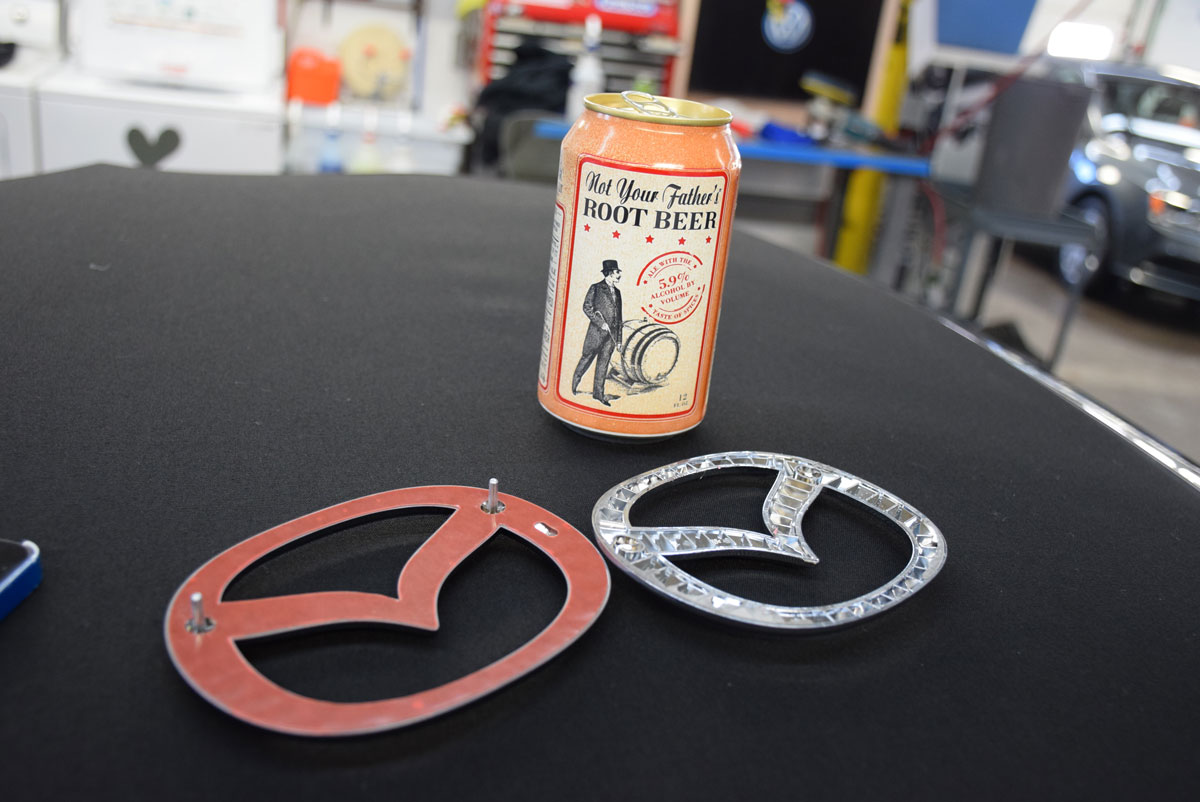
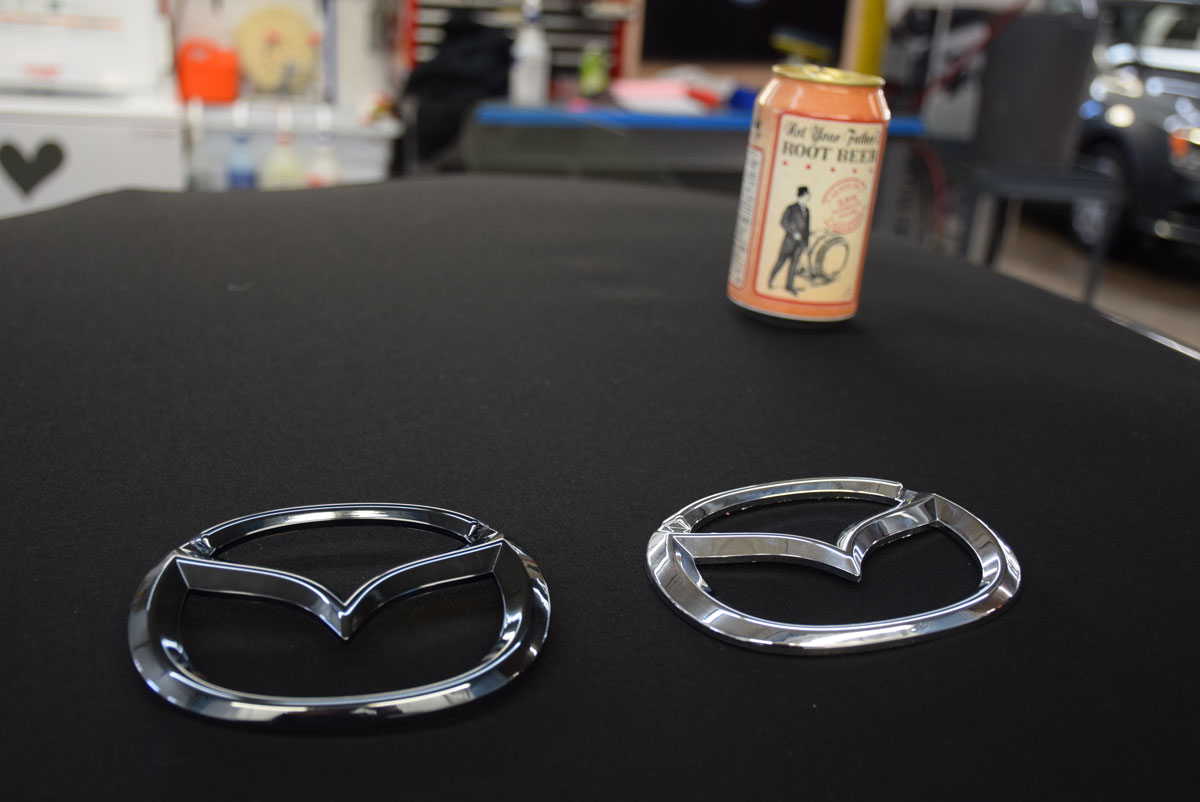
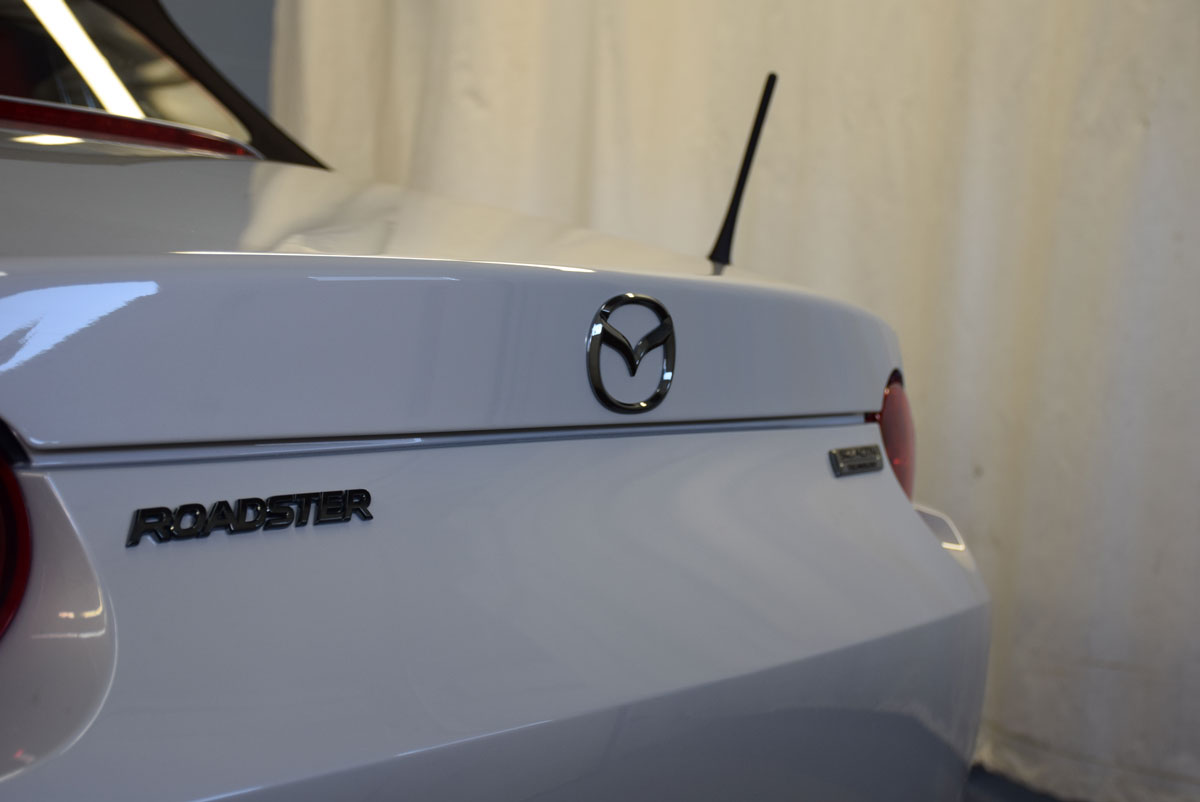
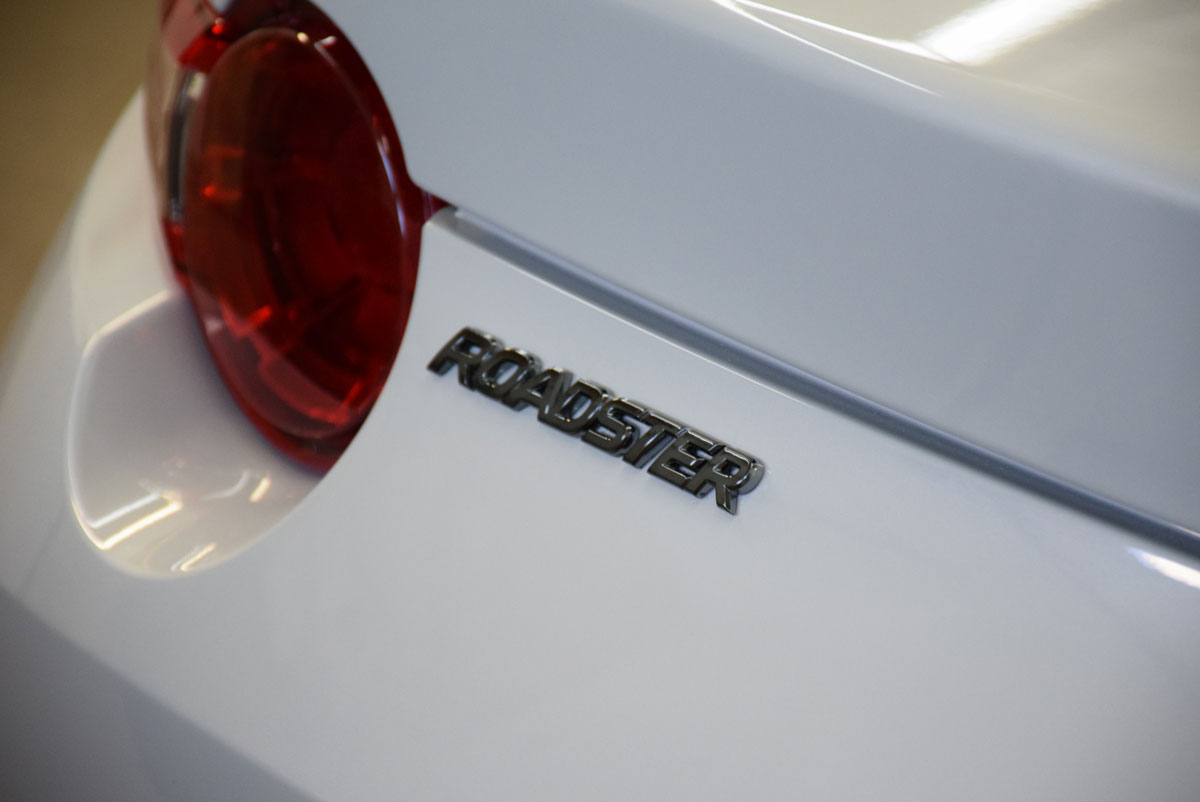
Another quick post about some small details that makes my 2016 ND Demo Car (The Project REV9 Clubman) a more unique build. I’ve wanted to change my “MX-5” emblem for a “Roadster” emblem, but also add a nice classy touch to my exterior, so I’ve got myself the REV9 Black Chrome Emblems.
Here are some before shots:
The OEM emblems all have pins that leave holes in the bumper if you remove them. You gotta take your time with a heatgun when removing OEM emblems. You end up with some holes in your bumper and lot of glue to remove. Total installation time was less than 1 hour.
Also, when removing the emblems, we broke most of the OEM pins. They are very fragile. That’s why the Black Chrome Emblemsare nice to have since they are brand new and re-use OEM pins (REV9 on the left, OEM with broken pins on the right).
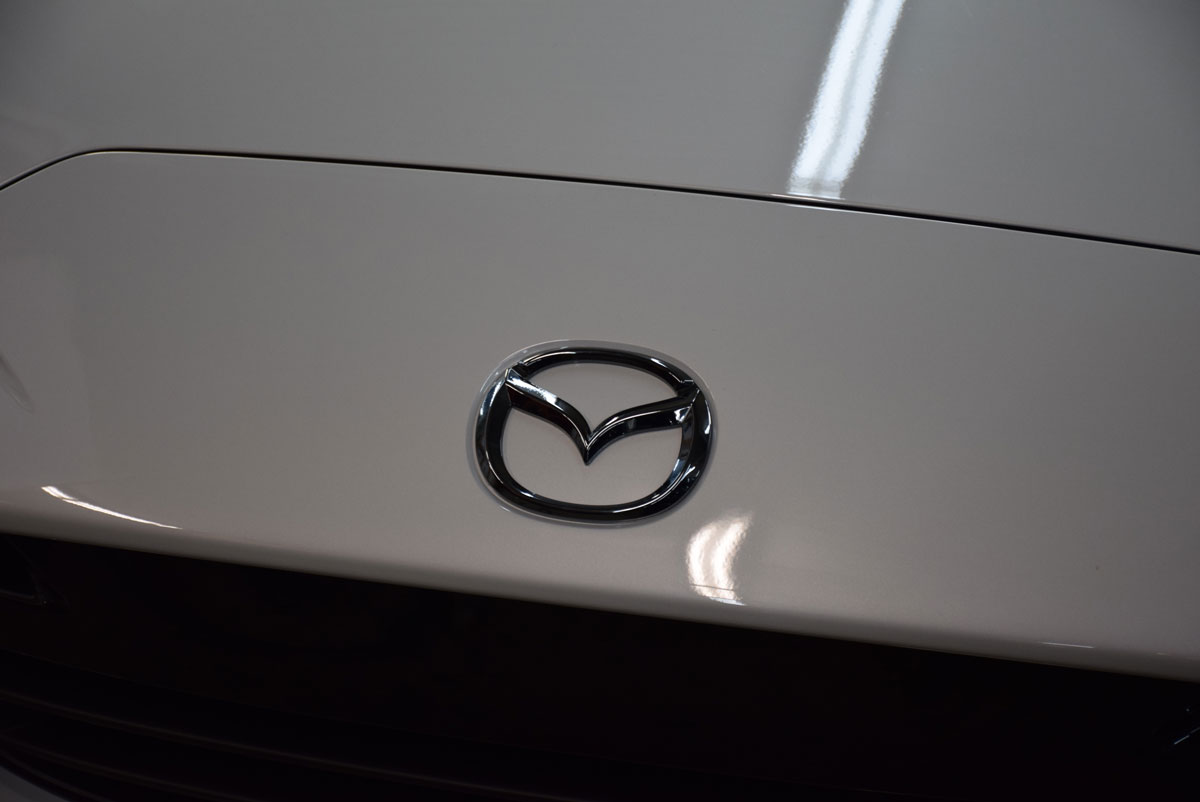
As you can see, the finish of the black chrome is very subtle (left), but has a nice deep and elegant tone:
Once cleaned, I recommend fixing scratches that the emblems might have caused during removal using a touch-up paint.
Then, you just need to remove the self-adhesive behind the REV9 Black Chrome Emblems and install them using the existing holes left on your bumper. They all match up, so it’s super easy to install. Here is the final result:
Pretty glad I did the change, it’s very subtle but real nice touch to the look of the car.
You can follow our build on this blog using this link.
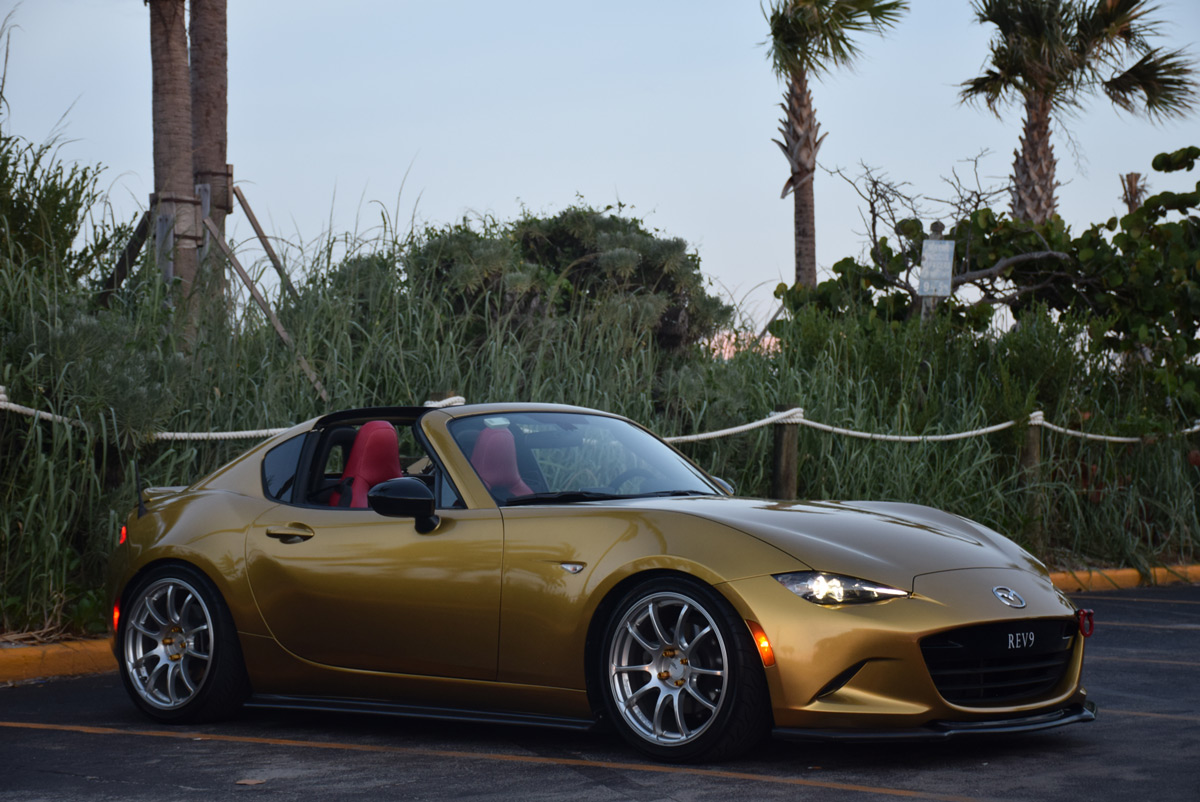
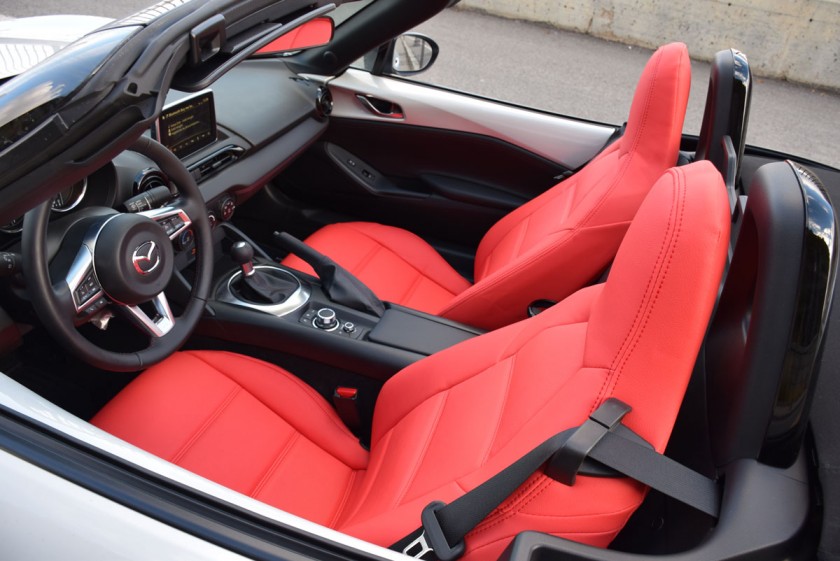
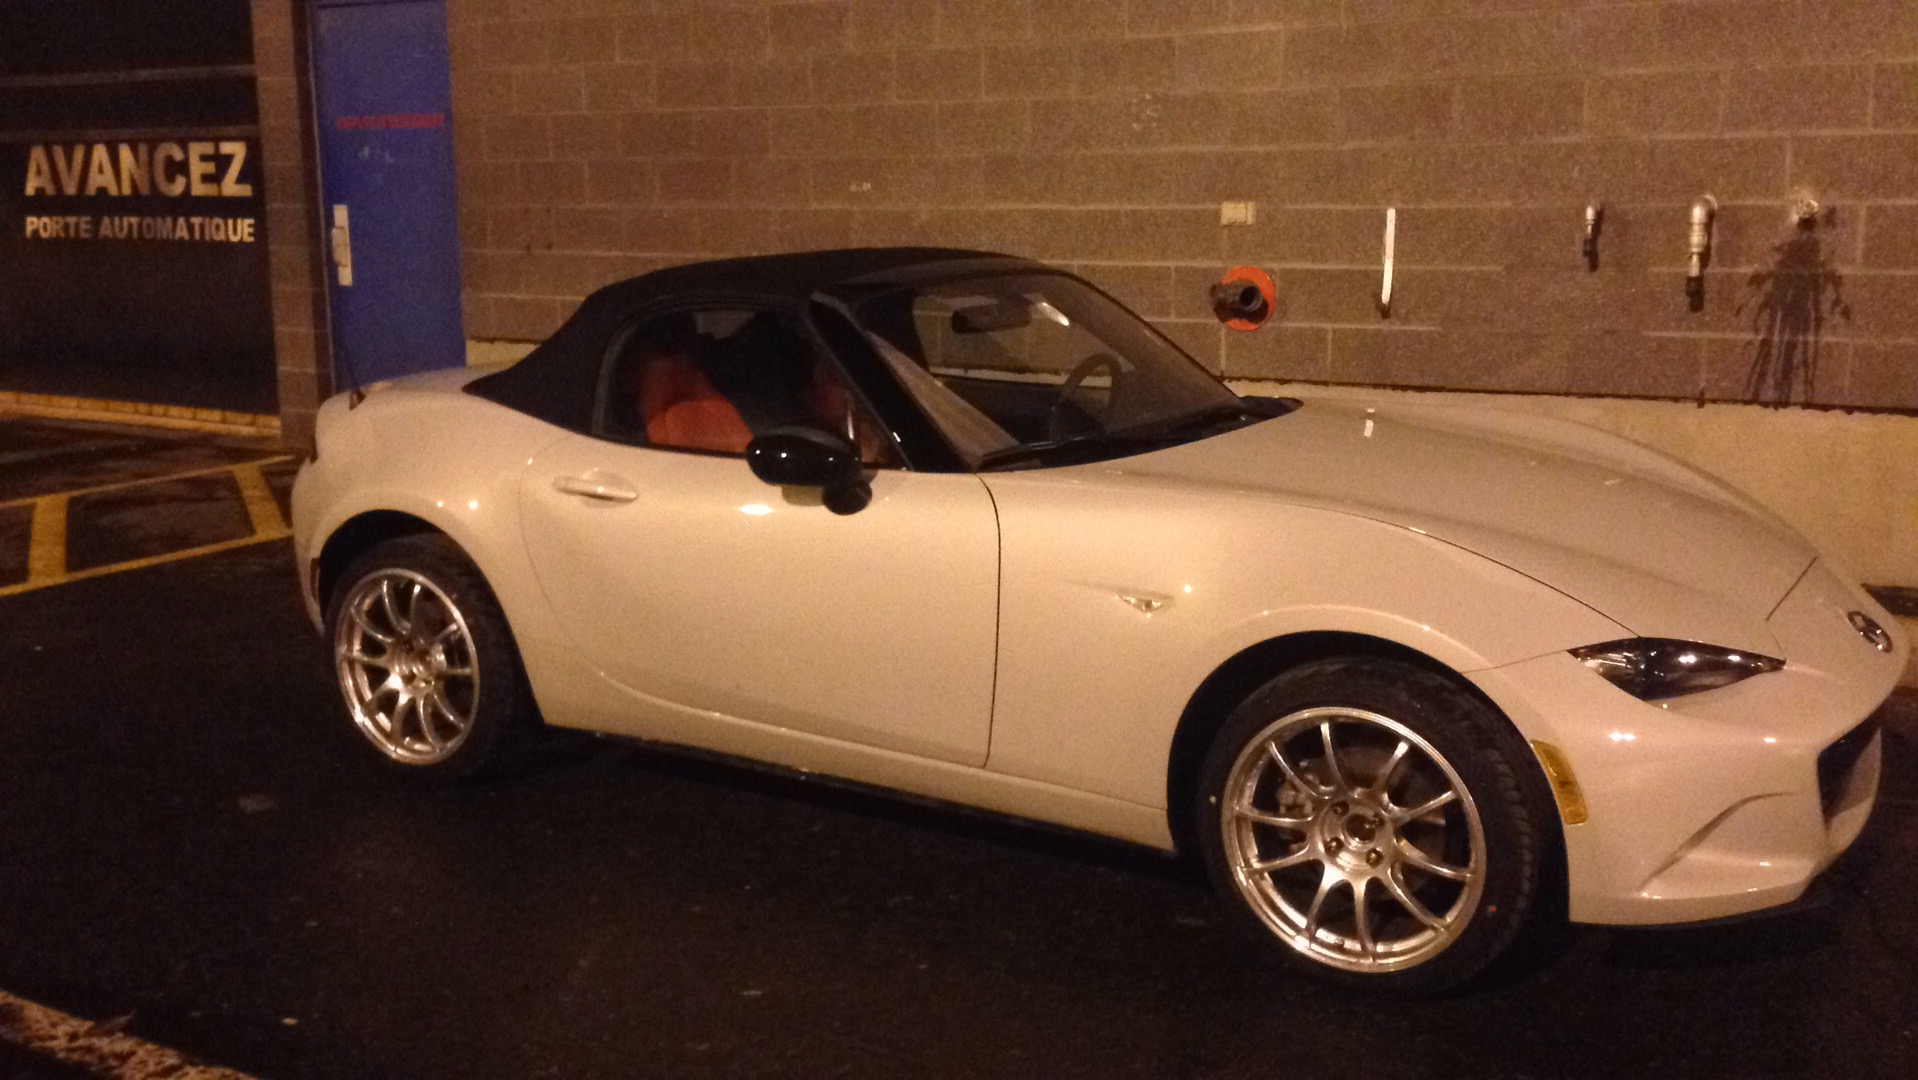
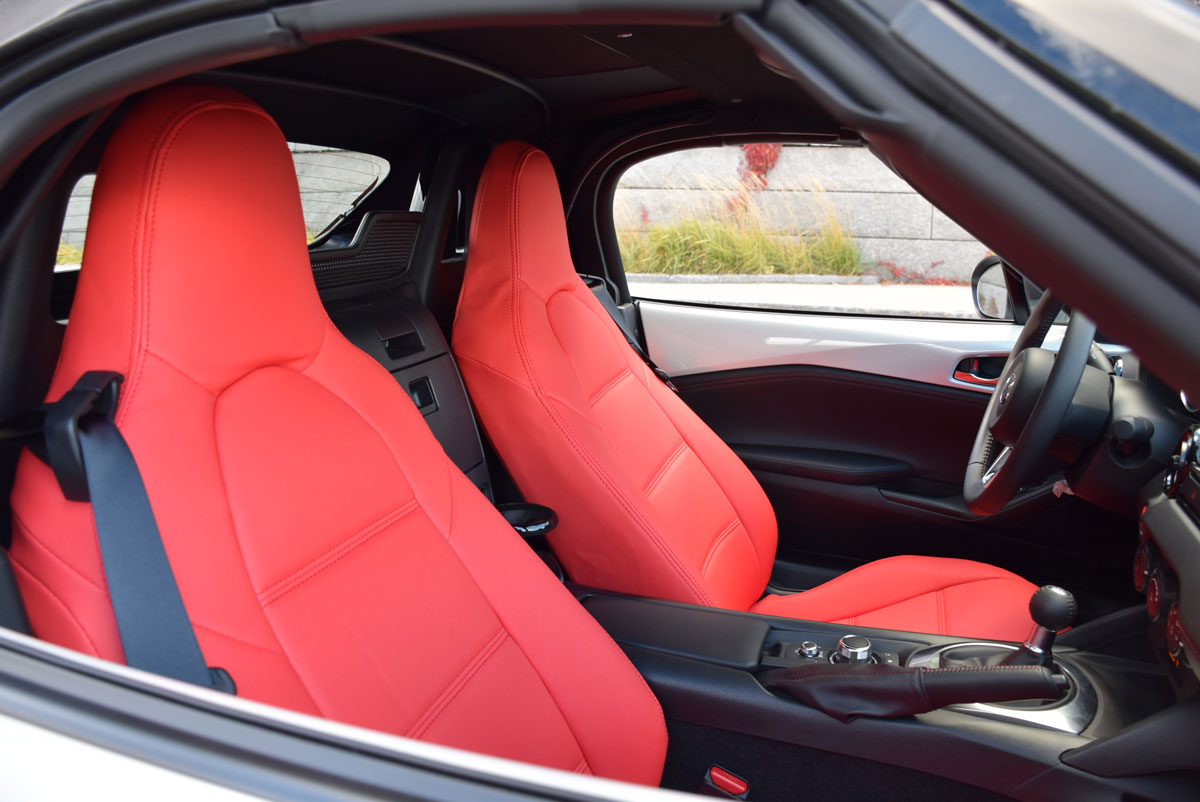
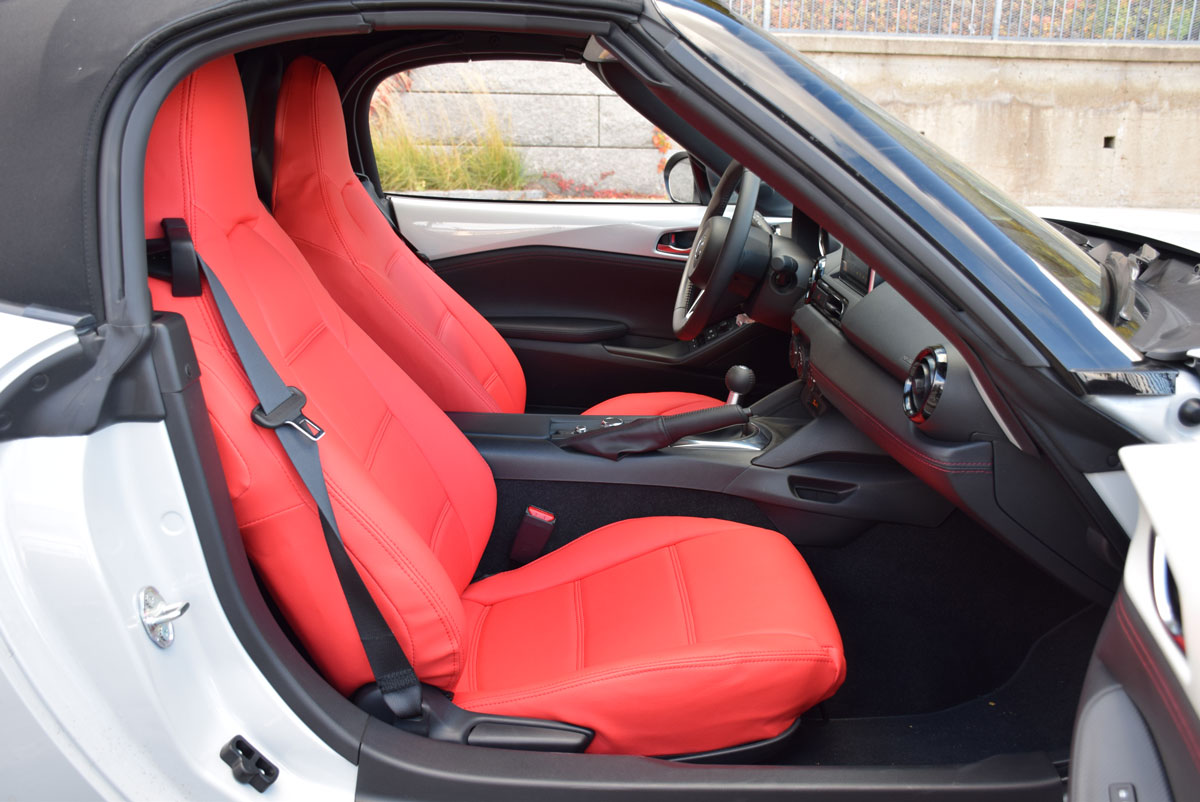
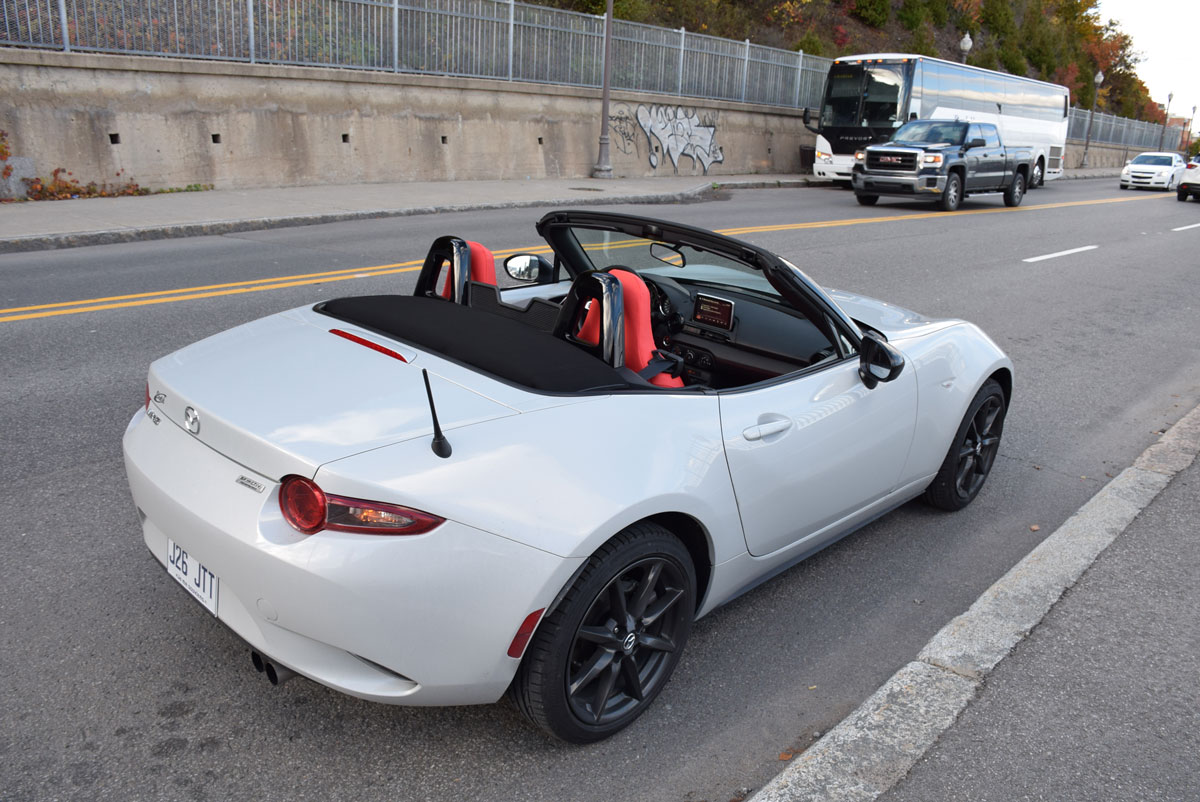
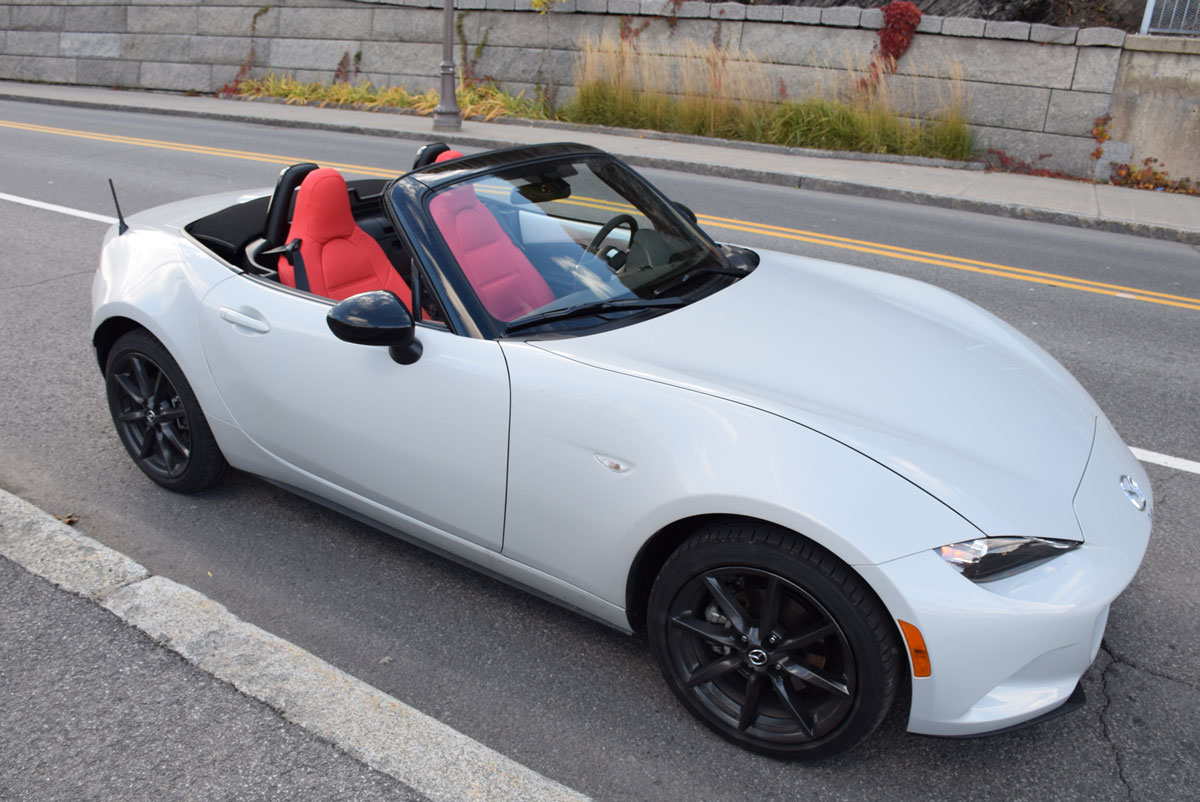
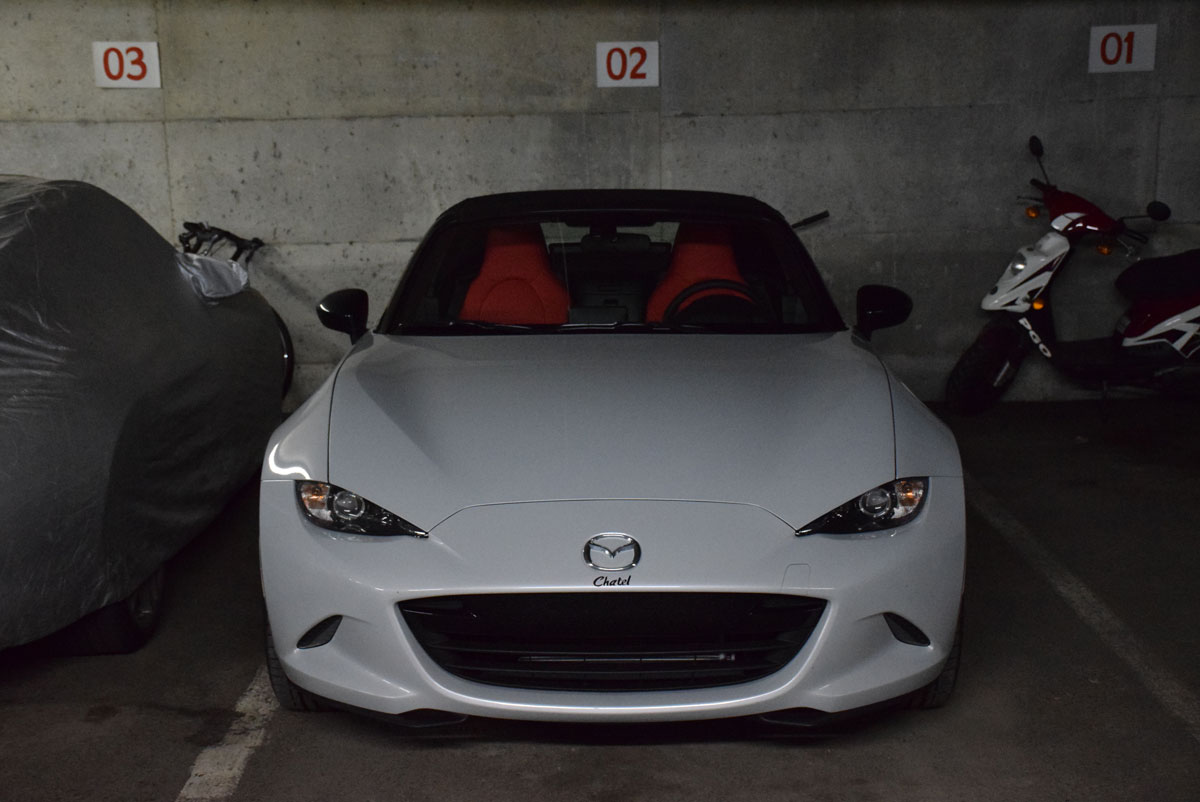
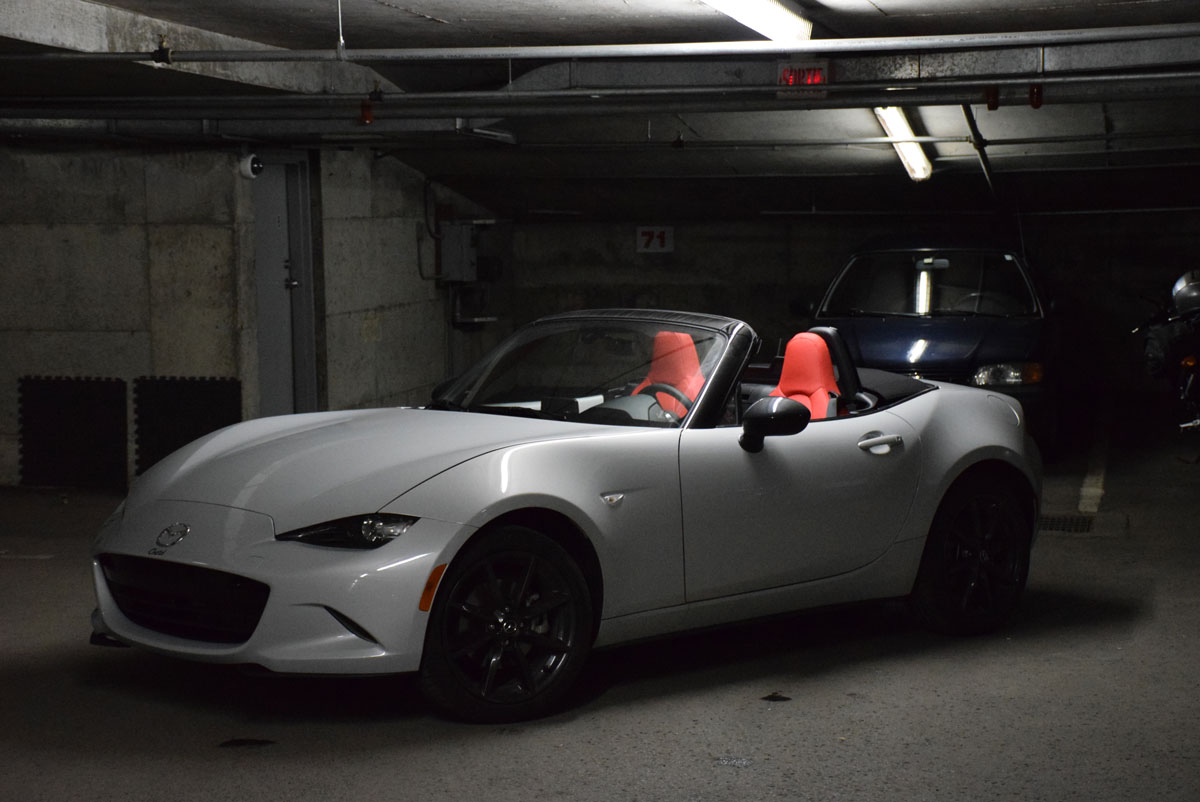
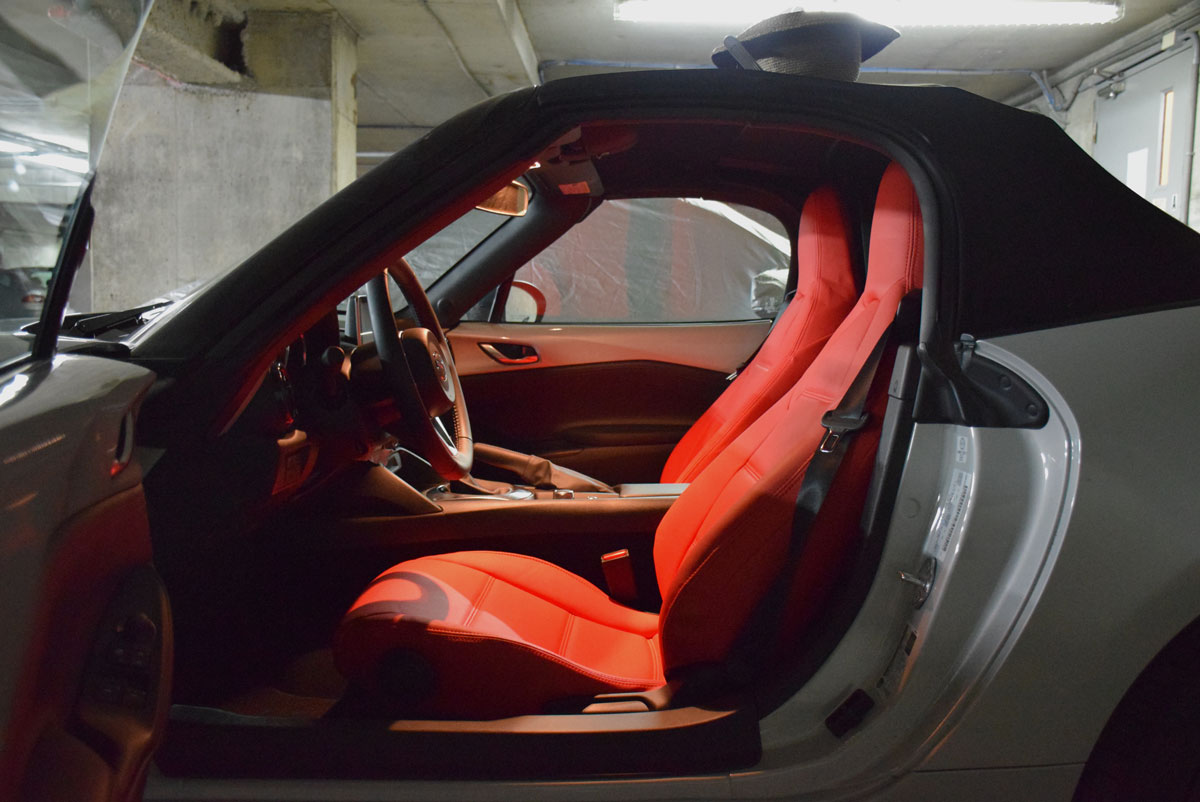
When I ordered my 2016 ND MX-5 Shop Car, I knew I wanted to have a more unique look than what Mazda offered. I choose the Autowear Seat Covers because they are in synthetic leather and the color is pretty vivid!
(Although I have red stitching on my seats as an option, I wanted something different).
I was not a huge fan of the tan leather option and wanted a bit of contrast in my interior. That’s why I got myself some Autowear Seat Covers for 2016 ND. It was available in Black Leather & Red Stitching, but I wanted to try something more “punchy”! (With windows closed, it’s still a bit noticeable).
Installation was super easy, took less than 1 hour to install BOTH seats. I’ve never installed something so easily on my car. You can read the installation instructions here.(The look is pretty nice, contrasts really well with the Ceramic Metallic color).
The look of the seats is really neat. For “not so expensive” seat covers, they look really great and don’t “cheap out” your interior at all.(As you can see, the covers go under the plastics from the seats which integrate them very well to the interior).
Depending on the lighting, they will show as super bright red or regular red.
(The red is very vivid, as you can see).
It really gives a cool look to the vehicle, making it much more unique than before.
When parked indoor, the small amount of light these seats will receive really do brighten the interior!
(I gotta love that “evil look” picture)!
Here are some other shots for viewing pleasure:
As far as seating position, these sure add a small amount of synthetic leather between the original seat and you, but the most drastic part is that the center part of the seat is now a bit tighter and the middle “floats” a bit over the original seat, making it a bit more comfortable at the same time. The material of the seat cover is non-slippery which is nice and it feels very tight on the seats. Also, the seats do not reduce the sound coming from the headrest speakers by much. I still can hear people clearly when talking over Bluetooth.