Category Archives: Parts Review

Product Review – Daikei Lever Extension

Introduction

The Daikei Turn Signal Lever is a practical accessory that enhances accessibility to the turn signal stalk, especially when a steering wheel boss hub is paired with a deep-dish steering wheel or a quick-release setup.

This Signal Stalk Extender is compatible with stalk diameters ranging from 18 to 28 mm and offers an adjustable extension range of 30 to 100 mm, making it versatile for a variety of vehicles.

Installation Process

Although the stalk extender is originally designed for RHD (Right-Hand Drive) vehicles, it can be easily adapted for LHD (Left-Hand Drive) configurations.

To make this change, remove one of the larger Phillip head screws that holds the lever.

Once removed, flip the lever 180 degrees to the opposite direction.

Reinstall the Phillips screw, leaving it slightly loose.

The Daikei Turn Signal Lever is now ready to be installed in the vehicle.

Loosen the small screws on the adapter to allow it to expand. Slide the adapter onto the stalk and position it in the desired location. Tighten the four small screws in a diagonal pattern to ensure a secure fit.

Finally, adjust the lever’s angle as needed, and tighten the Phillips screws once the preferred position is achieved.

Conclusion

The Daikei Turn Signal Lever is a well-crafted accessory that improves functionality while adding a sleek, seamless look—particularly in darker interiors. With its easy installation and fully reversible design, it ensures a hassle-free upgrade.


Product Review – Jet Stream Gurney Hood Flap

Introduction

Jet Stream introduced this item a few years back, showcasing it on a handful of their customer cars. Although it never made it to their catalog as a new release, they’ve been more than happy to craft it upon request.

The Dilemma 

Unfortunately, the gurney flap does block the OEM windshield spray nozzle. So, if you’re keen on keeping this feature, you might want to consider opting for a nozzle relocation kit, which is entirely optional.

Installation Process – Nozzle 

To install the nozzle, it’s necessary to remove the wiper cowl. A separate blog post detailing the steps involved in removing the cowl cover can be found here.

Once the cowl is off, mark the drilling location for the 10mm hole needed for the new nozzle. Using the center screw location of the cowl as a reference, measure 2 inches to the right and then half an inch towards the bottom. However, I chose to position it more centrally, opting for a distance of 1 1/4 inch instead of 2 inches.

A step drill bit comes in handy for this task.

The nozzle simply slips through the hole and is secured in place with a threaded plastic collar.

After mocking the cowl back onto the vehicle to ensure there are no clearance issues, proceed to add the rubber hose for the washer fluid. Depending on your setup, like my NB with the NOPRO relocation tank, you might need to adjust the length of the rubber hose accordingly. Just be cautious not to make it too short, risking kinking.

Remember to route the rubber hose behind the wiper arm link. Secure the cowl with the screws.

Installation Process – Gurney Flap

Now, onto the gurney flap. Prep the hood area by wiping it with alcohol to ensure a clean surface.

The item comes with a roll of double-sided adhesive, which you’ll apply to the bottom of the flap, ensuring it’s evenly spaced from the edge and firmly pressed. I opted for a single strip, but there’s enough tape provided if you prefer to add a second.

Once aligned perfectly, use masking tape to prevent any shifting during the final glue down. Peel off the tape backing strip while pressing down, working your way down to the other side of the vehicle. And that concludes the installation!

Conclusion

Since fitting this, I’ve taken the vehicle on a highway run and can confirm the wiper arms remain steady even at speeds over 85mph. Visibility isn’t compromised, and it’s easy to forget it’s there. Plus, I really admire the aesthetic it brings to the car, neatly concealing the majority of the wiper arms from a frontal view.

The nozzle spray performs just as well as those from the hood. In fact, the relocation actually tidies up the engine bay once you remove the OEM hoses for the hood spray nozzles.


Product Review – Garage HRS Air Conditioning Filter

Introducing the Garage HRS Filter

One of the most exciting advancements in automotive accessories over the past year has been the introduction of cabin filters for our beloved Roadsters. Thanks to the wonders of 3D printing, finding a solution for this long-awaited upgrade has become a breeze.

Enter the Garage HRS Filter: a beautifully designed 3D-printed product that not only looks the part straight out of the box but also feels impressively good.

Installation Process 

Now, let’s dive into the installation process. Prepare your toolbox with essentials like a Phillips screwdriver, masking tape, and a 12mm socket and ratchet. Additionally, having a pry tool on hand will prove invaluable.

Pro tip: Use a piece of masking tape to mark the glass where the wiper blades rest to ensure they’re aligned upon reinstallation.

Removing the wiper arms involves removing the rubber cap and loosening the 12mm nut before gently pulling the arm upwards. Be prepared to apply some force, especially if it’s the first time the arm has been removed.

Next, the wiper cowl, held in place by six screws hidden beneath plastic cap covers. Carefully pry these covers off using a scalpel or small flat-head screwdriver, exercising caution to avoid damaging the plastic.

Finally, the rain/water diverter panel, secured with five screws and three plastic clips.

Pay special attention to the clips on the firewall, ensuring you pry the inner piece first before rotating it off like a regular screw.

A clip/pry tool will come in handy for the third clip.

With those hurdles cleared, it’s time to address the AC air intake. For NB Roadsters like mine, the existing metal mesh offers limited protection against debris entering the AC blower, making a cabin filter a welcomed addition.

Take advantage of this opportunity to give the area a thorough clean, promoting fresher air circulation within the cabin.

While the Garage HRS Filter boasts impressive design, one flaw surfaced during installation: a less-than-secure fit within the rectangular intake. My simple yet effective solution involved adding a 1/16th-inch weather seal tape to the filter housing’s inner edge.

This minor adjustment significantly enhanced the housing’s stability and sealing, resulting in a snugger fit and improved performance. Curious to replicate this solution? Here’s a link to the weather seal tape. https://a.co/d/iOWnzlu

So far, my experience with the filter has been nothing short of delightful. Not a hint of strong odors from the outside world has infiltrated my sanctuary on wheels.

In conclusion, installing a cabin filter in our Roadsters not only enhances air quality but also adds a touch of innovation to our driving experience. Here’s to many more miles of fresh, exhilarating adventures ahead!


Product Review – Autoexe Evolution Wipers

Today, I’ll be reviewing the Autoexe Evolution Wipers and showing you how to make them work on a left hand drive Miata !

These wipers are designed for RHD vehicles but with some minor modifications they can be adjusted.

The trick is to pop out the J hook anchor and reinstall it in the opposite direction.  When flipped, you’ll notice interference with a small bolt that secures the aero fin.

A small section in the plastic needs to be cut to clear the small bolt. Cut enough to clear the head of the bolt as shown below.

Once the cut has been made, install in the opposite direction and check its not binding.  It should rotate freely. Below you can see the small bolt that we needed clearance for.

Here you can see the changes. The modified LHD version is up top and the original RHD at the bottom.

Lastly, install to your wiper arm like any ordinary wiper.

Performance wise, they excelled in clearing water without any streaks. I’ve had them for a few months and they still perform flawlessly. The aero fin does a good job of reducing vibrations of the wiper at high speeds.

They haven’t been tested on snow or ice but I’m positive they will perform just as great.

10 Modifications & Upgrades You Should Do To Your ND (2016+) MX5

Here is a short list of modifications that we believe are totally worth doing to your 2016+ ND Mazda MX5 Miata. This list was made after doing a trip throughout the whole USA (17,000+ KM) and racing the car at Laguna Seca Raceway (check out our blog section The Road(Ster) Trip). It’s not a list entirely for racing, nor entirely for street use, it’s to have a good overall balance.

Safety

As we always say, safety first! Let’s talk about some modifications that we believe will just improve your safety and will be worth it (as a wrecked MX-5 is not as valuable as the one who’s never been in an accident).

1. ZOOM Wide Blue Mirrors

This is one of the mod that we ALWAYS do on ALL of our Roadsters. Why? Because our cars are super low and these mirrors have 2 functions : wide depth of view (so you can see what’s in your dead angle with your roof is up) and blue mirror (anti-glare). It’s pretty awesome when driving at night and being followed by a car with bright lights. We also recommend getting the Jupiter Blue Rear View Mirror to minimize glare from cars at night! If you want something a little different, check the JoyFast Wide Mirrors.


(Photo : ZOOM Wide Blue Mirrors)


2. Mazda Backup Camera

This is a very popular item. It’s coming standard on the 2019+ models, but for those of us with a ND1, it’s a great mod to have. It takes a few hours to install, but it’s so worth it to be sure never to back up on anyone or a curb. The optional cleaner is really nice as the camera can get dirty/get humidity as it’s not covered.


(Photo : Mazda Backup Camera)


3. Aftermarket Muffler

Why is a muffler a safety device? Our cars are hard to notice (very low/small) and the factory exhaust is quite silent. A muffler is a good way for others to know we are there (loud pipes save lives). Although there are performance gains from it, they are very limited without ECU tuning. Our favorite in term of sound/looks is the Integral Kobe Type-US Muffler. You want to control the noise? Check out the Fujimura Dual-Sound Muffler! Want a totally different look? Check out the Autoexe Dual Center Exhaust!


(Photo : Autoexe Dual-Center Muffler)


Performance

4. Coilover Suspension

The OEM suspension on the ND MX-5 is great, but you will reach its limit at one point. Body roll is quite big on the car and we just love to see lowered Miatas! Our pick for street suspension would be the Cusco Street Zero which will reduce the body roll while making the car even more comfortable than from factory. For racing, it really depends on your goals, but you can check out our Coilovers for ND!


(Photo : Cusco Street-Zero Coilovers)


5. Lightweight Wheels

Changing wheels greatly affects the dynamics of your Roadster. The vehicle is very lightweight and does not have the huge power that most sports car have. This means that keeping weight low is really important, and even more important for rotational mass. Our best pick for street wheels are the 16×8 +35 Rays TE37 Sonic Wheels that are forged, light weight and really mean looking. If you’re more racing oriented, we believe that the 17×8.5 +40 Rays TE37 Saga Wheels would be your weapon of choice, allowing you to run wider tires and bigger brakes. If your budget doesn’t allow for forged wheels, we think that the Enkei PFM1 17×8.5 +40 Wheels are awesome stylish, lightweight and high quality wheels for the price. If budget doesn’t matter and you want the lightest wheels available, check these 16×7.5 +28 JoyFast T66-F Wheels or 17×8 +34 TWS T66-F Wheels (if you need bigger brake clearance).


(Photo : RAYS TE37 Saga 17″ Wheels)


6. Chassis Bracing

The ND MX-5 is super lightweight. Unfortunately, making the car so light had a small drawback on the chassis rigidity. It’s not so bad, considering it’s quite easy to fit with strut braces and underchassis bracing. Our recommended solution is to run the Autoexe Strut Tower Bar Set combined with Autoexe Member Brace Set for maximum rigidity. If you want to try a very simple mod that you’ll feel right away, try the Nielex Pro-Spec Knuckle Support that will fix a very weak point of the ND. The Nielex piece has sold over 3000 units in Japan as it’s a very inexpensive mod that will make the steering feel much more stable/solid.  If your car is lowered, don’t forget to change your Front & Rear Sway Bars to bring back suspension geometry to how it should be (our pick : Autoexe Sway Bars).

 
(Photo : Autoexe Strut Tower Bar Set)


7. Brake Pads

This is a mod that anyone doing spirited driving will enjoy right away. Please be careful, though. We found out that most street brake pads will not survive intense circuit racing. If you don’t plan on racing your car at the track, our pick would be the famous ACRE Light Sports Brake Pads which produce minimal brake dust and give the car a very nice and direct brake feel. If you intend on racing, depending on your racing category, we have a variety of Racing Brake Pads available! Need more braking power than the OEM brakes can offer? Check out the Runduce Big Brake Kit!


(Photo : Runduce Big Brake Kit)


Styling

8. Performance Steering Wheel

We think one of the weak point of the fourth generation MX-5 is the thin and easy-to-scratch leather steering wheel. Upgrading to a thicker steering wheel will feel A LOT better during spirited drives, it’ll improve the look of your interior and most likely give you more leg room as most of them are D-Shaped (this means that the bottom part is flat). The replacements steering wheels that we offer (look for pictures of steering wheels with airbag) will retain the OEM airbag and all your buttons (radio/cruise control) and can be used with paddle shifters as well (for automatic transmission). Our favorite is definitely the KenStyle Leather Steering Wheel (for street use) or KenStyle Suede Steering Wheel (for racing). If you want the most advanced steering wheel on the market, don’t forget to check out the DAMD Performance Steering Wheel! Honorable mention to the Autoexe Sports Steering Wheel for those who want to upgrade without going too thick.


(Photo : KenStyle Leather Steering Wheel)


9. Japanese Style Floor Mats

The ND’s interior is so minimalistic and perfect that it’s hard to make it look much better. A neat upgrade that most enthusiasts will love are the upgraded floor mats. Our personal favorites are the Zero X Pattern Floor Mats that will match the red stitching on the interior, but for the more old school lovers, Zero Checkered Floor Mats (Small) or Zero Checkered Floor Mats (Big) will just do the trick! All the floor mats that we sell are manufactured in Japan and are made to last very long.


(Photo : Zero X-Pattern Floor Mats)


10. Short Antenna

It’s one thing that most owners hate to look at. The OEM antenna makes the car look like a RC car. A very cheap investment will make your car’s exterior look much more luxurious. If you like the look of Honda S2000 OEM Antenna, check out the TUCKIN99 Short Antenna. If you want the shortest antenna on the market, look at the Arrows Super Short Antenna!


(Photo : TUCKIN99 Ver1 Short Antenna)


Bonus Upgrades

BONUS 1 : Custom Finish Emblems

All the custom emblem kits that we sell include the OEM JDM “Roadster” Emblem that fits right in the holes of the original MX-5 one and shows your knowledge of the Japanese culture! It also confuses the people who never saw the ND MX-5 and think it’s a new model. Those emblems are brand new and will replace your OEM ones. Our most popular are the REV9 Black Chrome Emblems, followed by the REV9 Flat Black Emblems and the REV9 Gloss Black Emblems. If you like the chrome emblems and just want more JDM touch to your vehicle, get the Mazda OEM Roadster Emblem.


(Photo : REV9 Black Chrome Emblems)


BONUS 2 : Seat Covers

If you bought a ND with fabric seats and want to upgrade your interior (and keep the OEM seats looking brand new for better resale value), consider putting some nice and tight fit Seat Covers. The Seat Covers that we sell are made so that if you get into an accident, the seat airbags will deploy without any problem due to the construction of our seat covers. Our favorite choice is the Autowear Seat Covers followed by the DAMD Seat Covers and for those who want a more custom option, check out the Nakamae Sports Seat Covers and Nakamae Quilted Seat Covers! Installation of any of these 4 just take under 30 minutes and makes the seat much more comfortable.


(Photo : DAMD Quilted Seat Covers)


BONUS 3 : Lightweight Flywheel

If you had a NA or NB Miata, one thing you might miss is the very quick throttle response from the cable throttle. Unfortunately, the ND has an electronic throttle and it’s not as quick to react as the good old cable. We found out that changing the flywheel to a lighter weight flywheel just does the trick. Be careful, though, if you pick a flywheel that’s too light, it’s going to affect the driveability of the car. If you want the perfect balance, we recommend the Autoexe Sports Flywheel (which is also available for the 1.5L Engine) which is perfect for street or race use.


(Photo : Autoexe Sports Flywheel)

New aerodynamics and muffler for the ND Shop Car & Byebye

I always enjoyed seeing cars with nice front lips. With my current ride height, I needed to make sure I had a front lip that would allow me some clearance and was looking for a clean look.

I opted for a new front lip that just got released not long ago, the TK Style Carbon Fiber ND Front Lip. It installs over the OEM front diffusers and just required a bit of drilling at hidden bumper spots to fit. You can install it within 30 minutes and it looks amazing :

Many people think it’s the Mazdaspeed ND Front Lip, but it’s got a different shape and lays flat with a slight raise in the middle to provide with more clearance.

It completes the look of the front end pretty nicely.

And, as you can see, it follows the shape of the front bumper, too!

I also decided to install the Odula Carbon Fiber ND Rear Diffuser as I wanted a more aggressive look for the rear end of the vehicle.

This piece took about 10 minutes to install, it only requires drilling at 6 different points:

It’s pretty hard to take good pictures of it, due to the high contrast of the Ceramic Metallic light color.

Lastly, I installed a muffler from my friend at Integral Kobe : the Integral Kobe Type-US ND Exhaust. This is called Type-US because it’s aimed for the overseas market since it’s not legal in Japan (sound level). It’s not overly loud, and in my opinion, it’s just perfect.

Look at the quality of the product :

It has a very unusual angled tip but looks pretty cool once installed with the laser cut logo:

I do not have a sound clip yet, because when we tried to do it, we hit a nail on the road and got a flat tire. Now, we will be able to do a sound clip about it very soon, but we have to warn you, it sounds extremely good. A full review of the muffler will be done soon!

It was sad to do, but the ND Soft Top is now back to stock and for sale at our local dealership.

Here is one last picture in all its glory:

This will be the last blog post about our Soft Top ND Demo Car (Project Clubman) because the car is now retired (back to Mazda dealership) and we now are working on our new ND RF Project Car (Project Classy). More updates coming soon!

Fujimura Exhaust For 2016+ ND MX-5 Review

There is an ancient proverb that says: “Loud Pipes Save Lives”. This is particularly true when your car looks invisible to most truck drivers. I’ve always had Miatas with aftermarket exhausts and never liked them to be ultra loud. In my NA, I was rocking the RS*R Invidia Exhaust (which had a slightly louder tone than stock, but with a much sportier sound). In my NB, I had the RS Factory Stage N-Zero2 Exhaust which was pretty silent until you hit full throttle. Those were some nice “feeling” mods as you could hear the engine as you pushed it.

When I first got my ND, I sometimes had difficulty hearing the engine because it was so quiet. Mazda did an awesome job at making the car SUPER silent. By good job, I mean, you can literally run the car without its muffler and it does not sound *that* bad (try it when you change your exhaust, you’ll see). The stock catalytic converters and mufflers coming from the mid-pipe make the exhaust noise almost impossible to hear (this is also why they include a sound enhancer, otherwise you really can’t hear the engine).

I had the choice of a variety of awesome exhaust setups, but I decided to go with the least expensive and probably most “extreme” exhaust we sell. I went for the Fujimura Gentle Sound Muffler. Ironically, it does not sound gentle at all. It sounds mean and awesome. Don’t worry, there are video clips later in this post.

So, here’s my complete review:

Installation:

Installation couldn’t be easier. The stock exhaust is held by 2 bolts and 4 exhaust hangers.

DSC_0148

Just remove the 2 bolts and then play with the hangers to get the exhaust out. Do this when the exhaust is cold… otherwise you might hurt yourself. I suggest doing this with someone else, as, otherwise the exhaust may fall on your face or on the ground while you’re trying to remove it.

After that, just take 1 of the OEM exhaust hangers and put them on the Fujimura exhaust. The exhaust is so light (3.3KG) that it only needs to have one mounting point.

DSC_0149 DSC_0151

Voilà, your exhaust is installed!

DSC_0152 DSC_0156

If it takes you more than half an hour to do this, you probably should not work on cars. It’s that easy to install.

Looks:

The Fujimura Gentle Sound Exhaust is pretty subtle. It’s a single-tip exhaust that has a slightly angled shape to make it as direct as possible. When the exhaust is not installed, you can basically see right through. The muffler and tip is polished for a neat look.

DSC_0155 DSC_0157

As with any shiny part that’s just a few inches from the ground, it gets dirty. At some point, if you are as careless as me, the finish becomes more silver than polished. It can be brought back to its original glory, but I didn’t get round to it yet.

DSC_0232

Still, could we say that after a while it’s less of a “cop-magnet”?…. Maybe.

DSC_0245 DSC_0267

There is also a fancier version of this exhaust: the Fujimura Limited Edition Exhaust with a beautiful titanium tip. I didn’t want to go too fancy for once and took the regular one.

Noise:

This is the important part, isn’t it? The Fujimura Gentle Sound Exhaust is made to give the car a deep and sporty sound. The president of Fujimura Auto tests various muffler setups until he finds the perfect tone. In addition, he created (possibly) the lightest exhaust setup available for the ND Miata.

When you start your car (going from stock exhaust), the first thing that enters everyone’s head is, “Oh my…”. It *sounds* really loud at first. The reason is simple: the stock exhaust is VERY silent. When driving, you’re like, “this is going to be annoying”. But after a while, you really enjoy it. I have to say, you really get used to the super quiet OEM exhaust. When I had both my NB and ND, if I went from my ND to my NB it felt like it was ULTRA loud. However, compared to other sports cars, it was just normal. When I went to Miatas At The Gap and saw tons of NAs, NBs and NCs, I understood that my ND was not even close to loud compared to other muffler setups. Still, everyone (and I mean everyone) loved the sound of the ND with the Fujimura muffler. It does not sound like a cheap racing exhaust; there’s absolutely no raspiness, which I love.

I took quite a long ride with it. I did over 5000 miles of driving through the USA and the exhaust never annoyed me. At full throttle, it has a sporty tone. When going slow, it has a deep drone. When driving on the highway with cruise control, it’s silent. I’m not kidding — you can’t hear it at all, it’s pretty amazing. From cruise control, when you decelerate or accelerate, then you can hear it. And that’s pretty nice, because as I said, “Loud Pipes Save Lives”. On many occasions during my road trip, I needed to let other cars on the road know I existed, otherwise they would have bumped me. That exhaust gets you noticed when you need it.

I’ve heard other ND muffler setups, but they didn’t impress me much. I like to hear my car when I drive, so I can actually “feel” it. The stock ND really lacks that feature. Now, it just feels like I’m connected to the vehicle.

Alright, enough talk, let’s hear it!

Start + Drive

Coming Back + Down Shifting

Passing Through (Windy… sorry!)

Acceleration

Revving + Slow Launch

Launch

Acceleration

A lot of videos, but I still don’t think they show the real awesomeness of the noise. I used my Nikon Camera and it was quite windy. Sometimes I was too close, which altered the sound a bit.

Here are 2 more videos to show you the noise:

During Dyno :

Inside Video (Deal’s Gap) :


Overall, I’m super satisfied with the Fujimura Gentle Sound Muffler. It’s an awesome sounding piece that helped me avoid a few highway incidents. Some people might think it’s too loud, and I have to say that it’s not for everybody. However, everyone who followed me (as well as me following my very own car) enjoyed the beautiful tone of this muffler.

1245131_1

5000 miles in a 2016 (Modified) ND MX-5 Miata

If you followed my whole adventure: The Road(ster) Trip, you probably noticed that it was a LOT of mileage on a non-stock vehicle. The car is lowered (on coilovers), has wider tires, a loud exhaust, a few engine modifications, minimal chassis bracing and some comfort modifications. It’s not heavily modified, but it’s far from having the same feeling as the stock car, too.

Here is my review of how the modifications affect the overall feel of the car during long distance driving and on a few mountain roads.

First of all, some of you may see this as a sales pitch for my products. I have to say that I totally endorse them and couldn’t be happier with them. Are there some less expensive options? Probably. Are there some better products? That’s possible. As far as I’m concerned, I always prefer to run the higher quality parts to the cheaper ones. In the long term, the resale value of the quality parts stays high, you don’t have a car that looks the same as 100 other ones and you are not afraid of failure because of quality control (all our parts meet the highest standards for quality).

So, in no particular order:
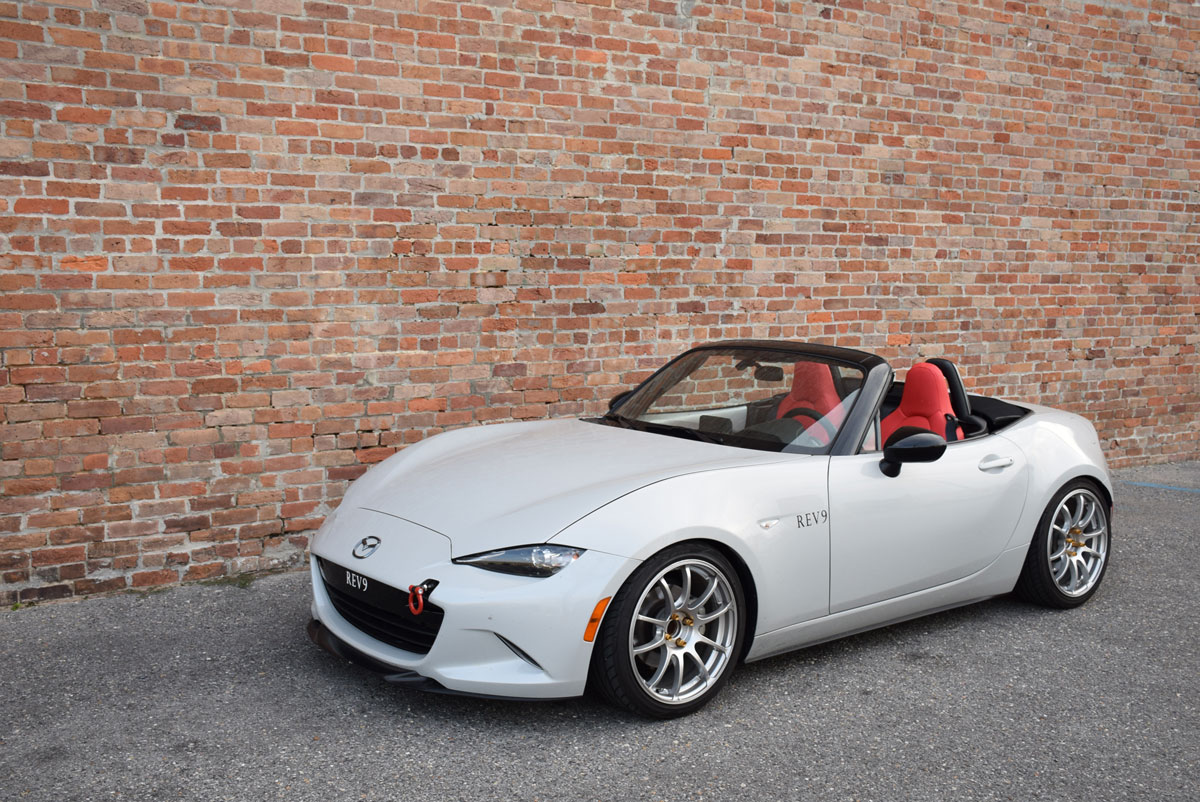
Suspension Review

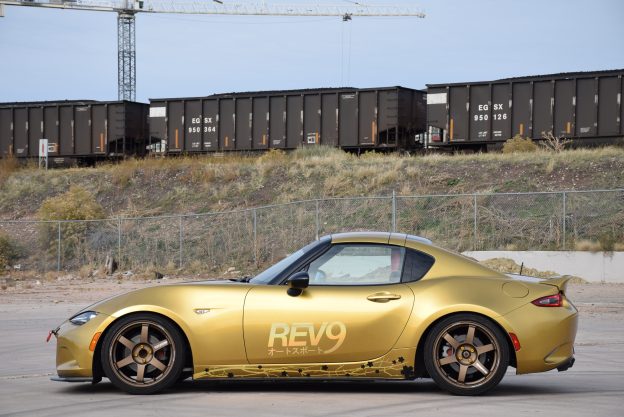
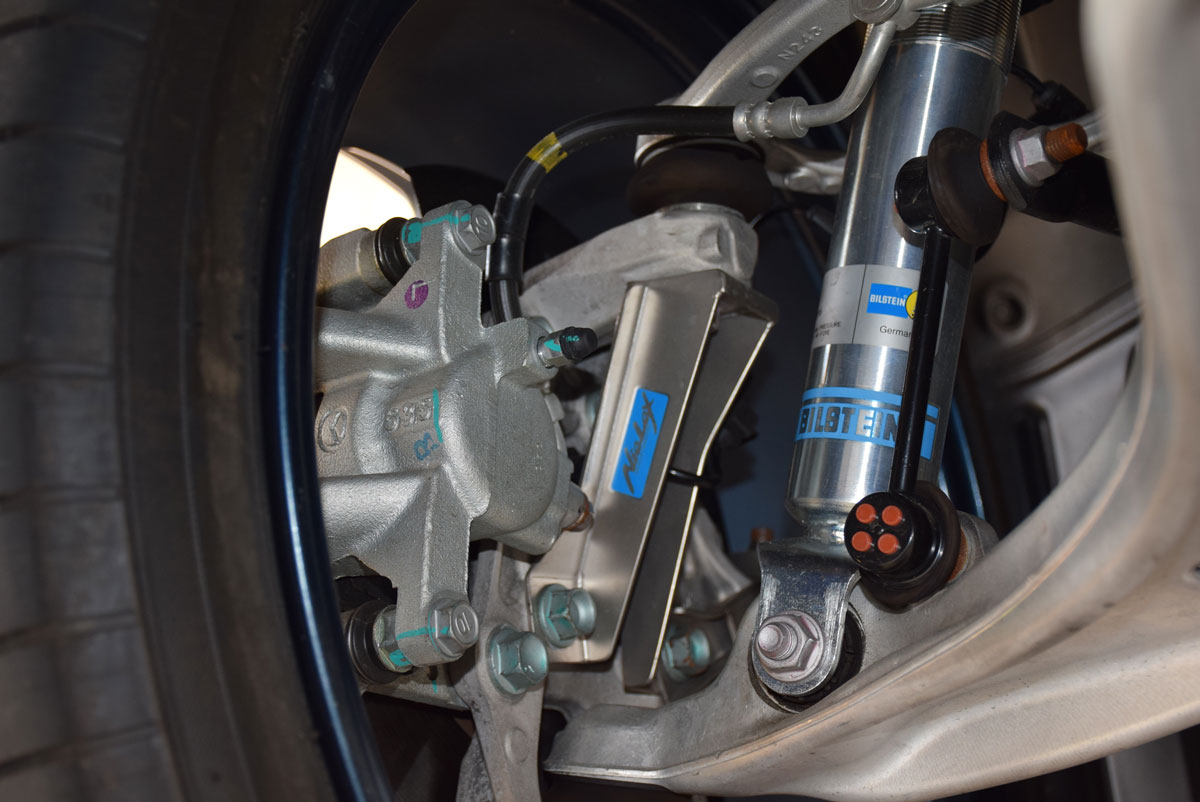
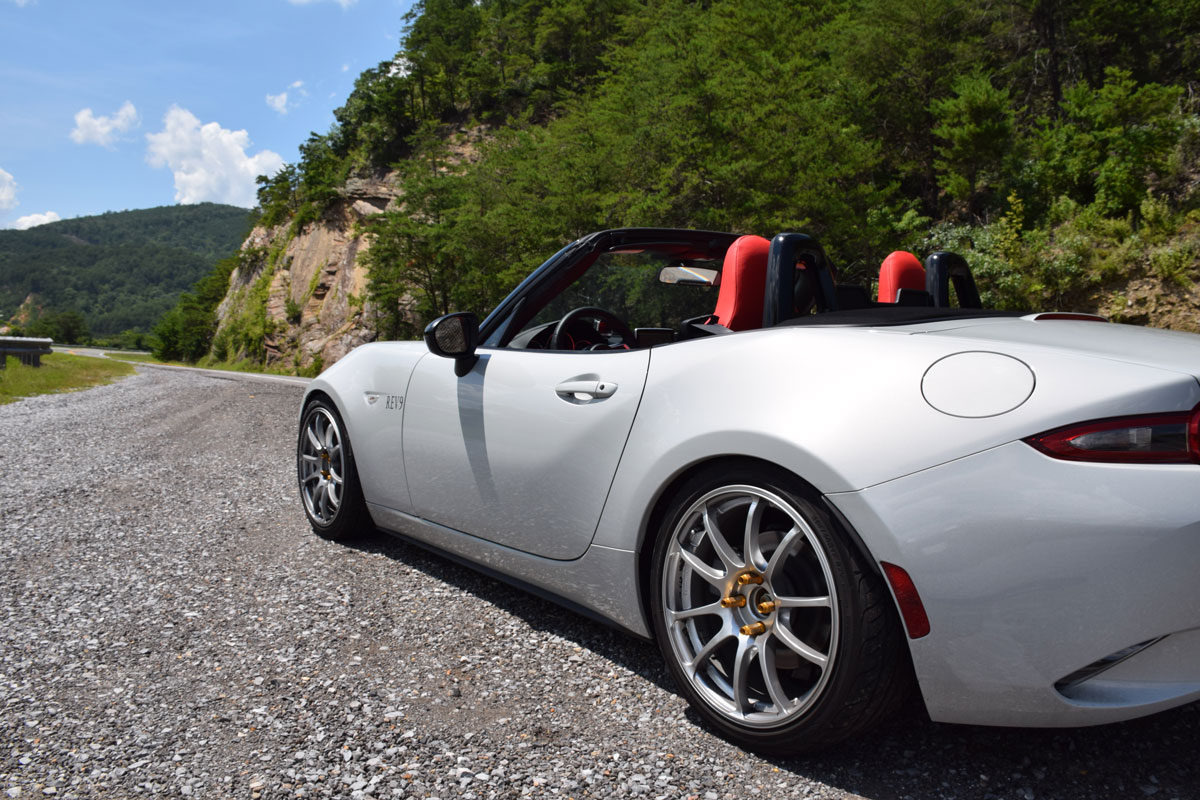
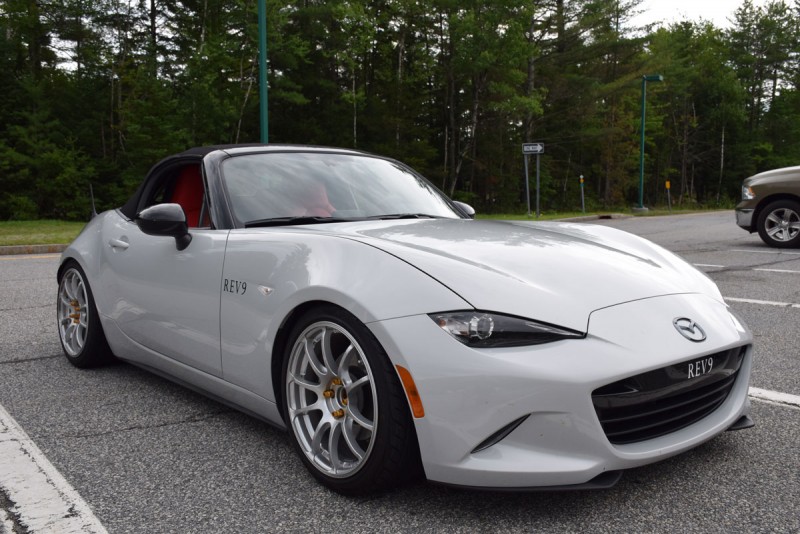
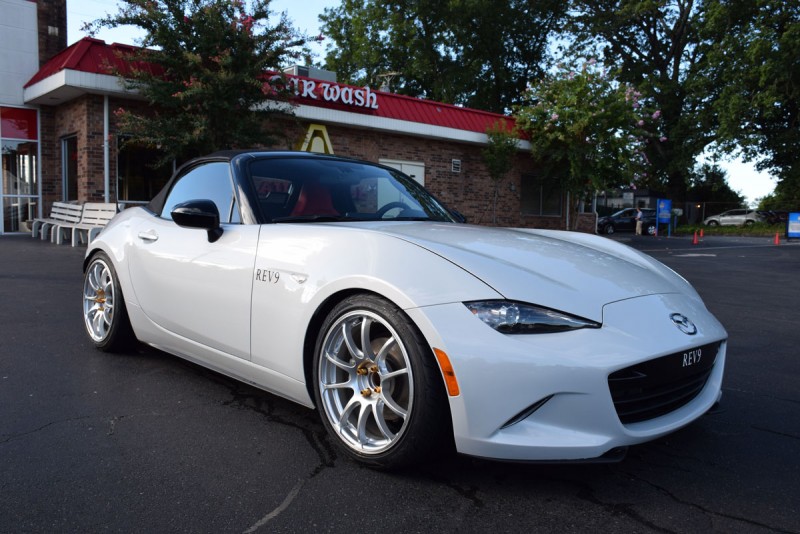
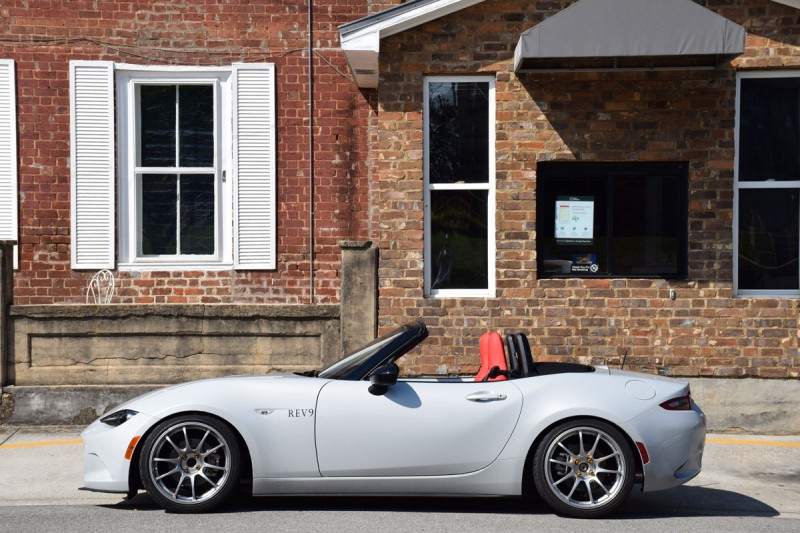
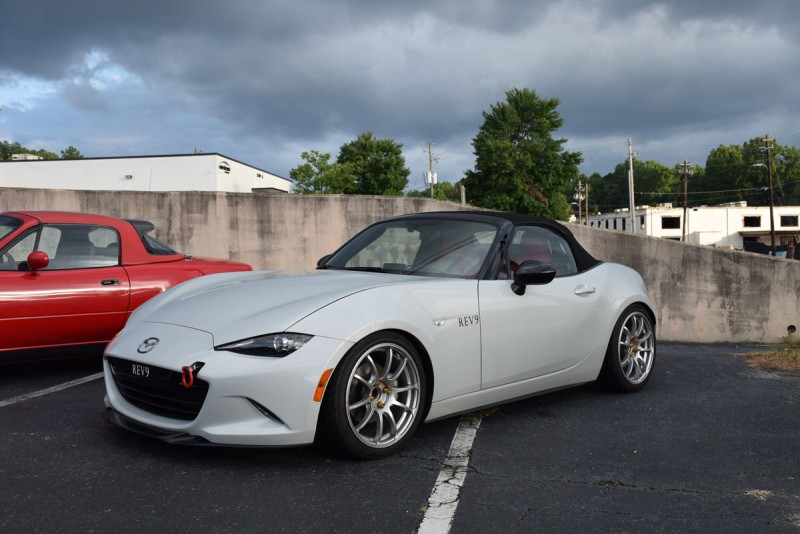
I am running the Cusco Street Zero Coilovers. These are in no way meant to be raced, but still, they managed to be pretty awesome on the mountain roads (see the videos I did when I was at Deal’s Gap). I felt like the car still had some slight body roll due to its suspension being on the “softer” side, but coming from the OEM Bilstein to these made a very big difference. The Bilstein are very hard and probably aimed more towards racing. The Cusco provided me with the look I wanted and gave me SO much extra comfort; it made the car a pleasure to drive. After 5000 miles, I feel like I made the car a nicer “street car” than what it was on stock suspension. However, if I were to race the car, I’d probably go for a firmer suspension with more adjustments. Overall, since I raised my suspension by 10mm, the car can be driven pretty much everywhere without worrying much about bottoming out.

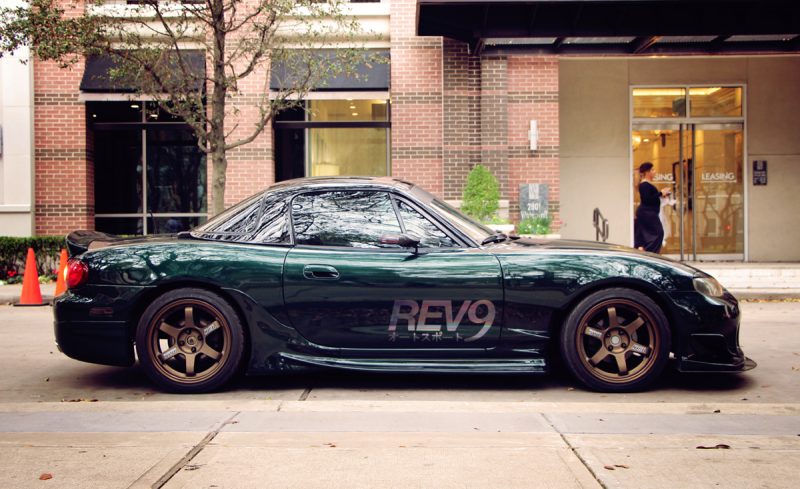
It is hard to notice from the looks, but it made a HUGE difference.

Before:

DSC_0953

After:

DSC_0986

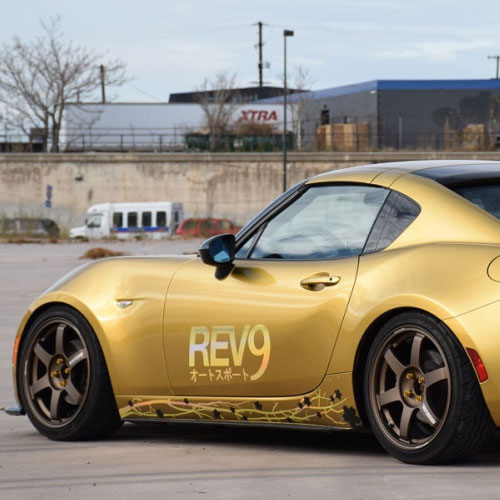
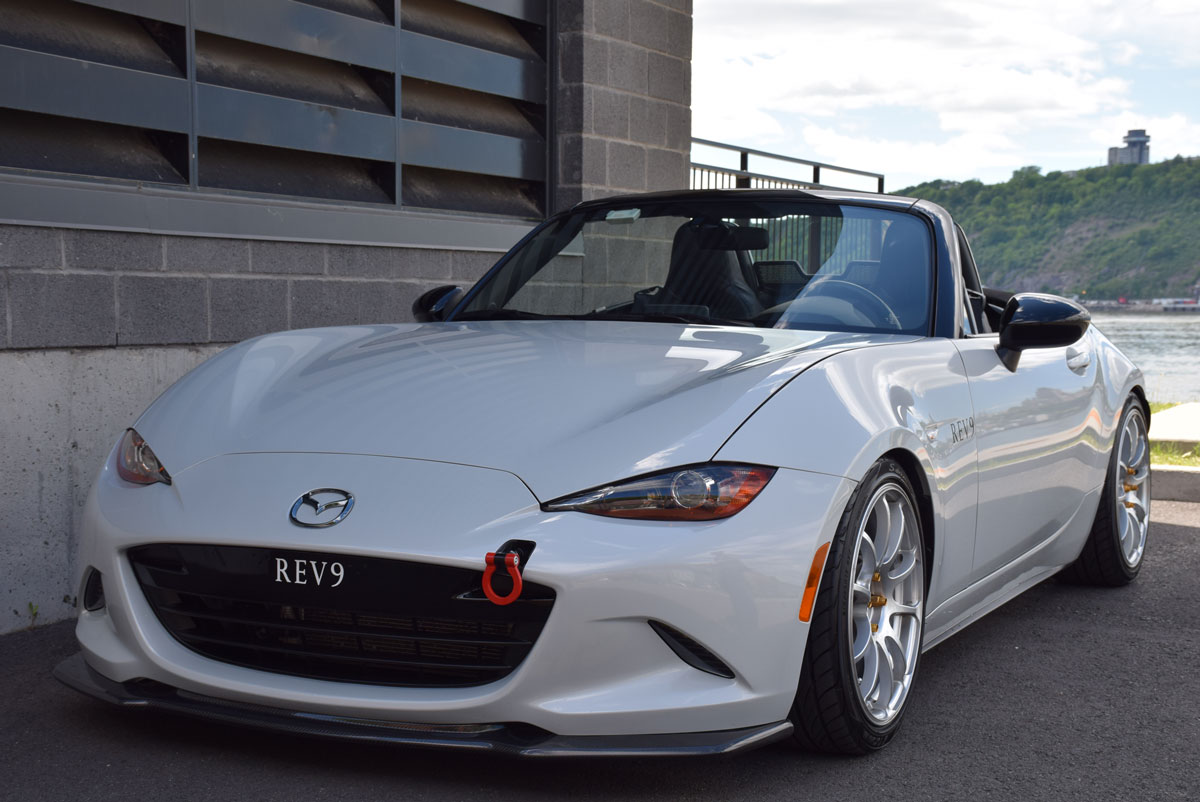
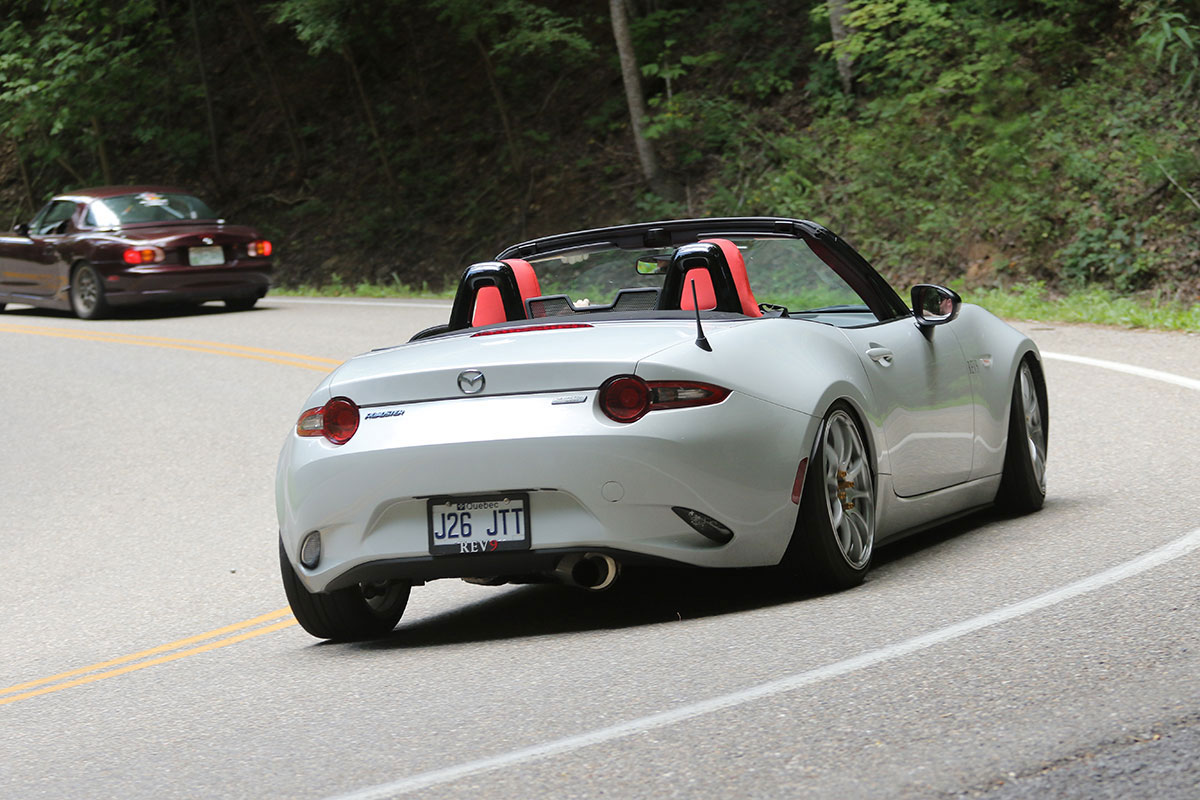
Wheels & Tires Review

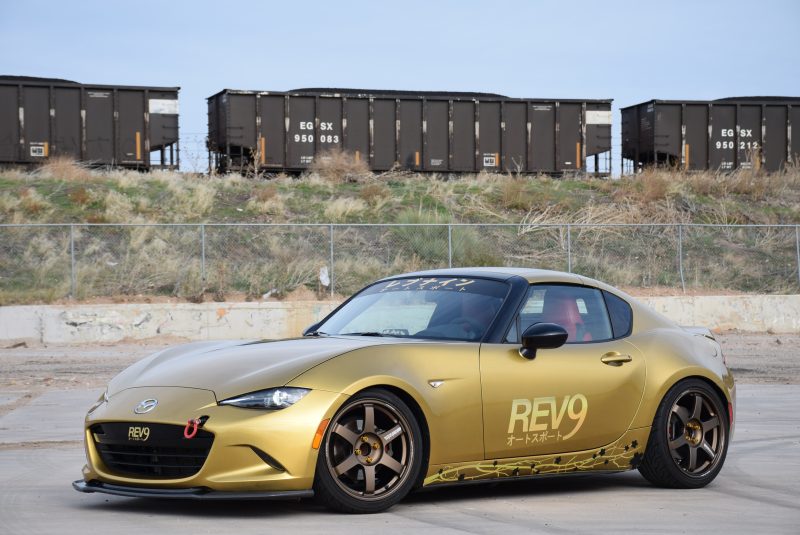
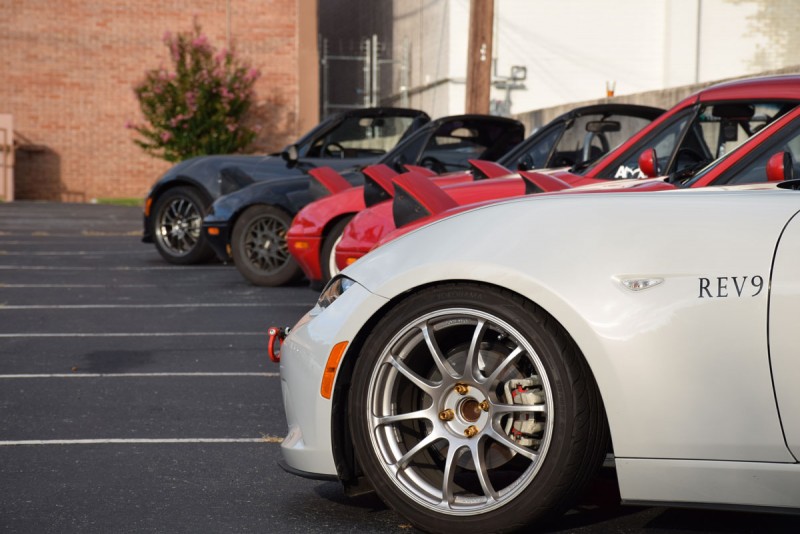
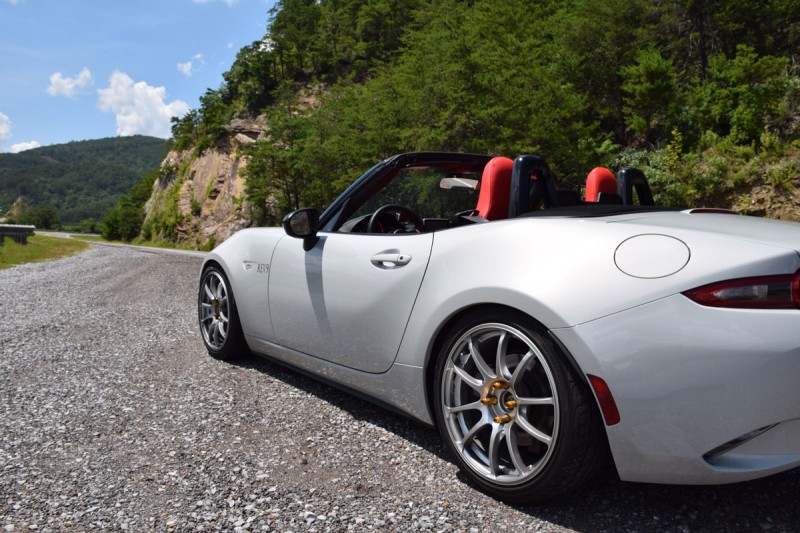
I absolutely love the look of my Advan RZ 17×8 +35 wheels, and it seems that everyone who saw the car in person had the same opinion. The concave spokes give the ND a much more aggressive look. The fact that they are lightweight and solid made me confident driving everywhere with them and did not affect the performance of the car in a negative way. The 8” width paired with slightly wider tires gave the car more grip than stock and a very nice road feel.

DSC_0108

The Yokohama S.Drive were nice tires for rain and overall driving, but they were really bad during spirited (or semi-racing) driving. I was not very confident pushing the car too much on corners and would keep the traction control ON all the time since the tires were slippery when they were abused. Their only good point would be that even though I did 5000 miles and so many runs at Deal’s Gap, while having some camber, they didn’t wear out much.

DSC_0990

I’ll probably go for some stickier tires next year. It seems like Bridgestone RE71Rs are the way to go.
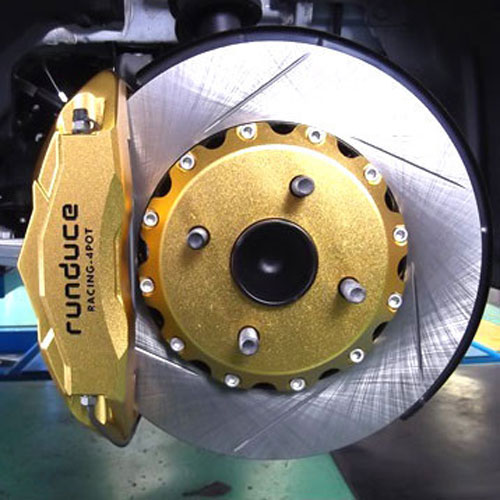
Brake Pads Review

I changed my stock brake pads for some pads that ACRE recommended to me: the Acre Light Sports Brake Pads. They said that these are perfect for those who don’t do competition racing and intend to drive the car in a more aggressive way. I gotta say, these pads are damn near perfect. They grip sooner, they don’t seem to fade at all and they really give a more aggressive feel to the car. The OEM ND pads are great, and when you come from a NA and NB, you feel like the ND is a braking monster. But, when you’re used to the ND and switch to better brake pads, it’s day-and-night difference. I loved the fact that they did not produce too much brake dust, they didn’t squeal at all and did not need to be warmed to be efficient. During my runs at Deal’s Gap, they were great and reminded me that my tires were not so great.

DSC_0153

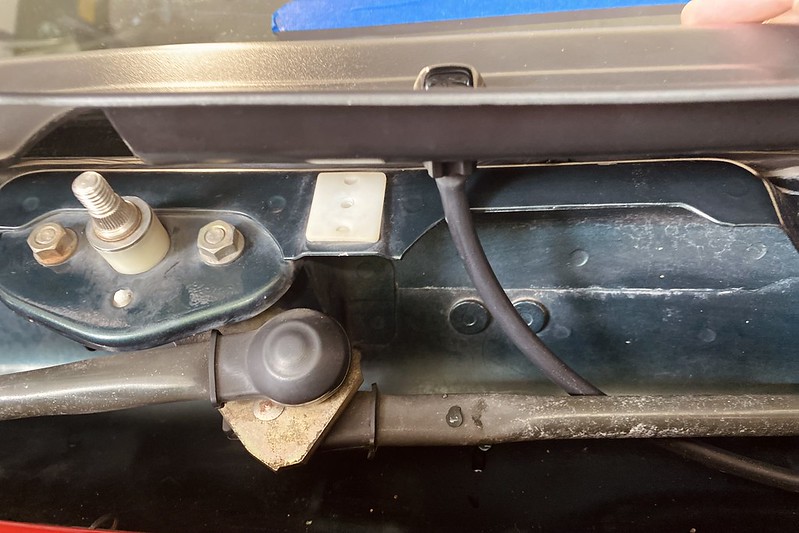
Knuckle Brace Support Review

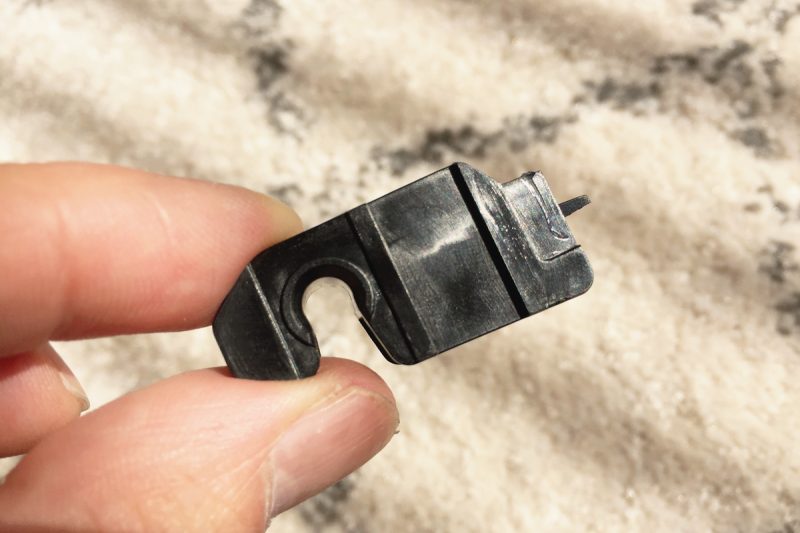
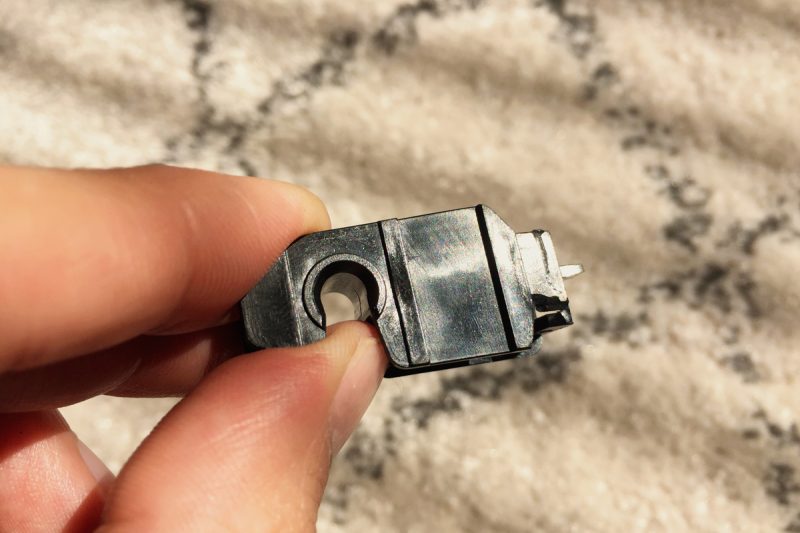
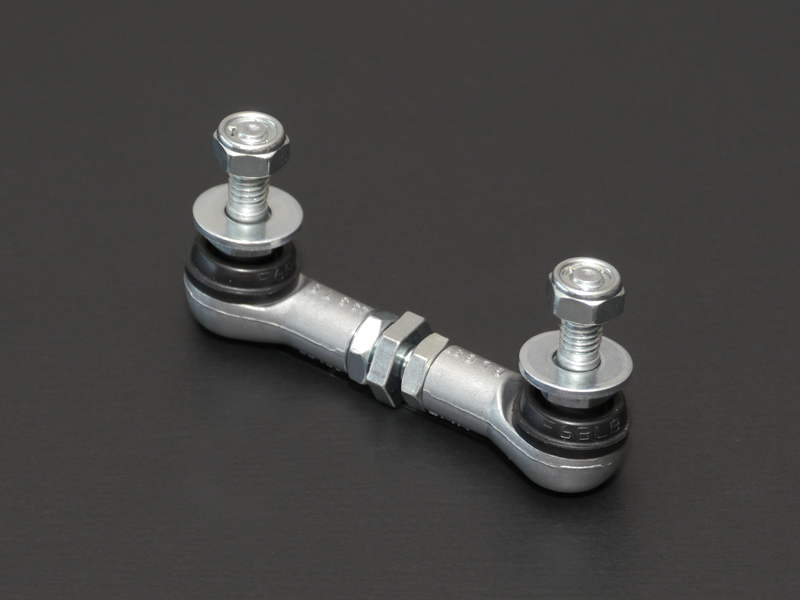
One little modification that I really enjoyed was the Nielex Knucle Support Brace. After installing it, I didn’t have to correct steering much during highway driving and it felt like a totally different vehicle. The front end was much stiffer and it felt more “solid” with much less flex towards the front suspension. There’s a whole debate about it on some forums, but in my experience, everyone who tries it can really say that there’s a difference between this and stock. It’s personally one of my favorite modifications and Nielex told us that they sold hundreds of them to ND owners who all appreciate it. Some people who tried the car said that the feeling is similar to adding a bigger front sway bar to the vehicle. To me, it felt like the car was much more “connected” to me.

DSC_0060

(Picture taken from my visit at Nielex in Hiroshima. Blog post coming soon)
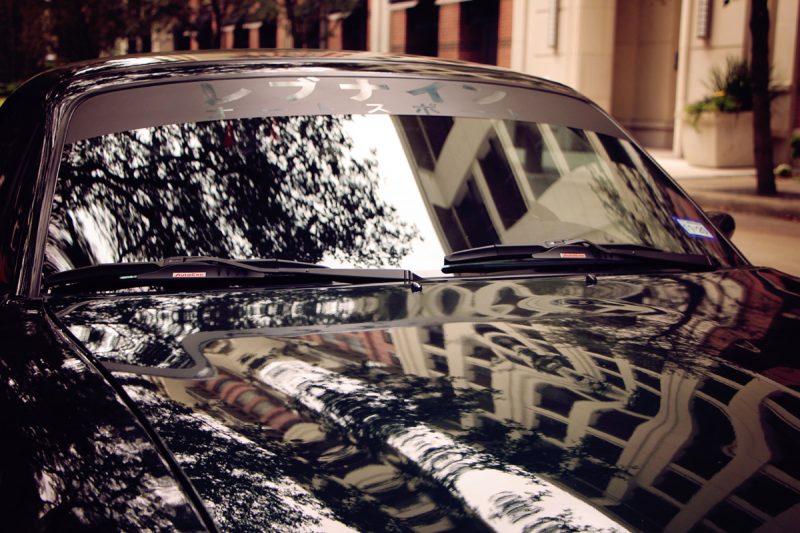
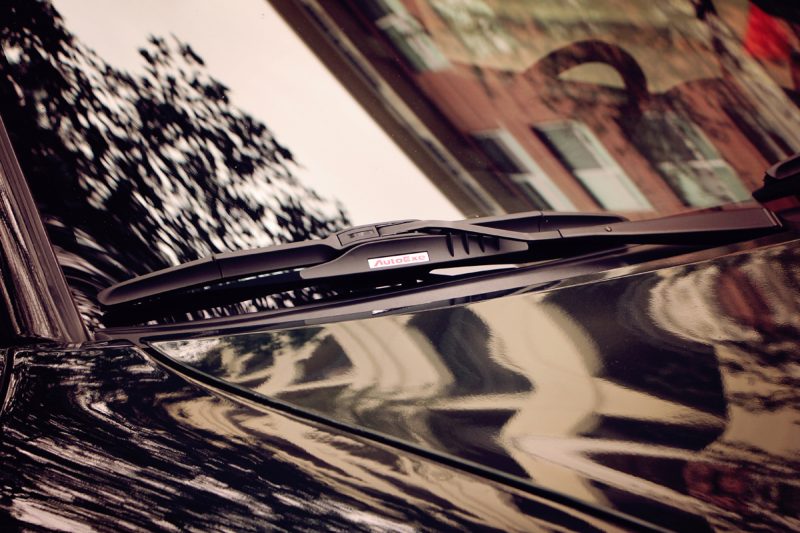
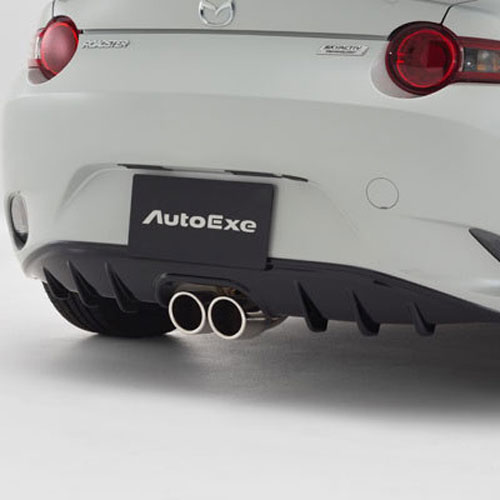
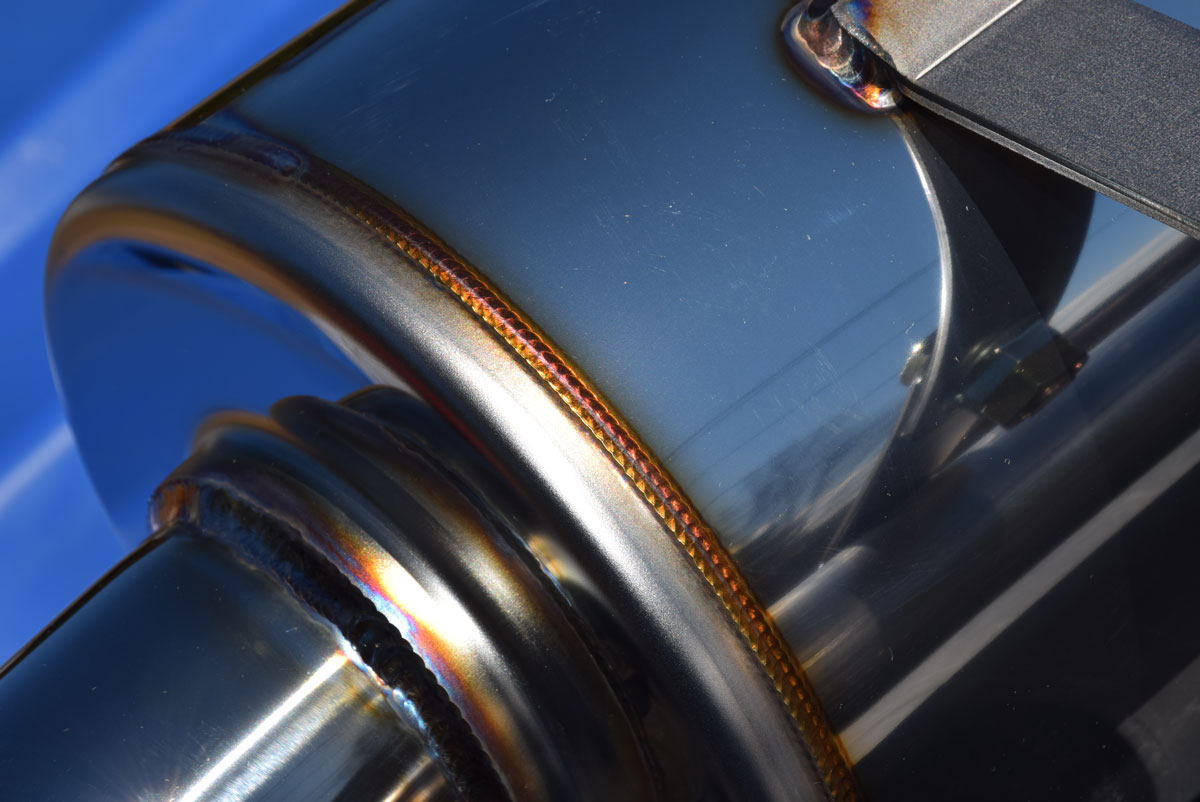
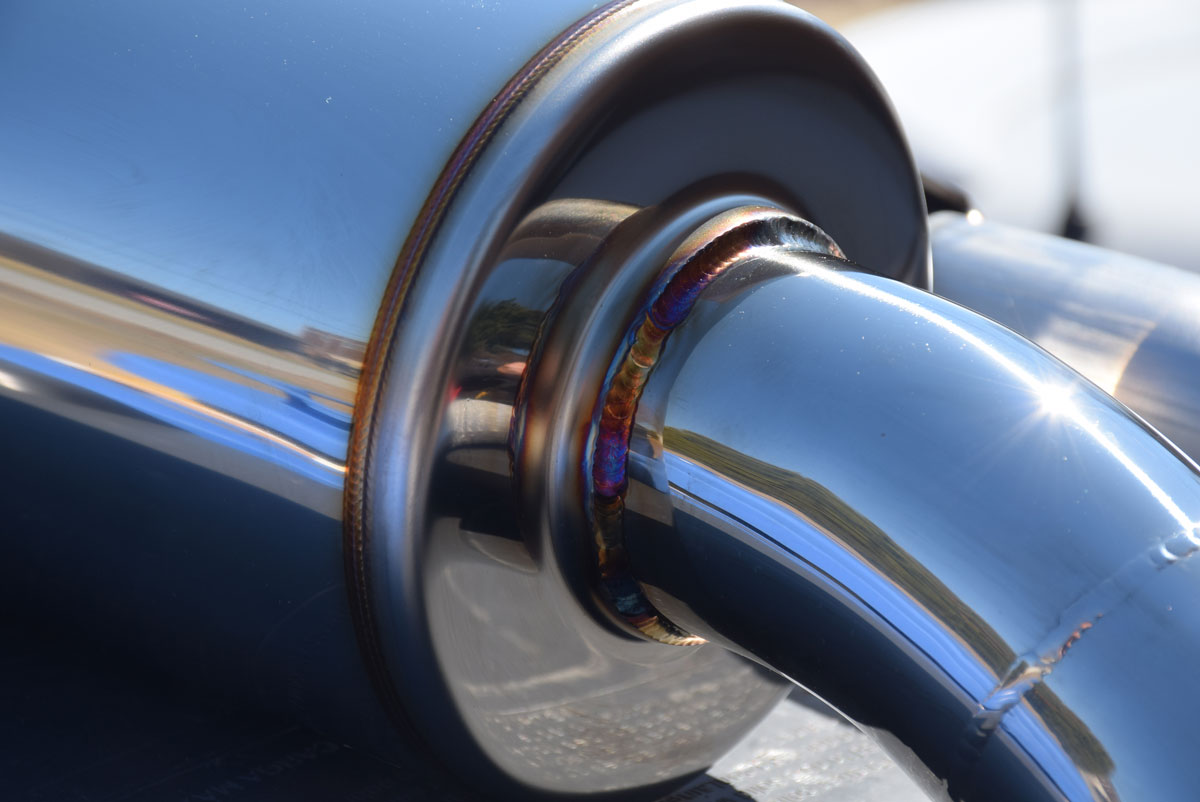
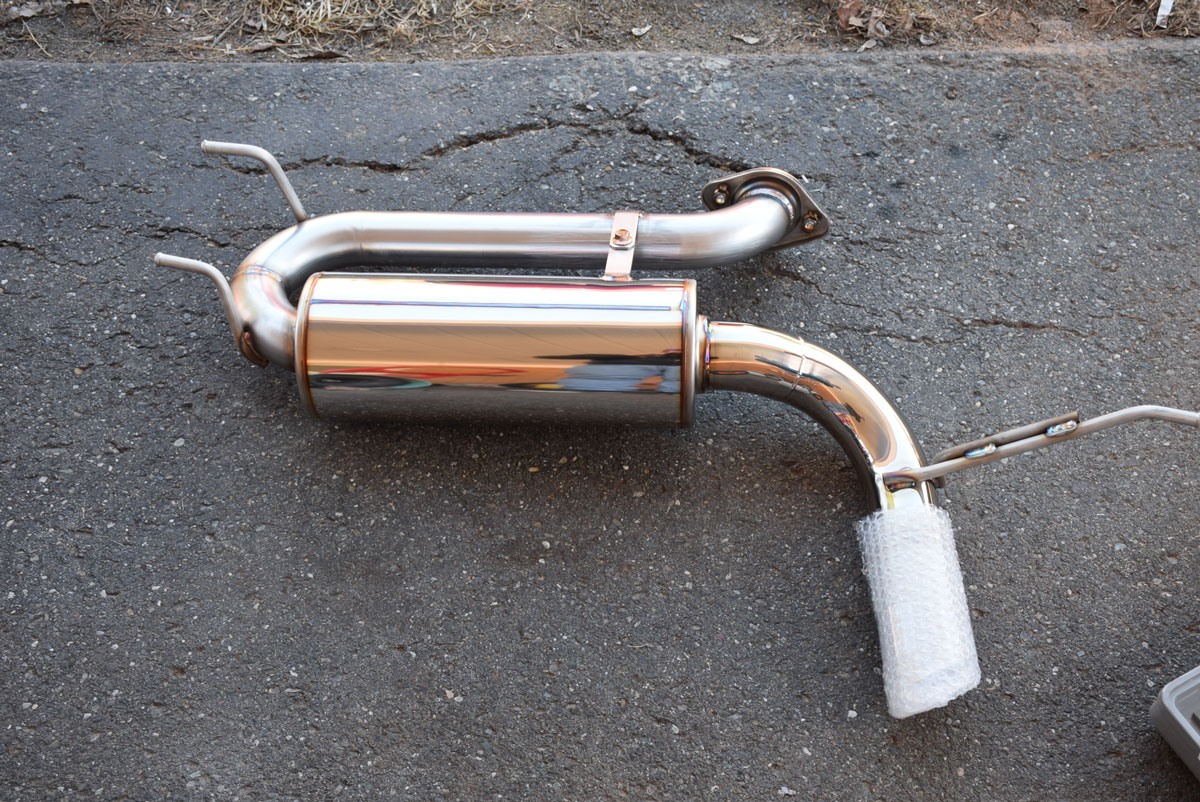
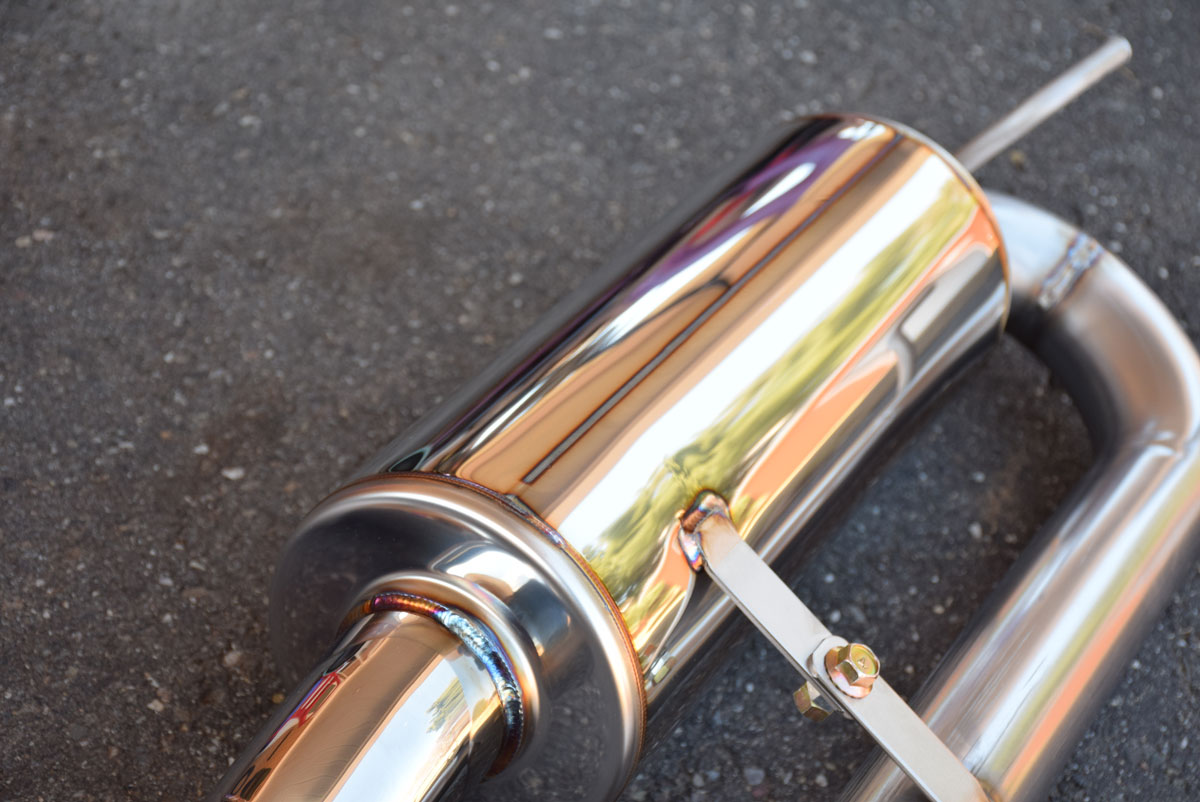
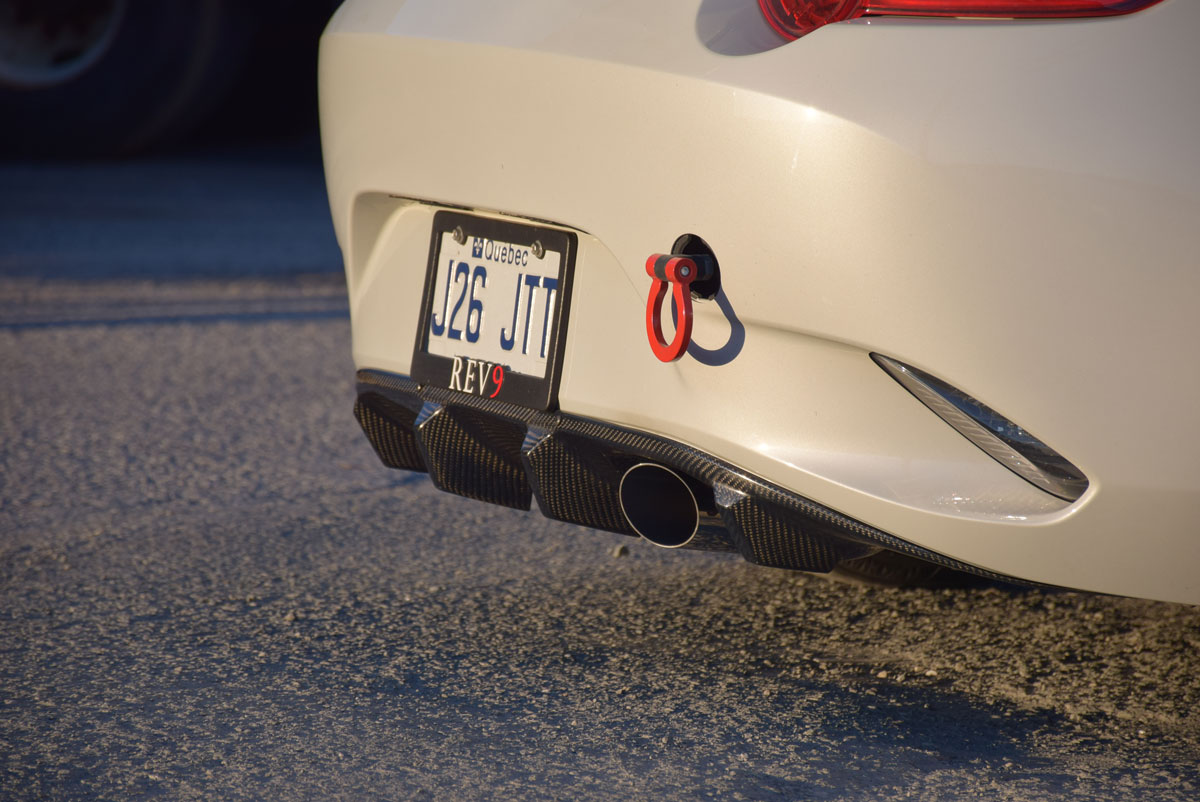
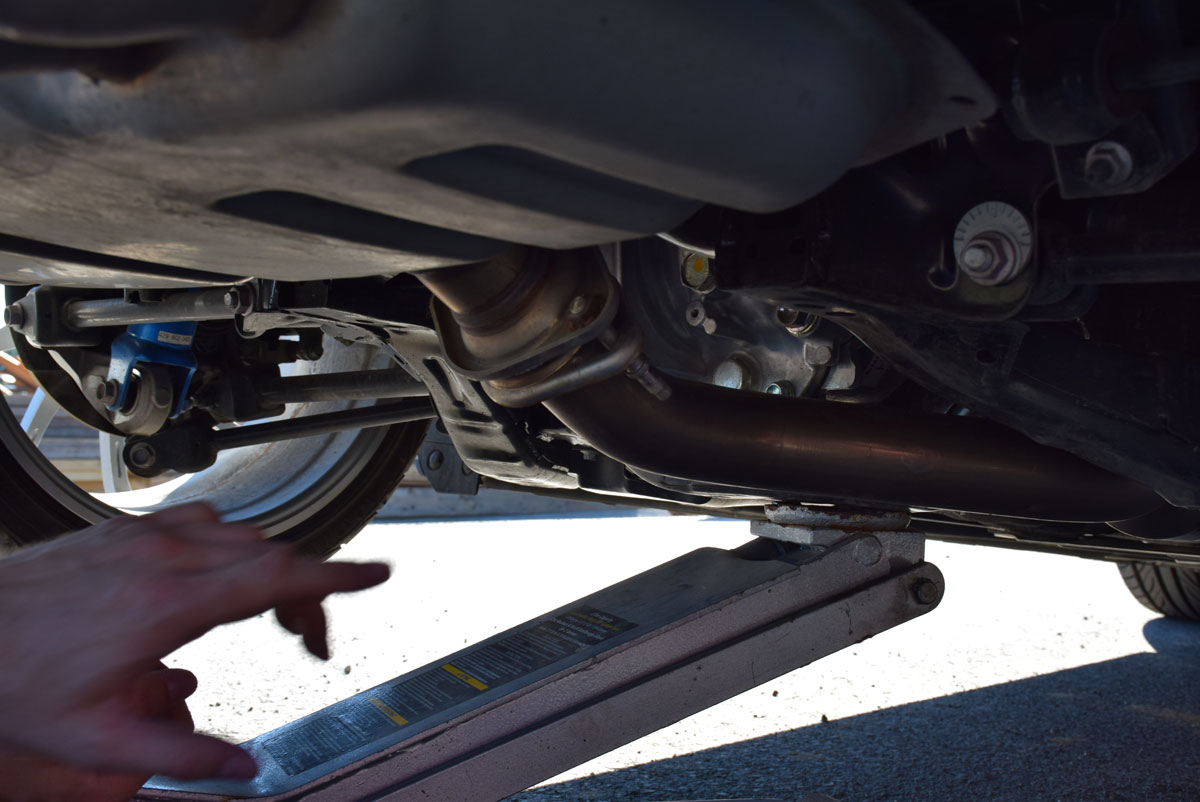
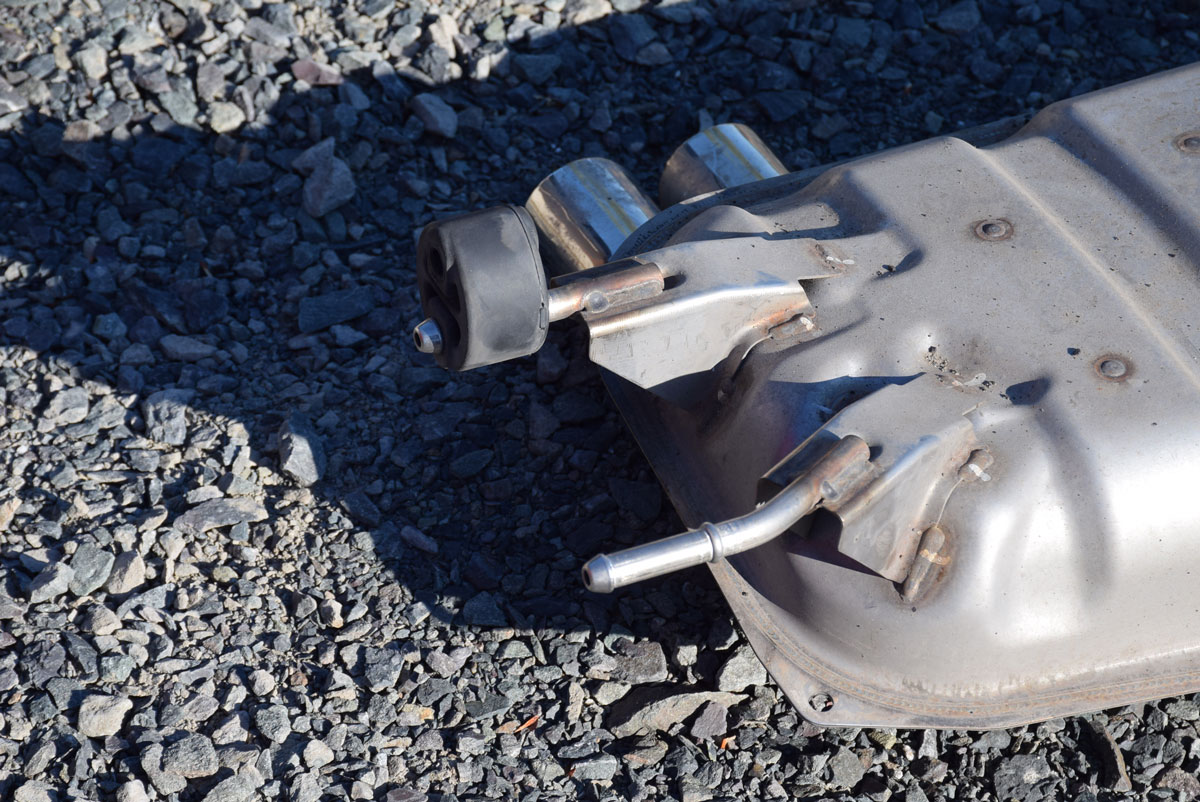
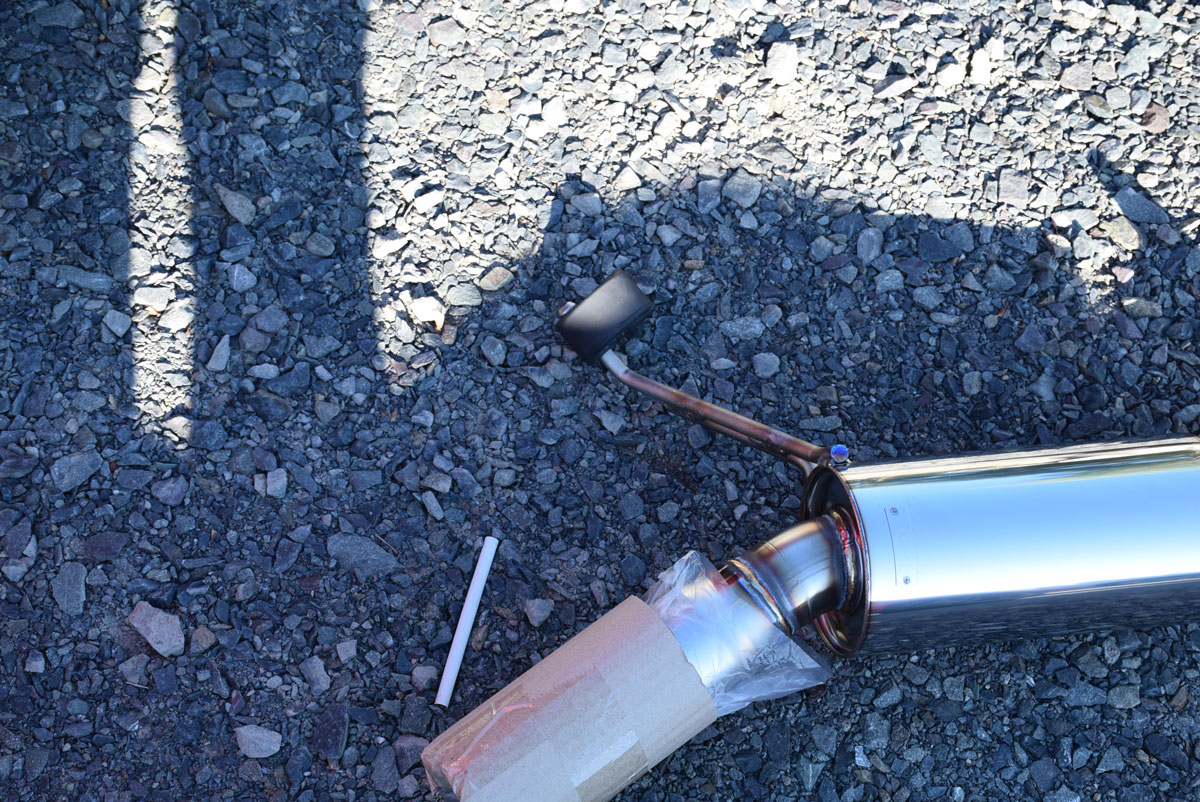
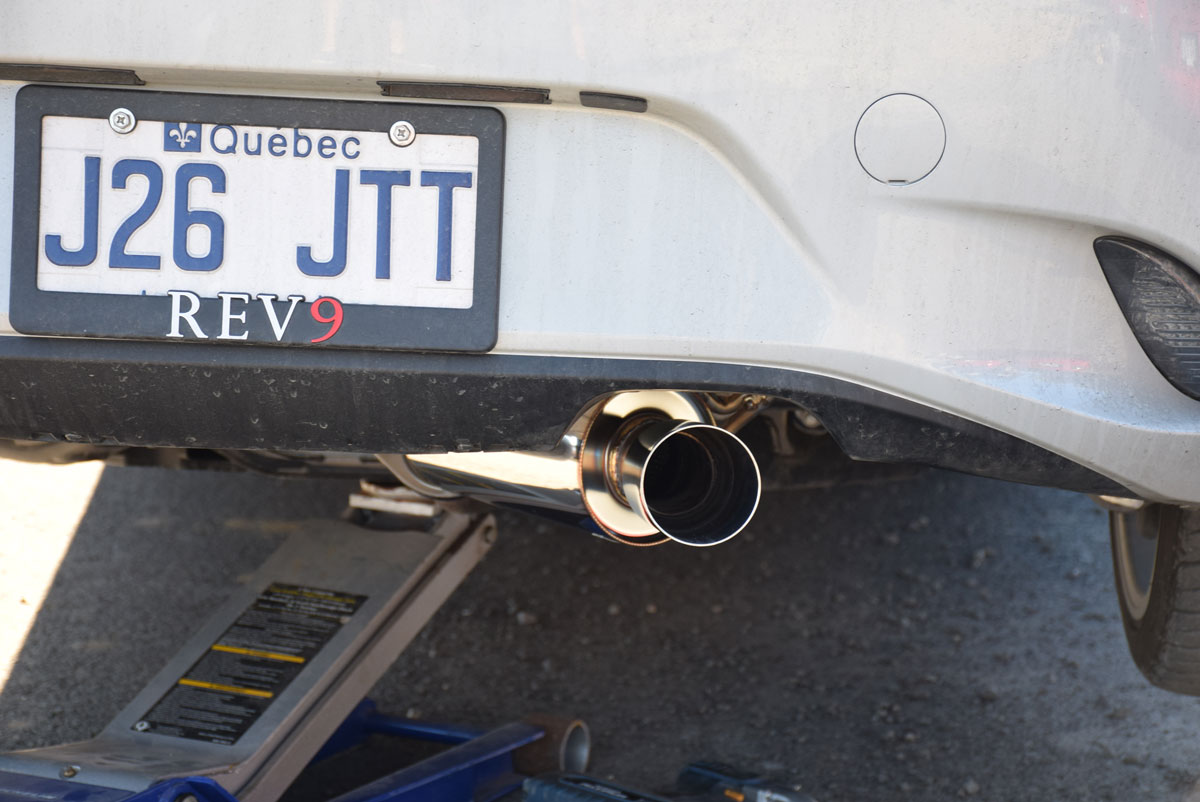
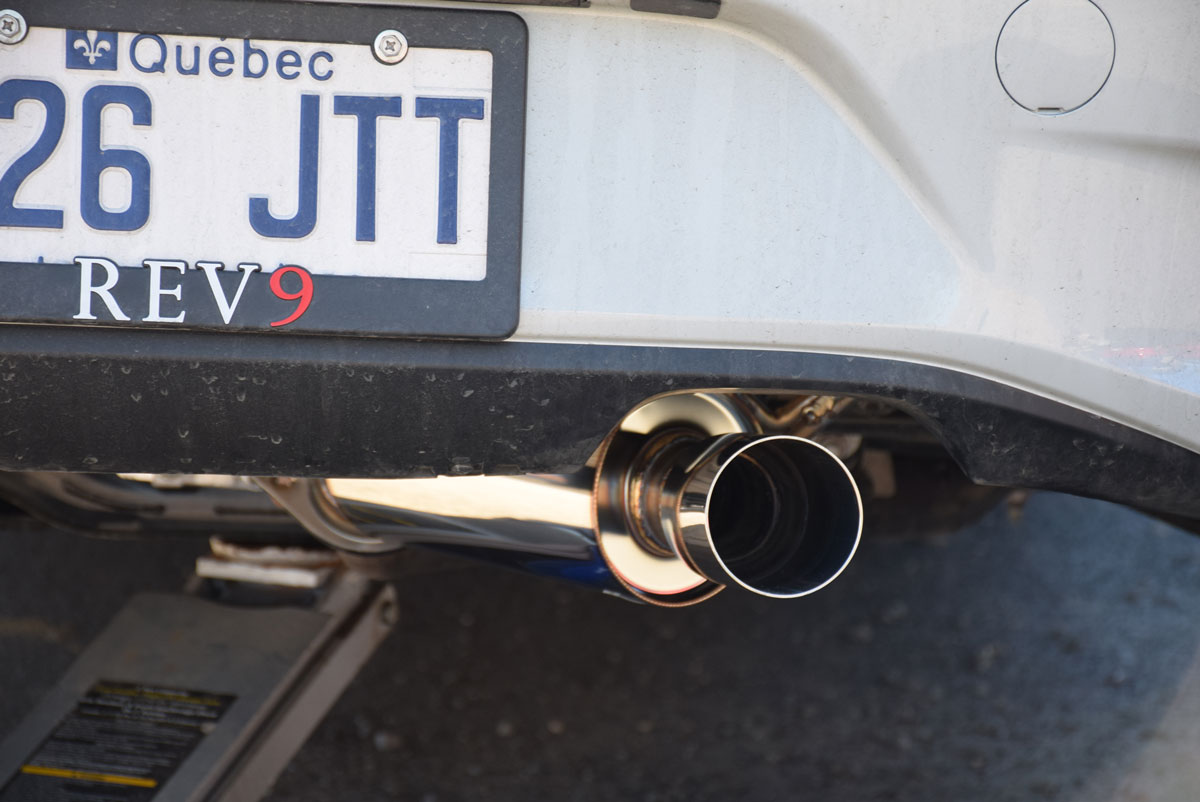
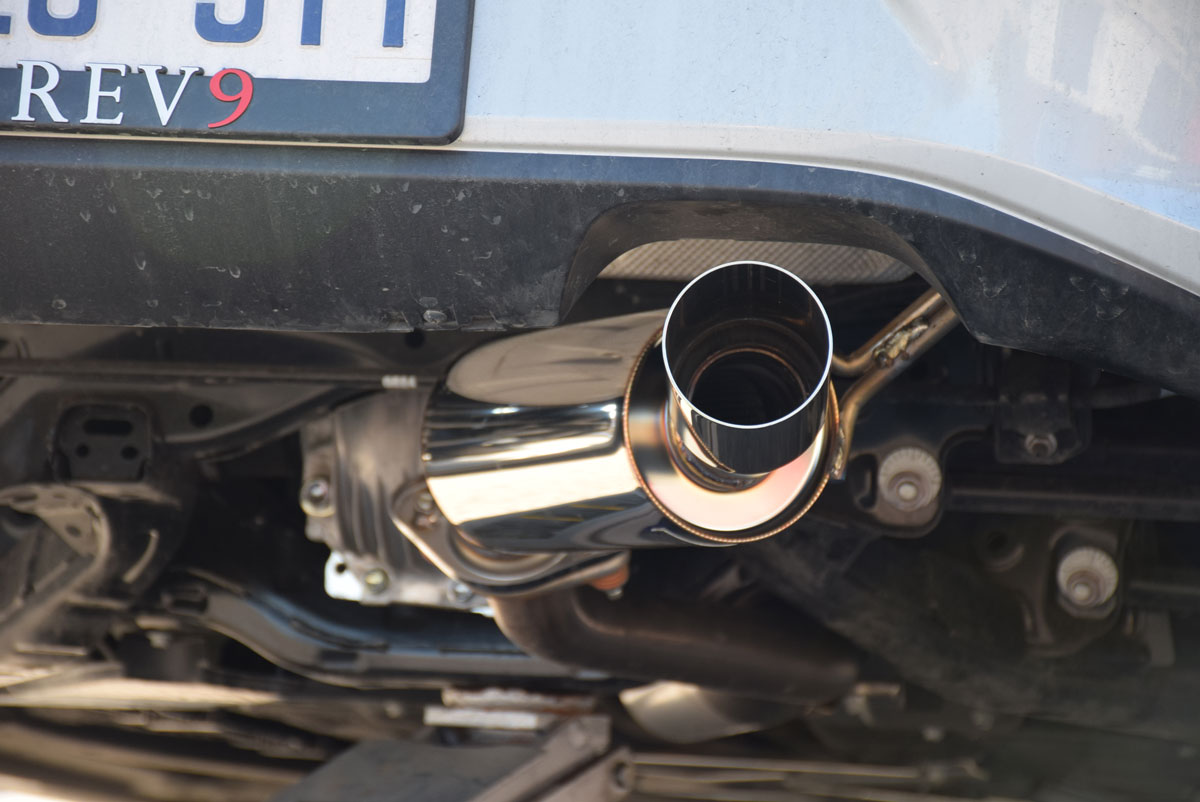
1245132

Exhaust Review

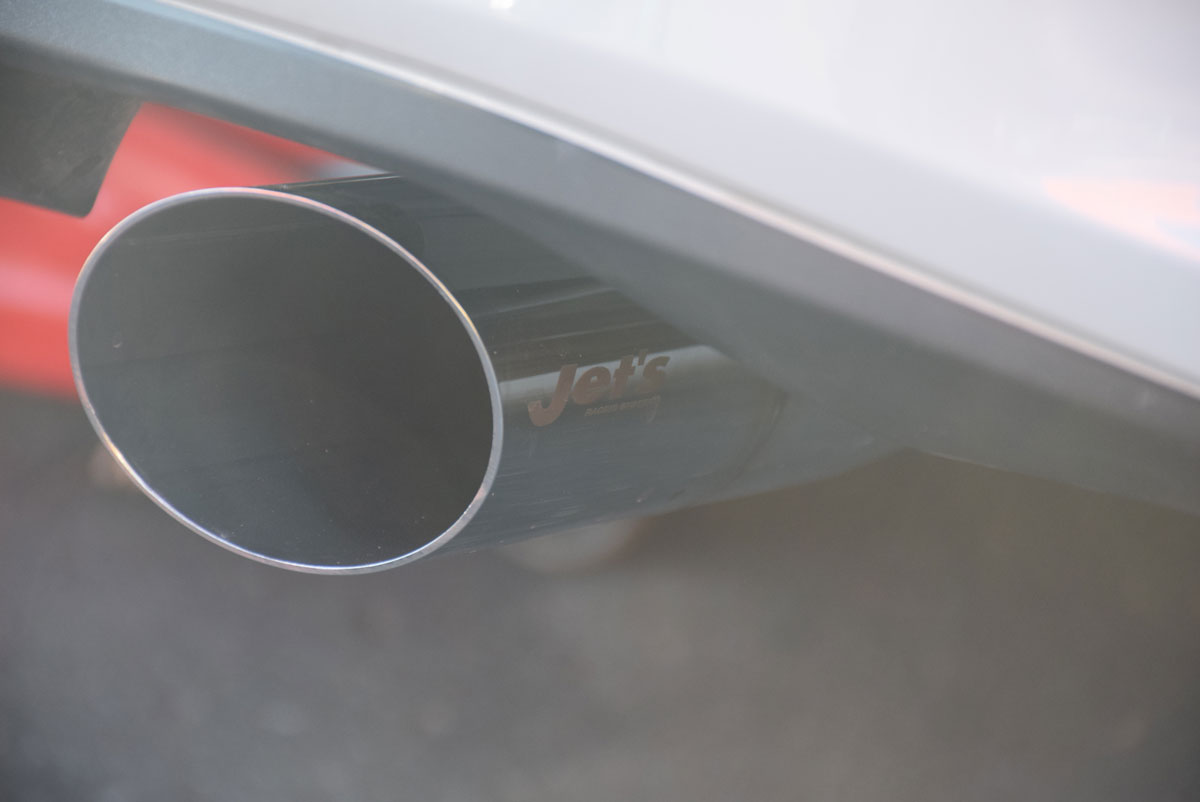
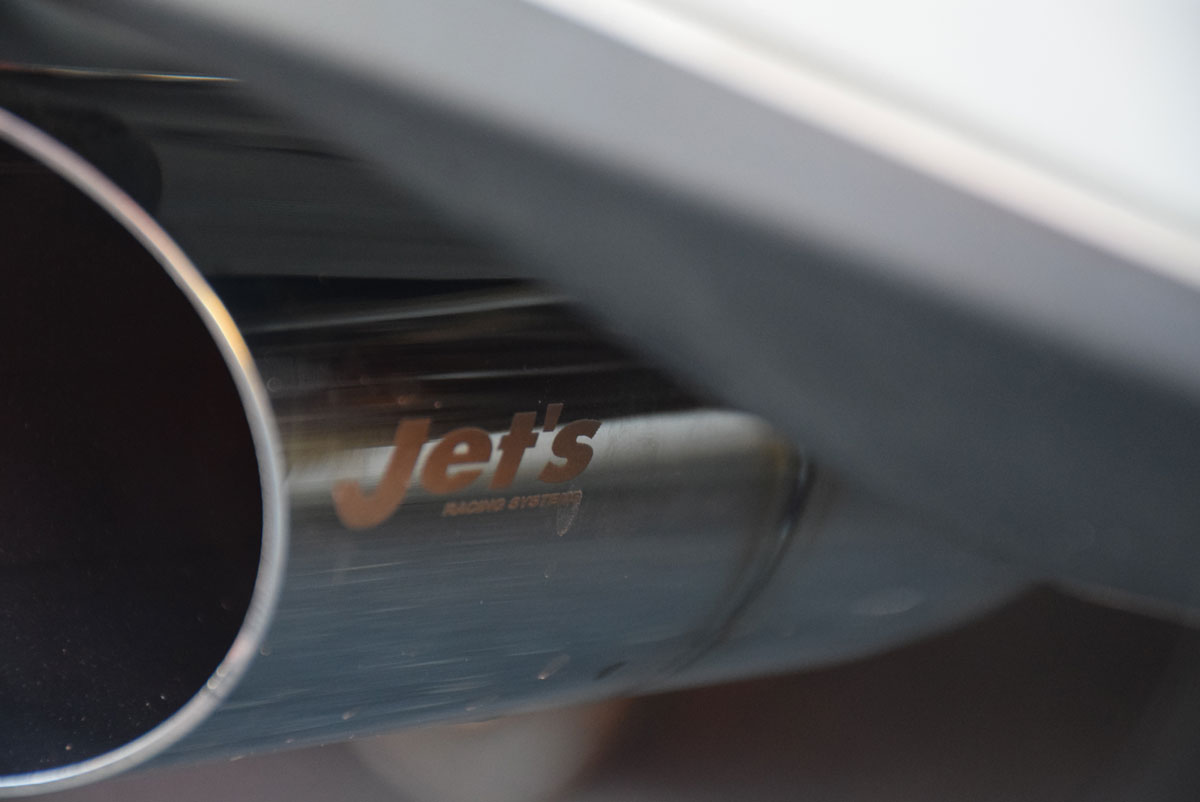
I’ll keep this one short, as I’ll post a full review of the Fujimura Gentle Sound Exhaust in the next days or weeks. At first, I was not sure about running a single tip exhaust that was a bit angled. After a while, I got used to it and really started to like the minimalistic look.

I first thought that the exhaust was extremely loud, but it seems that the ND is just VERY silent from factory. When compared to NA, NB and NC, it seemed that my exhaust was not much louder than other cars. One thing I have to say is that it feels awesome to hear the vehicle when you push it (which you don’t get with stock). But when driving on the highway, the exhaust becomes silent. No annoying drone or anything to make a long trip abominable. On cruise control, we really couldn’t hear it.

Also worth noting is a point a friend of mine made: Loud Pipes Save Lives. That’s very true; when you pass trucks (or higher vehicles), you can just put the pedal to the floor and they’re guaranteed to know someone’s next to them. It helped me avoid many incidents during this trip.
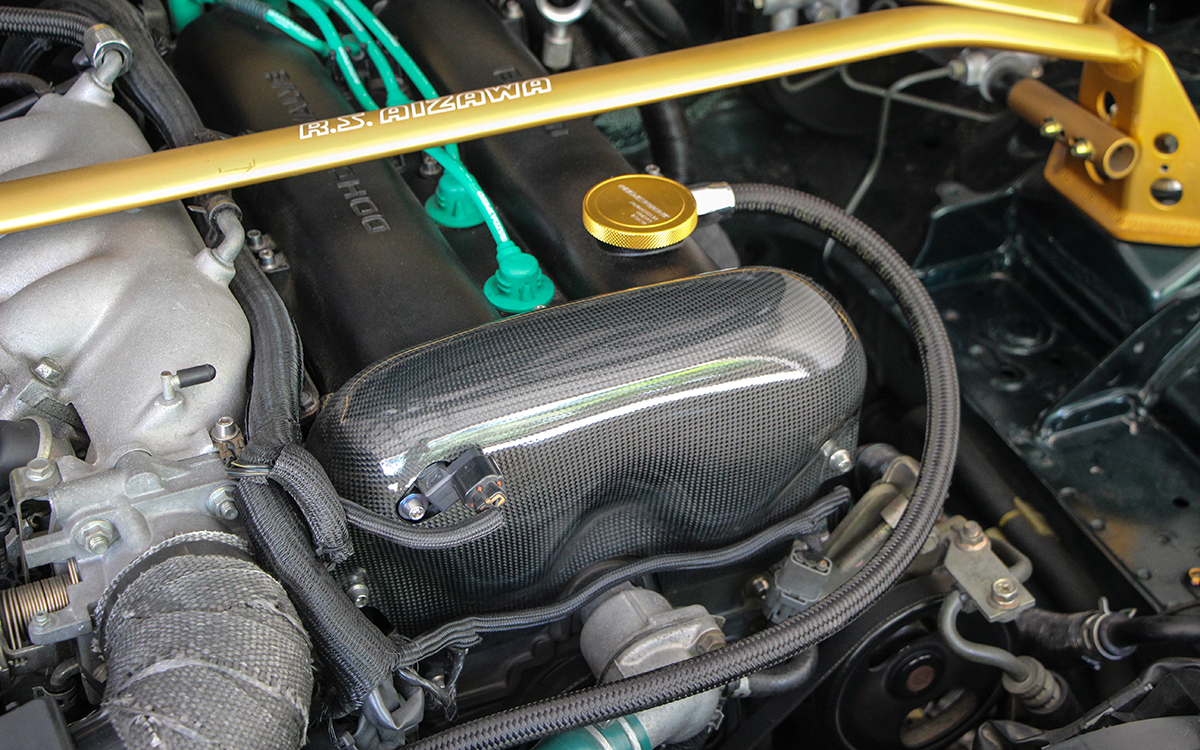
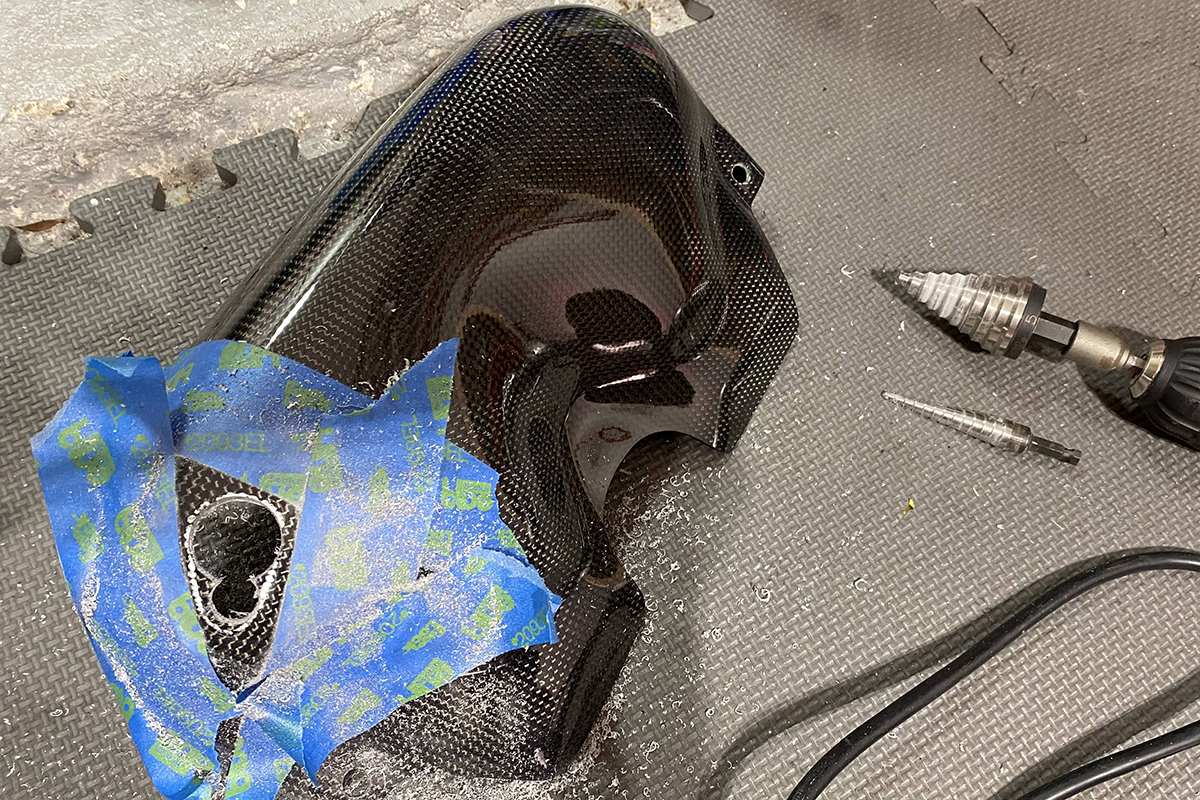
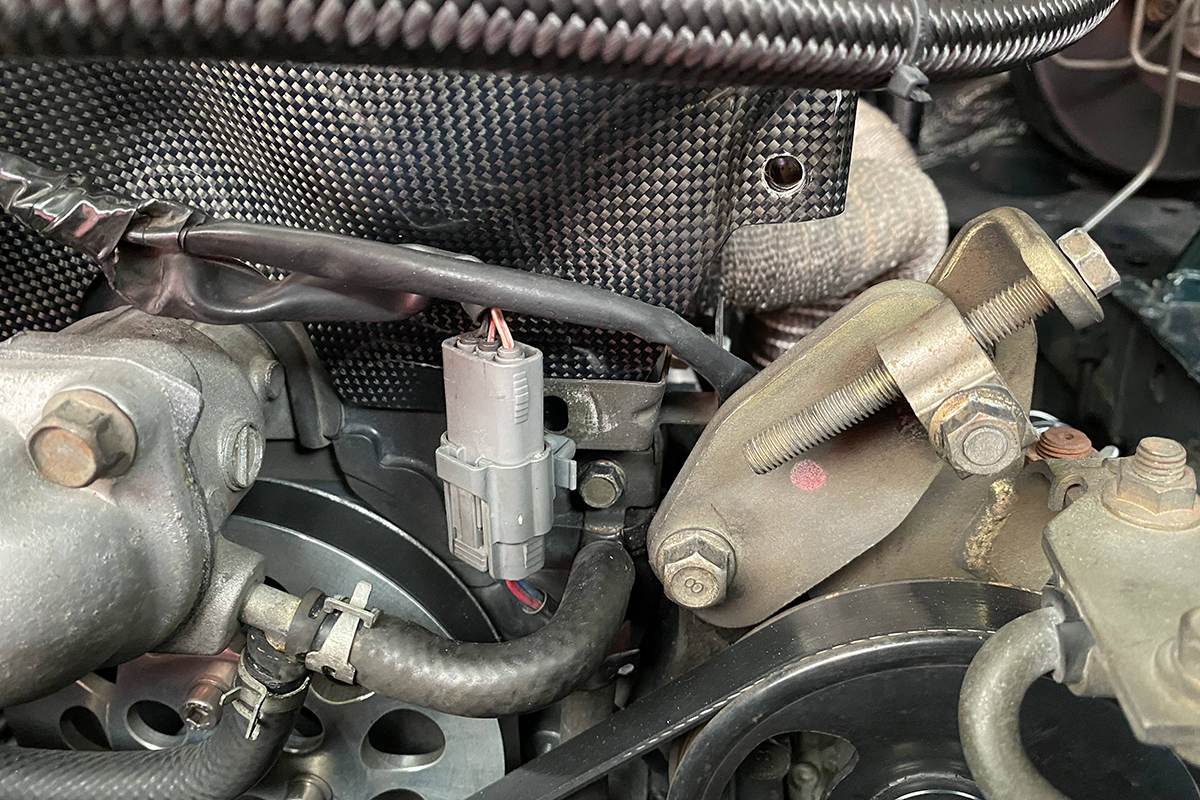
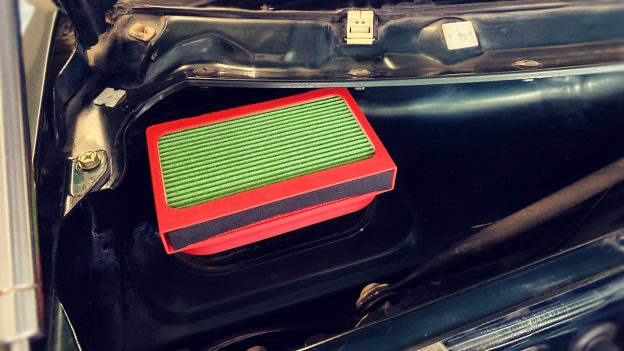
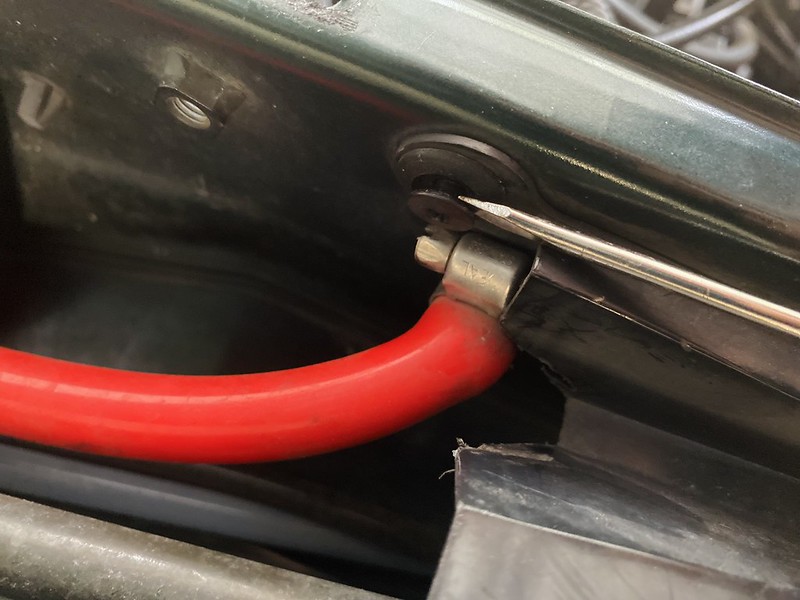
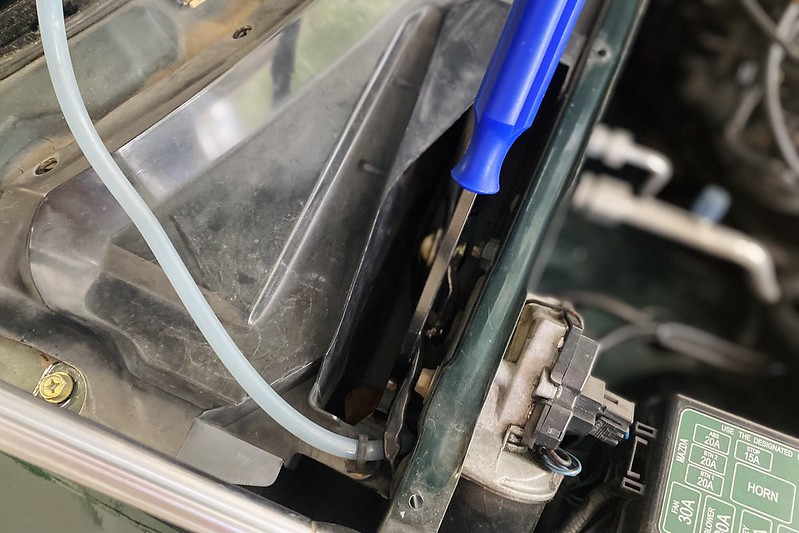
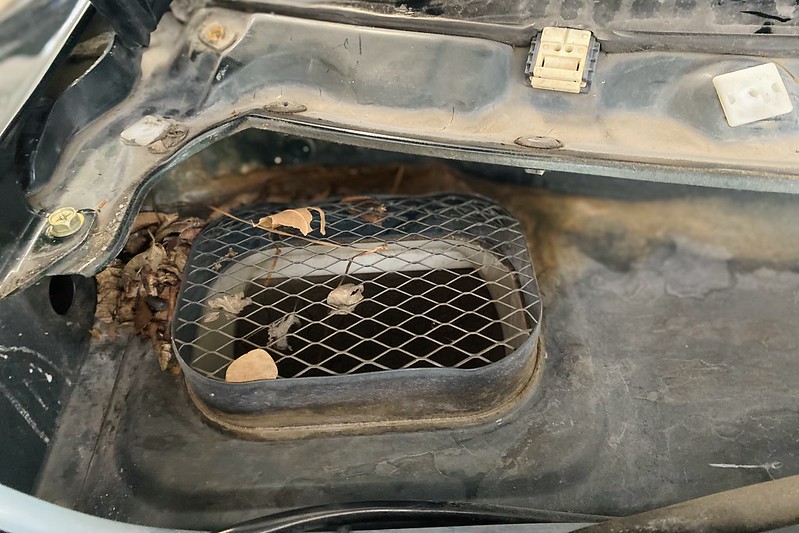
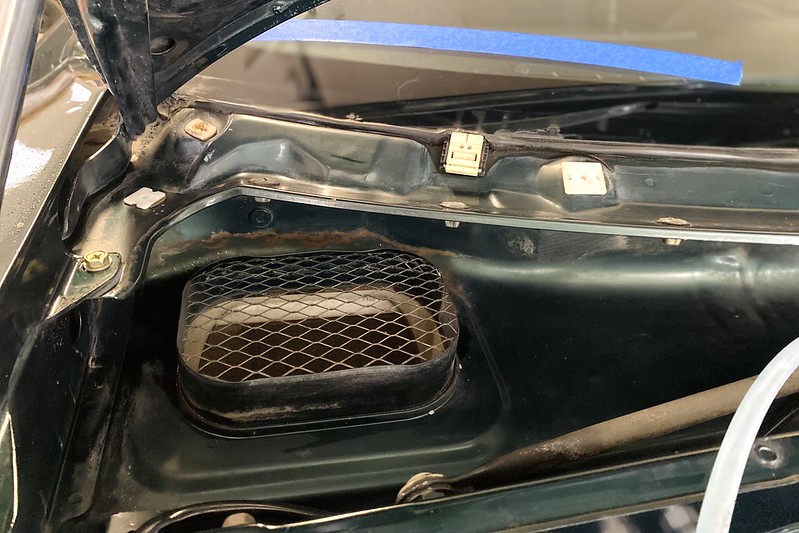
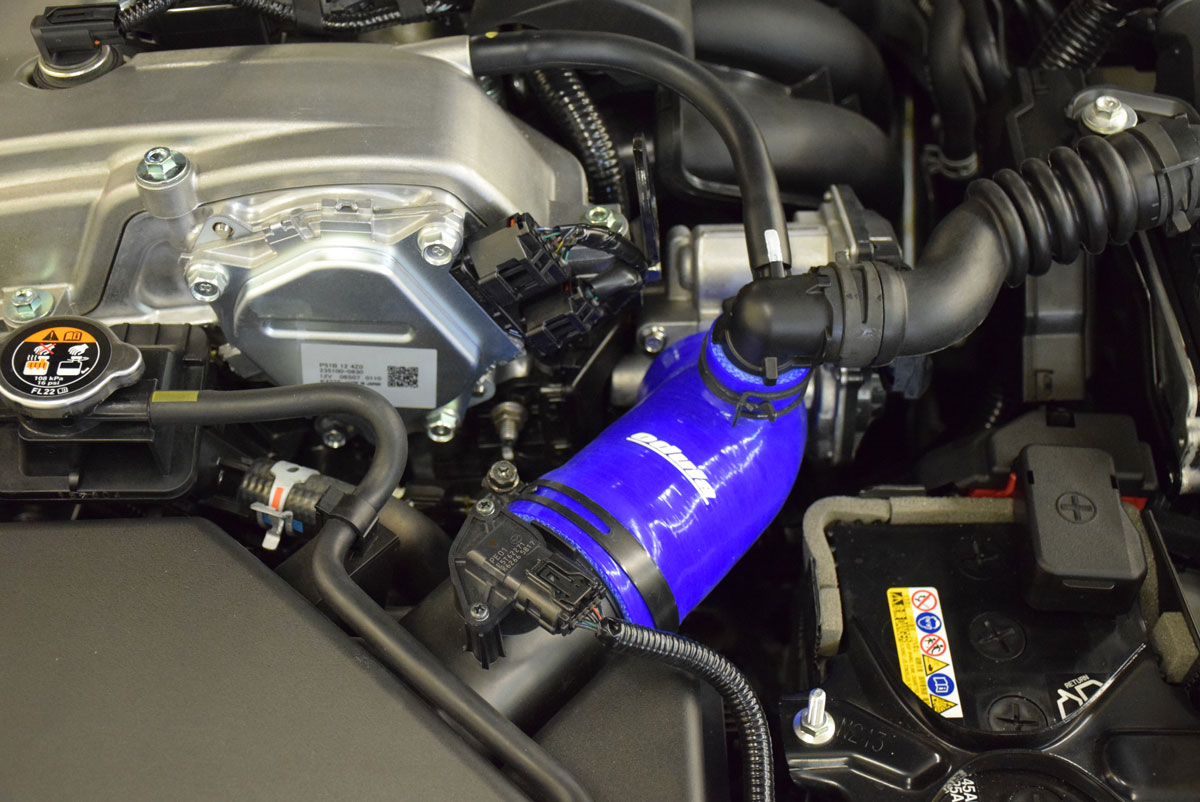
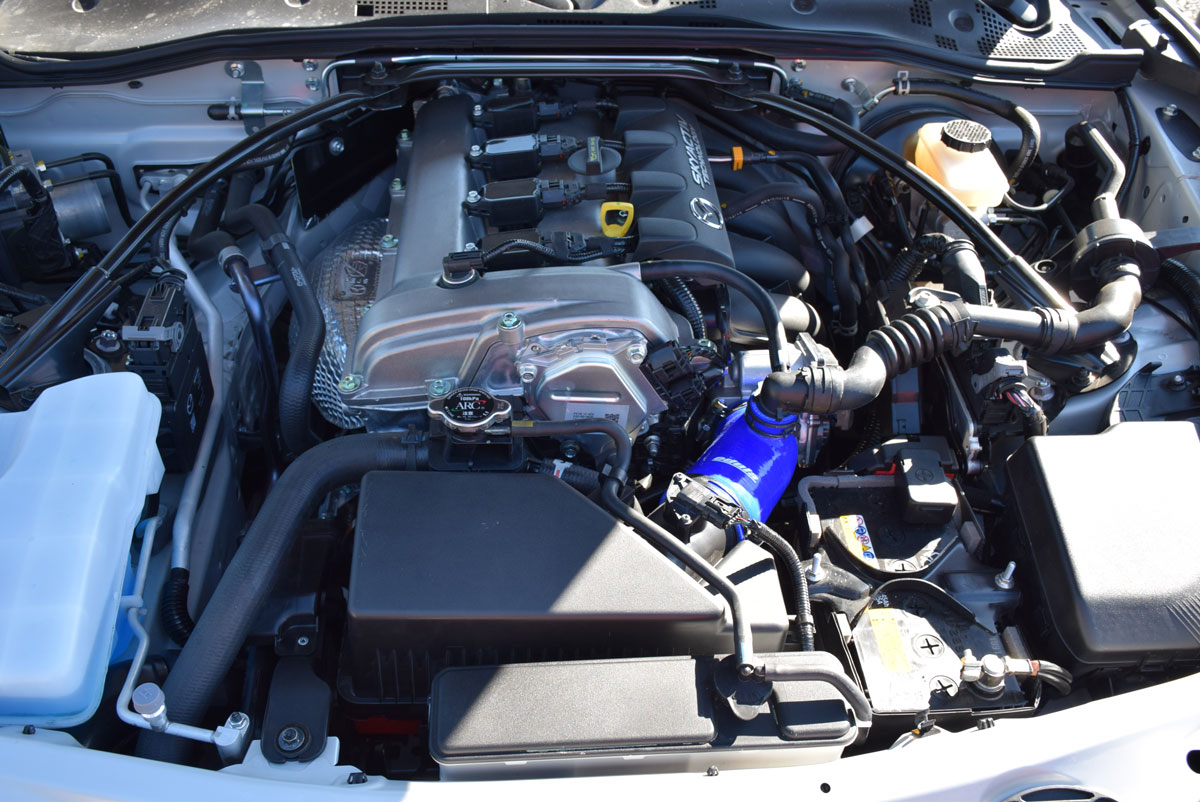
DSC_0125

Intakes Review

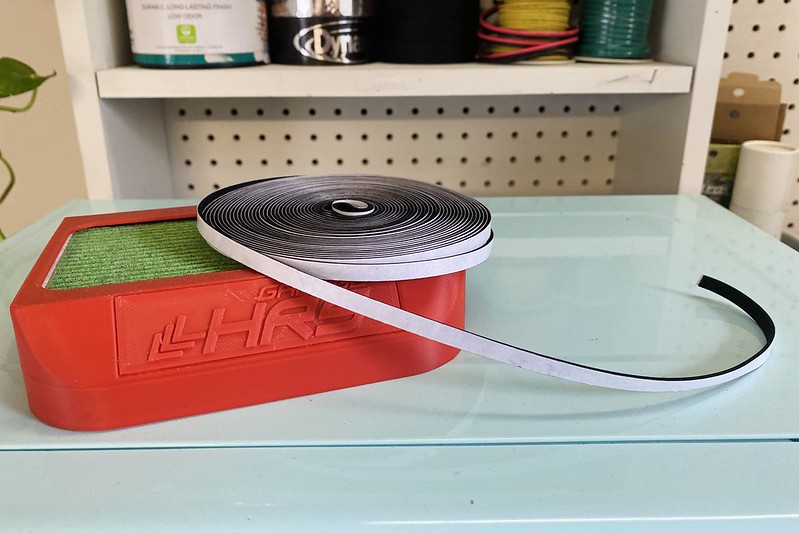
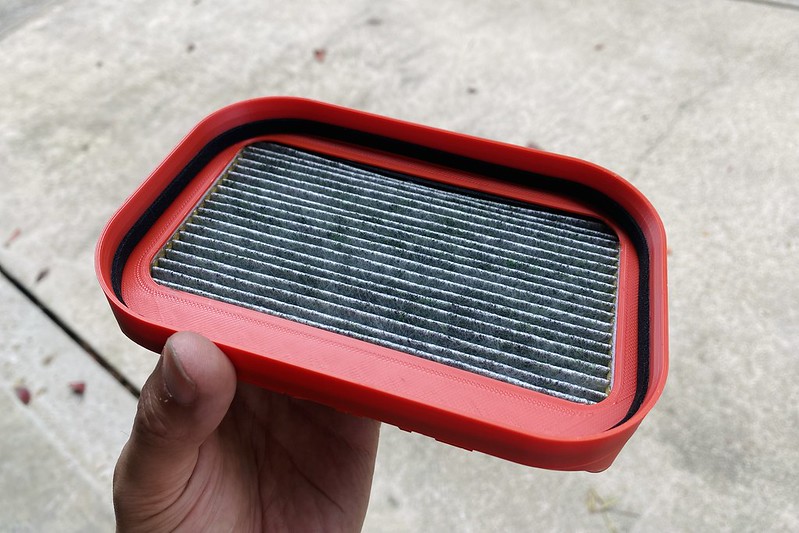
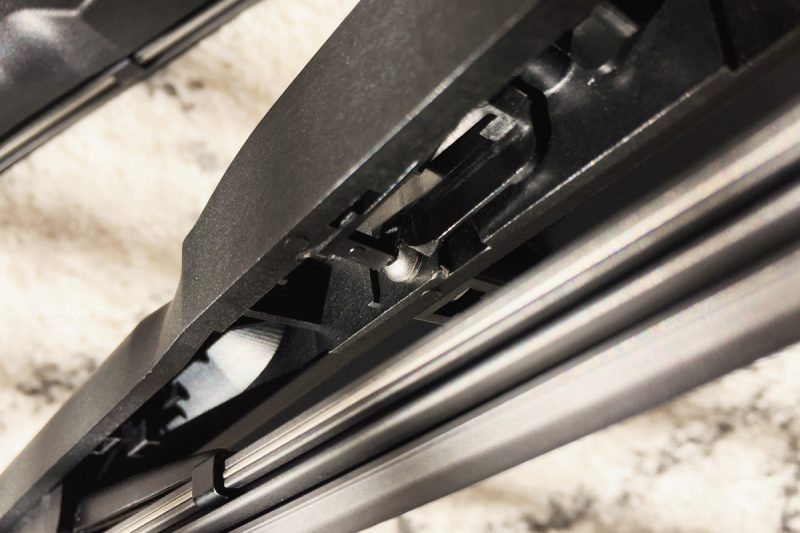
I am running the Autoexe Sports Induction Box paired with the Odula Air Filter as well as the Odula Intake Elbow (prototype). I can’t really say that I felt any difference in power. The Autoexe piece might actually have made things worse when I was in the South USA because it would suck some hot air. That said, the car still felt good and did not have issues, even in heavy rain.

DSC_0108_2

The sound from the intake, however, really was nice and cool to hear. I’d say that for me (living up North), it’s a good setup, but not optimal. Let’s say that it’s more of a “sound enhancement” than a performance upgrade. Still, my car is in no way meant to be a competitive racer, so I just enjoyed it. I’m patiently waiting for Japanese companies to release a nice and effective 2.0L Intake Option.
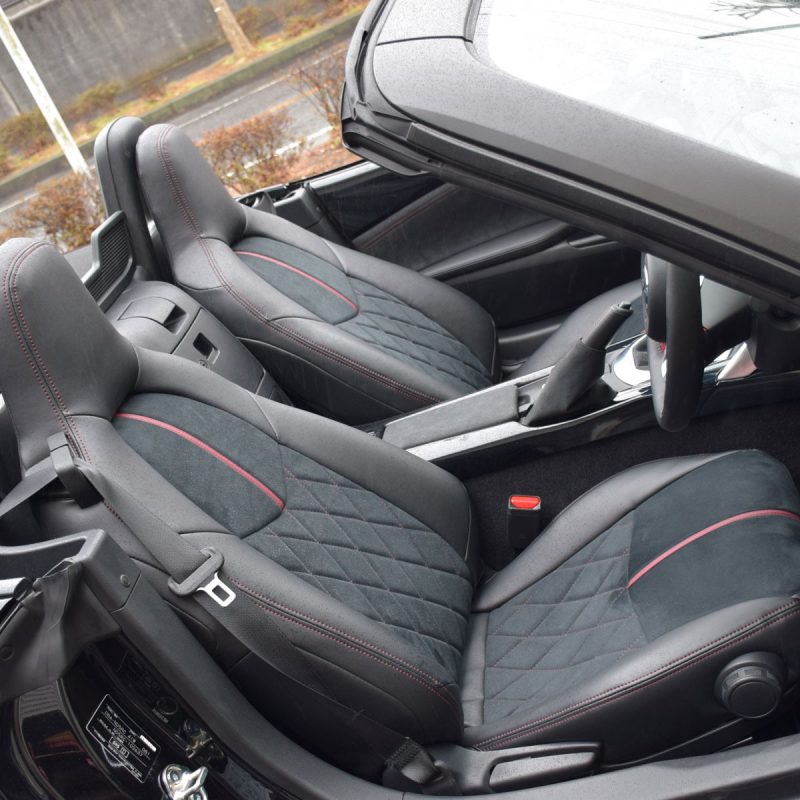
DSC_0145

Seat Covers Review

One thing that everyone who sat in or drove my car said was: “I can’t believe how comfortable those seats are”. I have to agree with them 100%. Putting on those Autowear Seat Covers was one very nice comfort modification. The middle piece of the seat cover has a ~0.5” play so that when you sit on it, your spline does not directly touch the seat. It’s hard to explain, but it makes the seat super comfortable and I can say that after driving 5000 miles in the car, I did not have any back pain. The OEM seats are great, but adding the covers just made them much more comfortable and really great for long distance driving. I’ve actually never felt fatigue on my back since I’ve had them. Also, the synthetic leather is non-slippery and spill safe, so it’s pretty great overall.

DSC_0015

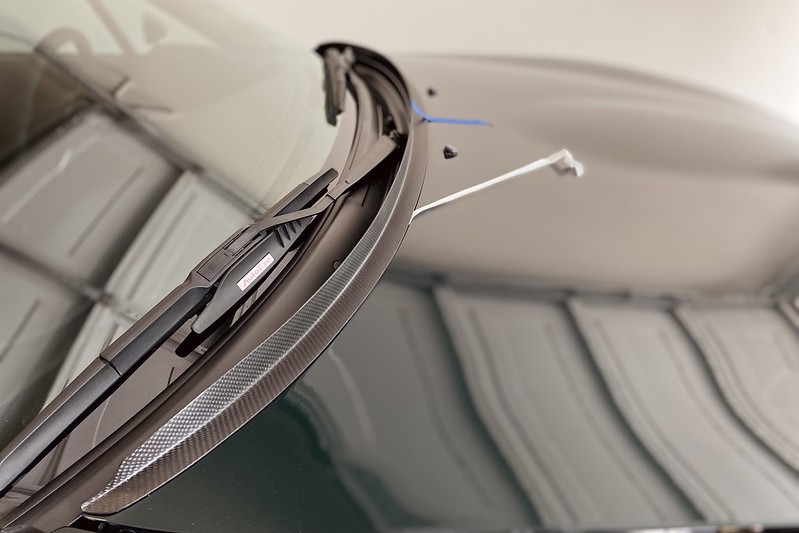
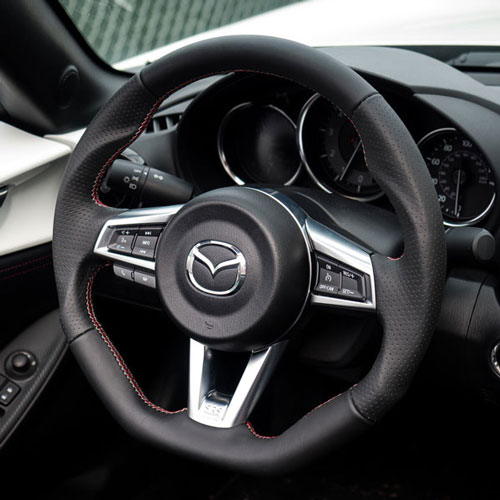
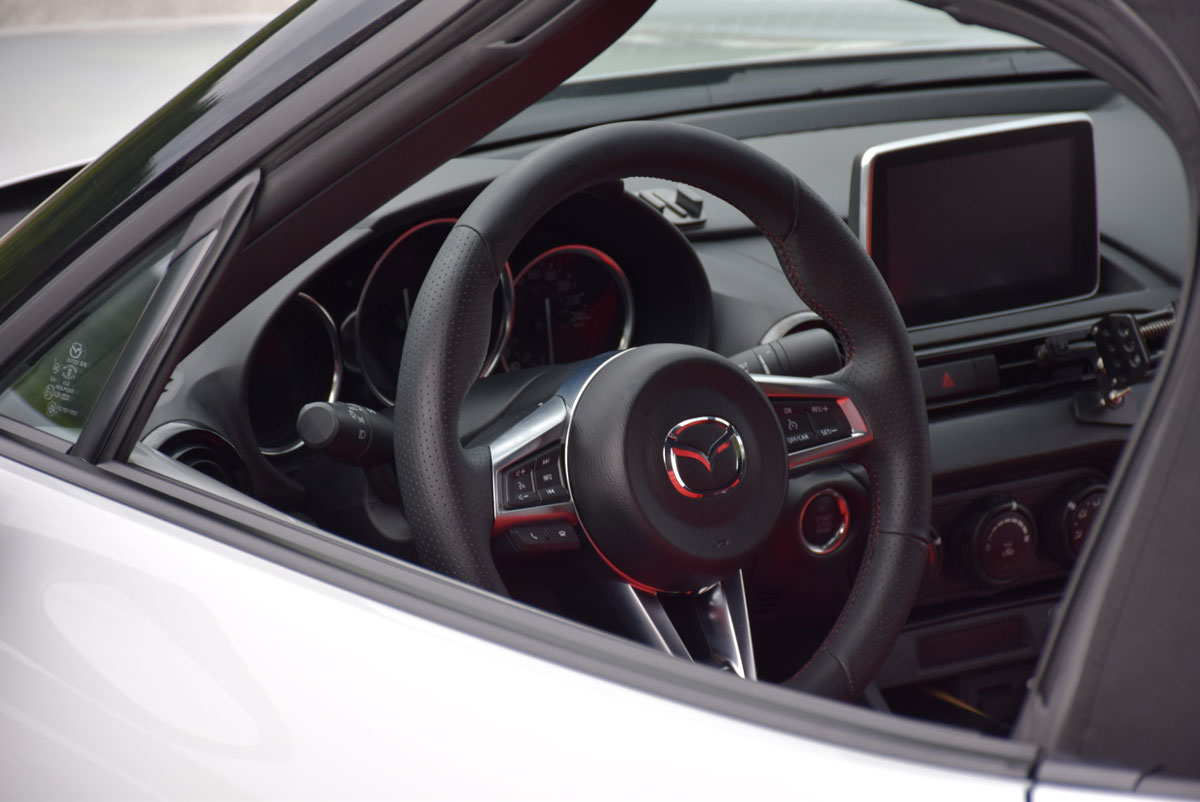
Steering Wheel Review

I will also do a full review of the steering wheel later, so I’ll keep it short again. I put the REAL Japan Leather Steering Wheel in my car. It’s a D-Shaped Steering Wheel with perforated leather. I gotta say that during the whole trip, it felt great. The grip was awesome, it never became slippery and it was thicker than the OEM. The “bumps” on the steering wheel at 3 o’clock and 9 o’clock also felt great during spirited driving.

After 5000 miles, you can see that the perforated leather got dirty (from sunscreen), but other than that it still looks the same and shows no sign of use. I guess I’ll be able to clean the sunscreen inside the holes somehow with a good washing product.

I would say that there is no way I would ever come back to the original steering wheel after having such a quality steering wheel in my hands. The original one just feels cheap compared to this thicker and nicer looking one.

DSC_0957

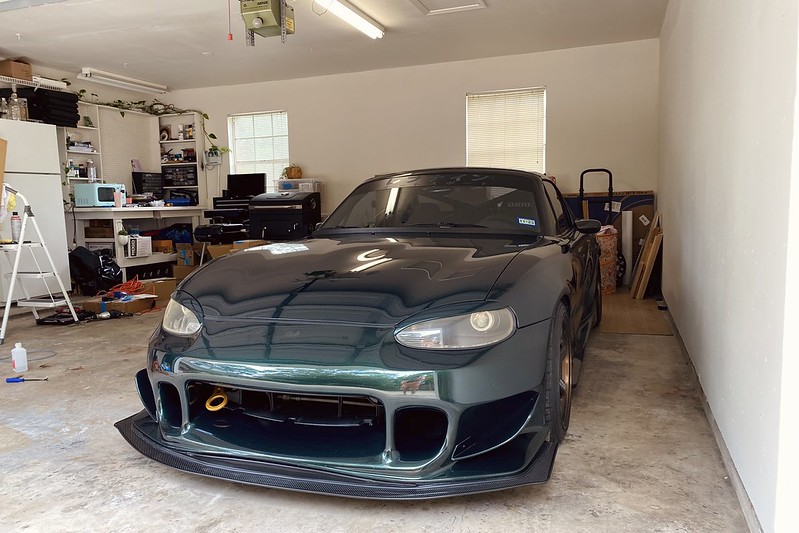
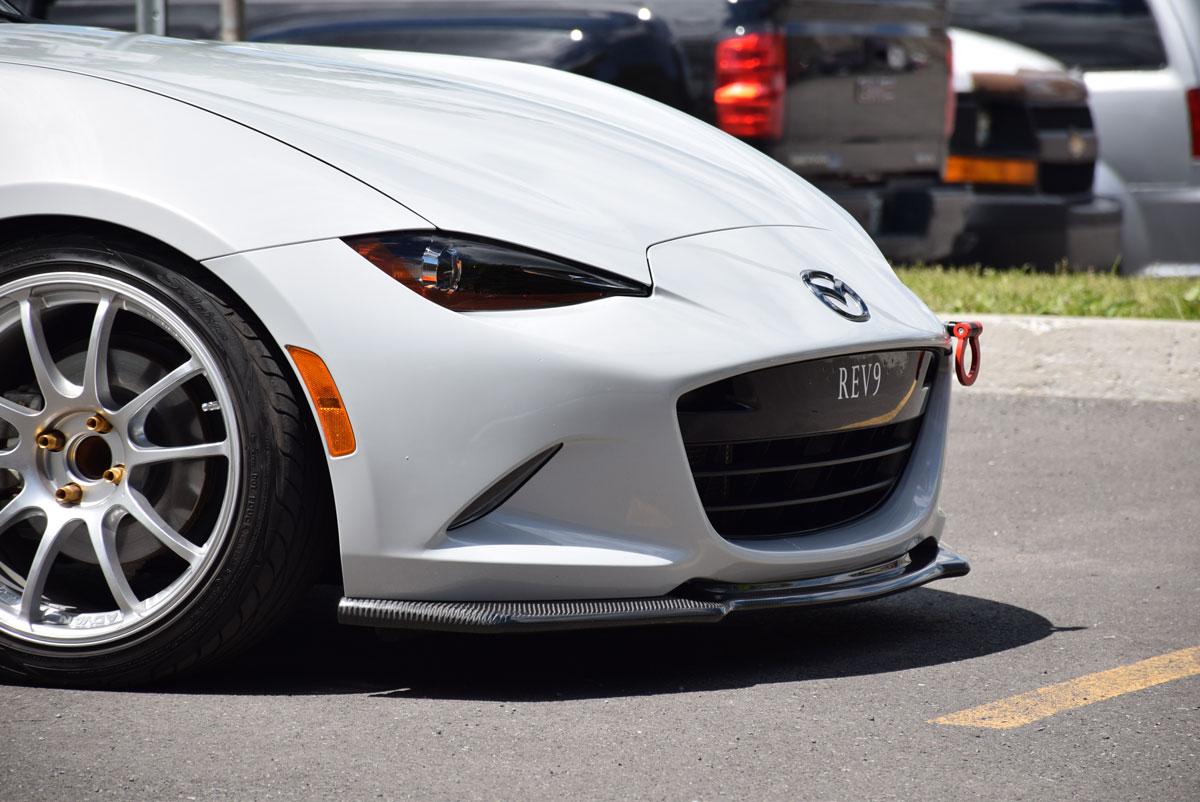
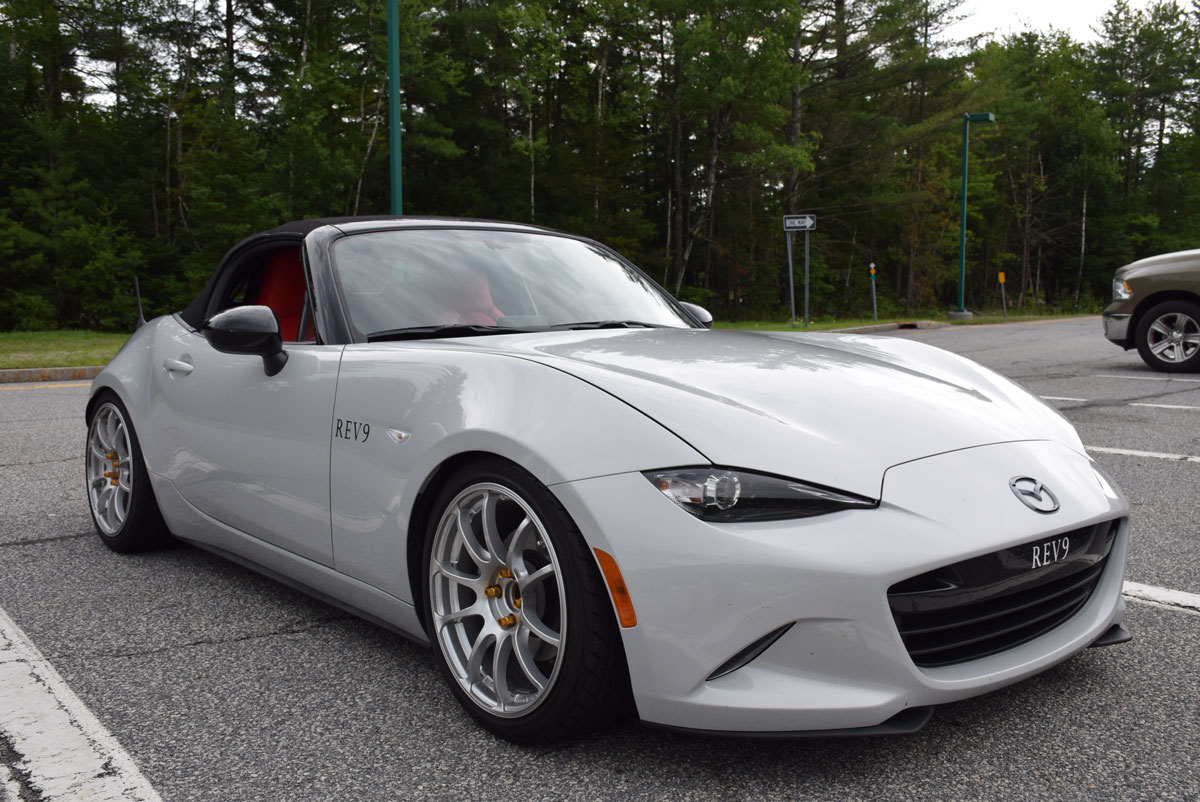
Front Spoiler Review

I installed the RS Factory Stage Front Spoiler during my trip. I have to say that I have mixed feelings about it. While I really love the look of it, I think it made me lose some “travel” with the front end of the vehicle. In the past, the lowest points of the vehicle were the two diffusers in front of the front wheels, and I would scrape them every now and then. Now, the front spoiler is the part that scrapes everywhere. Before installing it, I could enter my driveway (super steep) without scraping and now here’s what it does…

It’s a nice looking part and the issue is probably more my driveway that’s at a terrible angle, but for me, it might be a part that’s going to be removed in the future. Still, the look is very nice and mimics the look of a front lip without paying the high price for it.
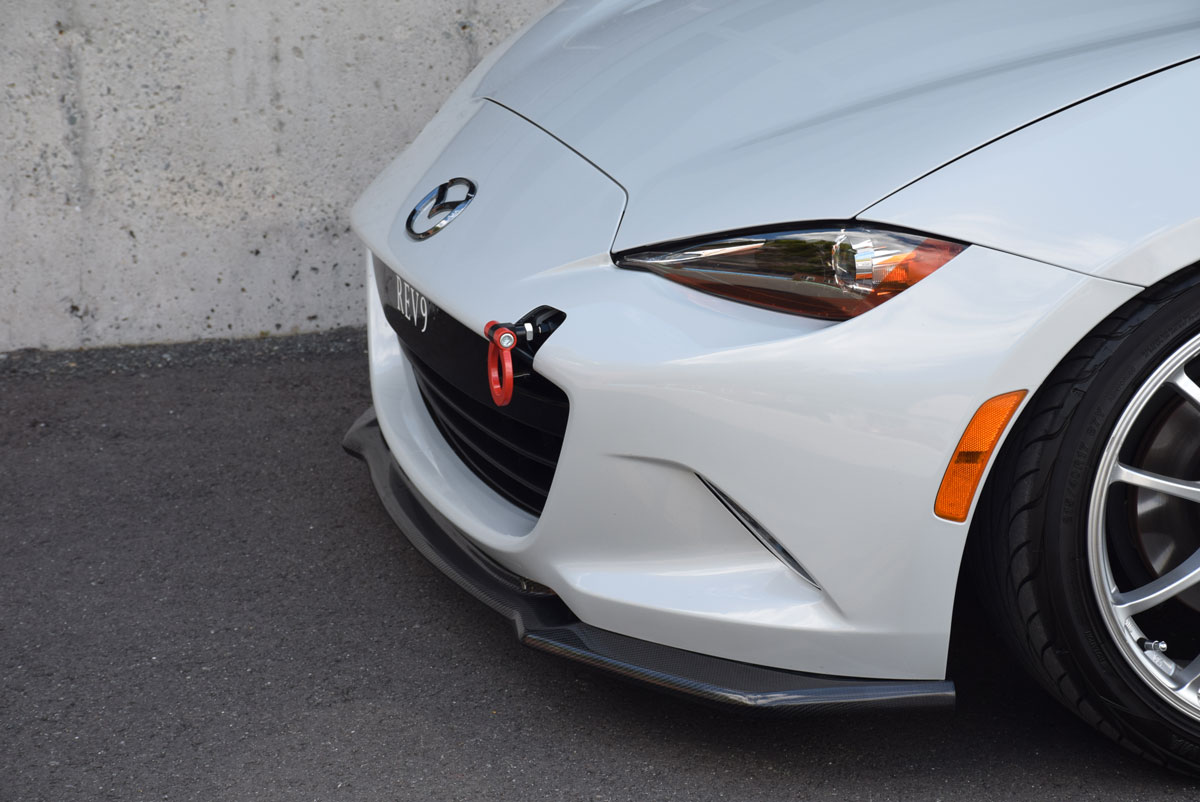
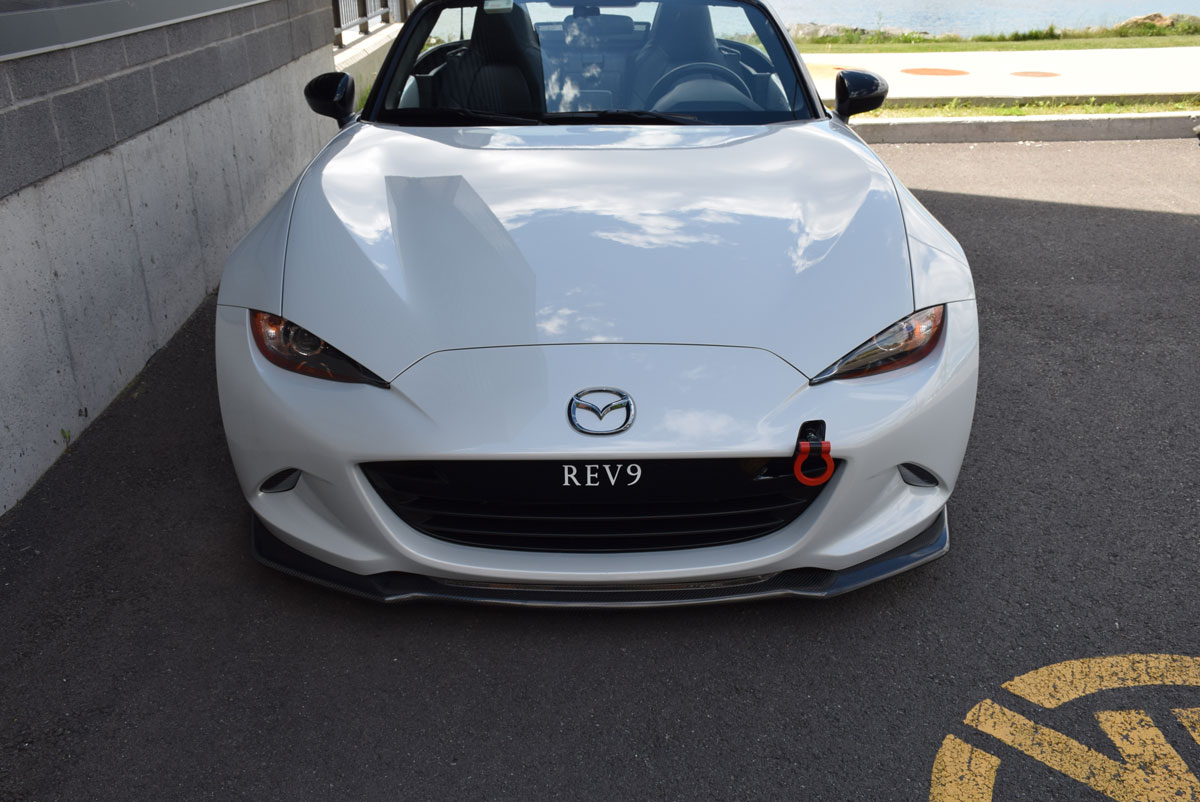
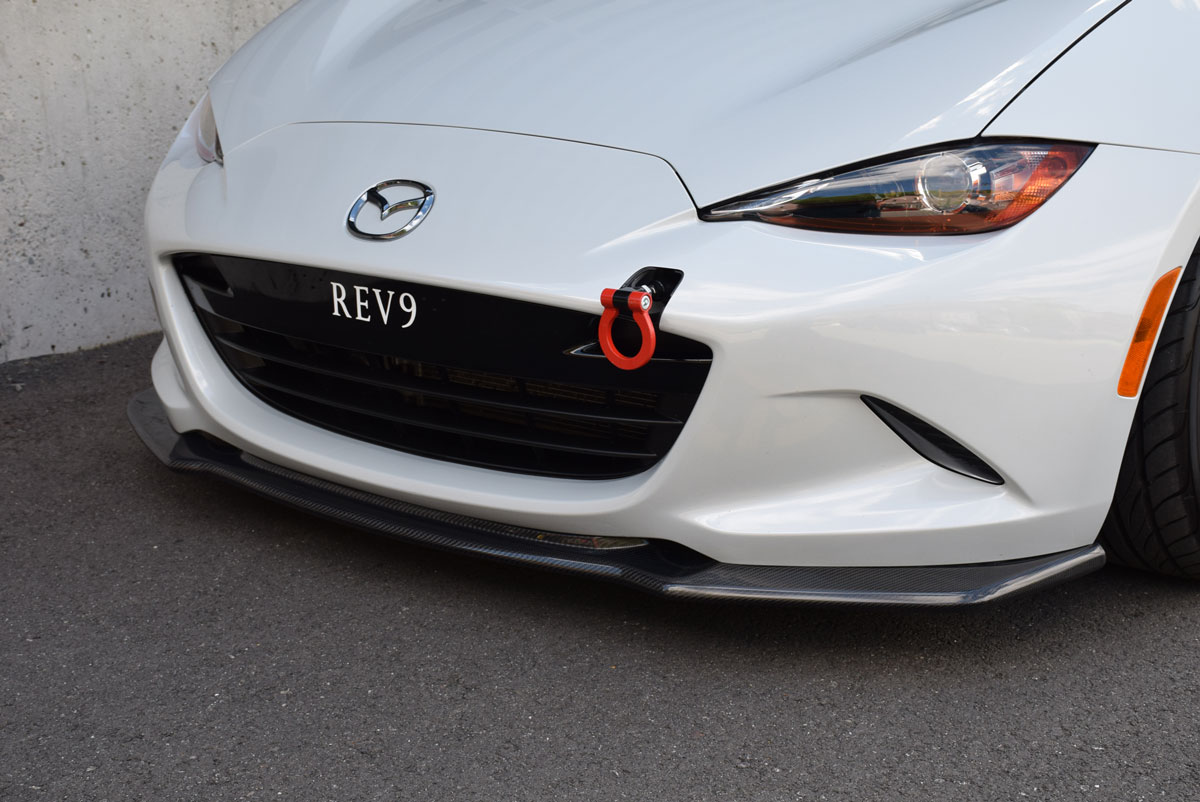
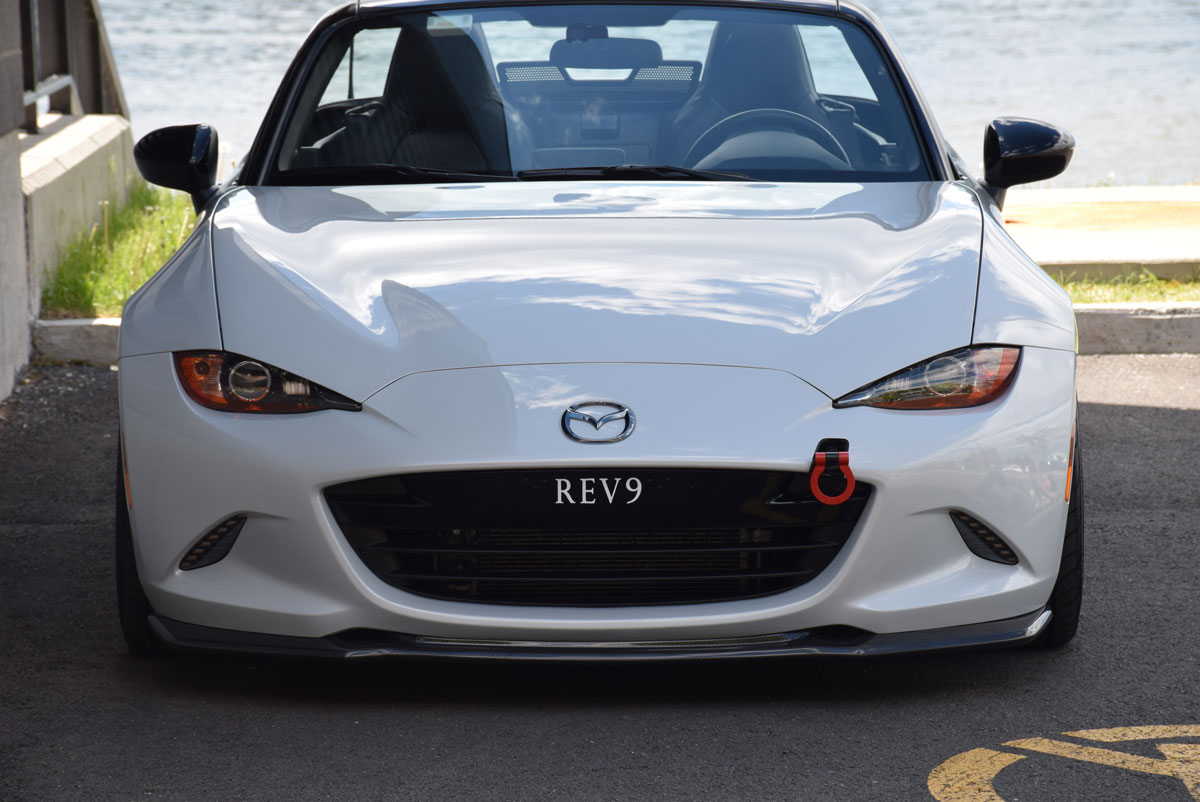
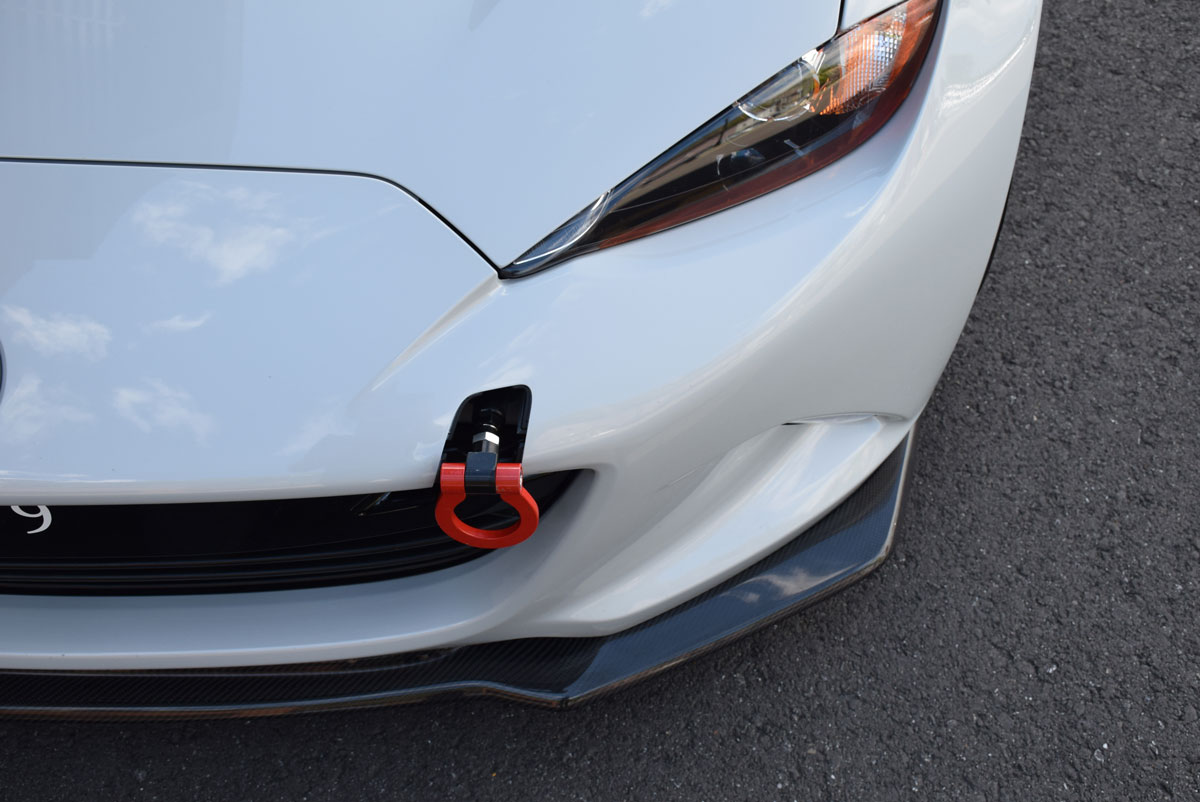
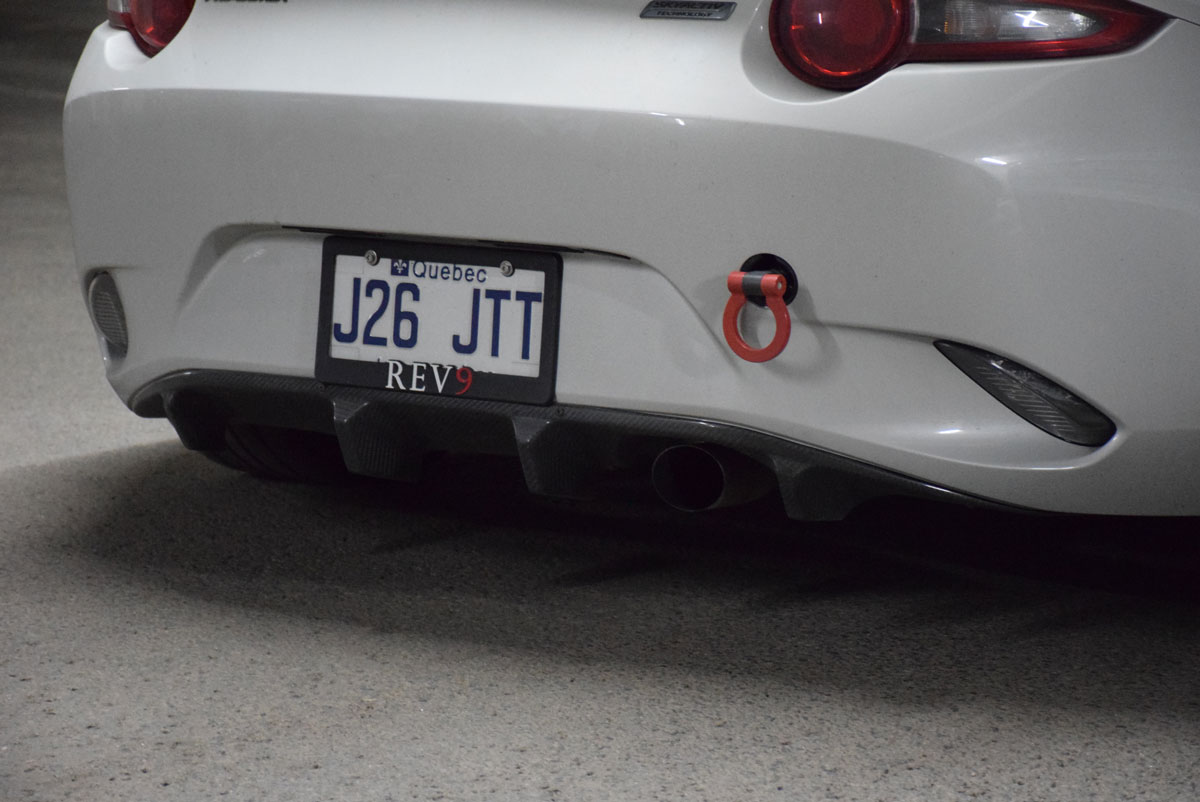
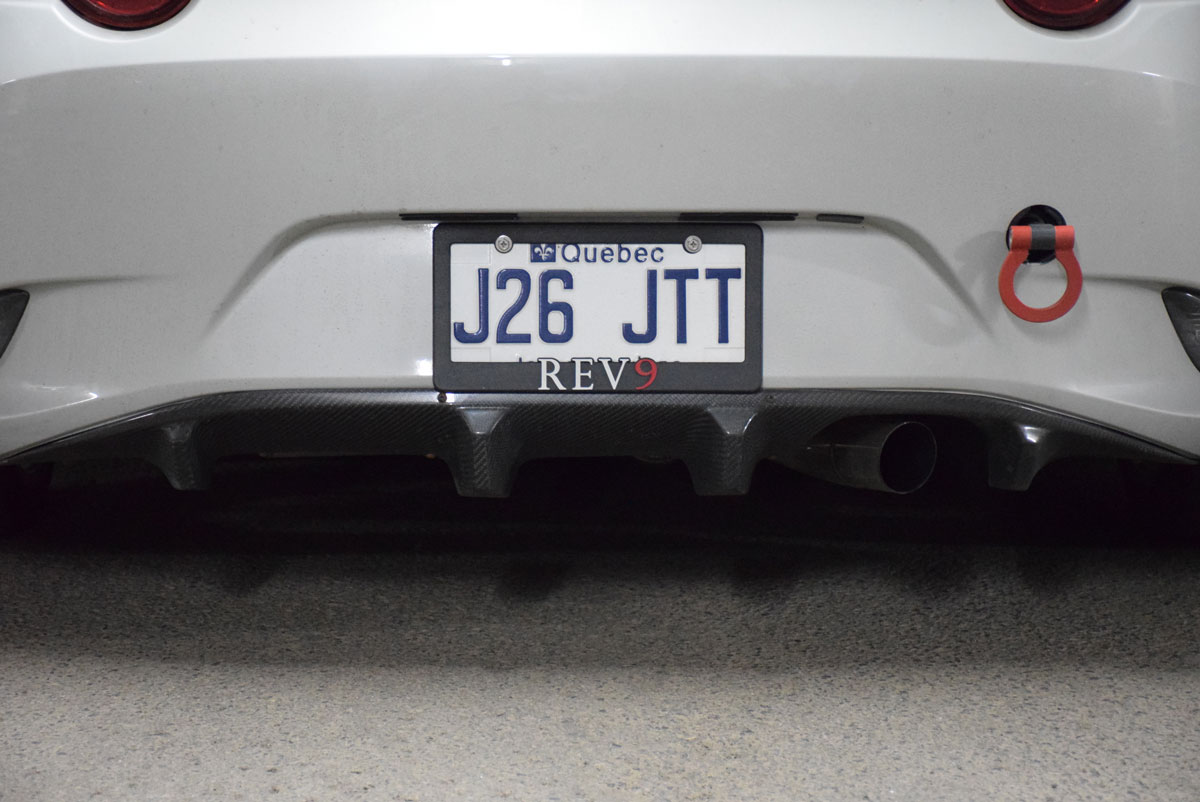
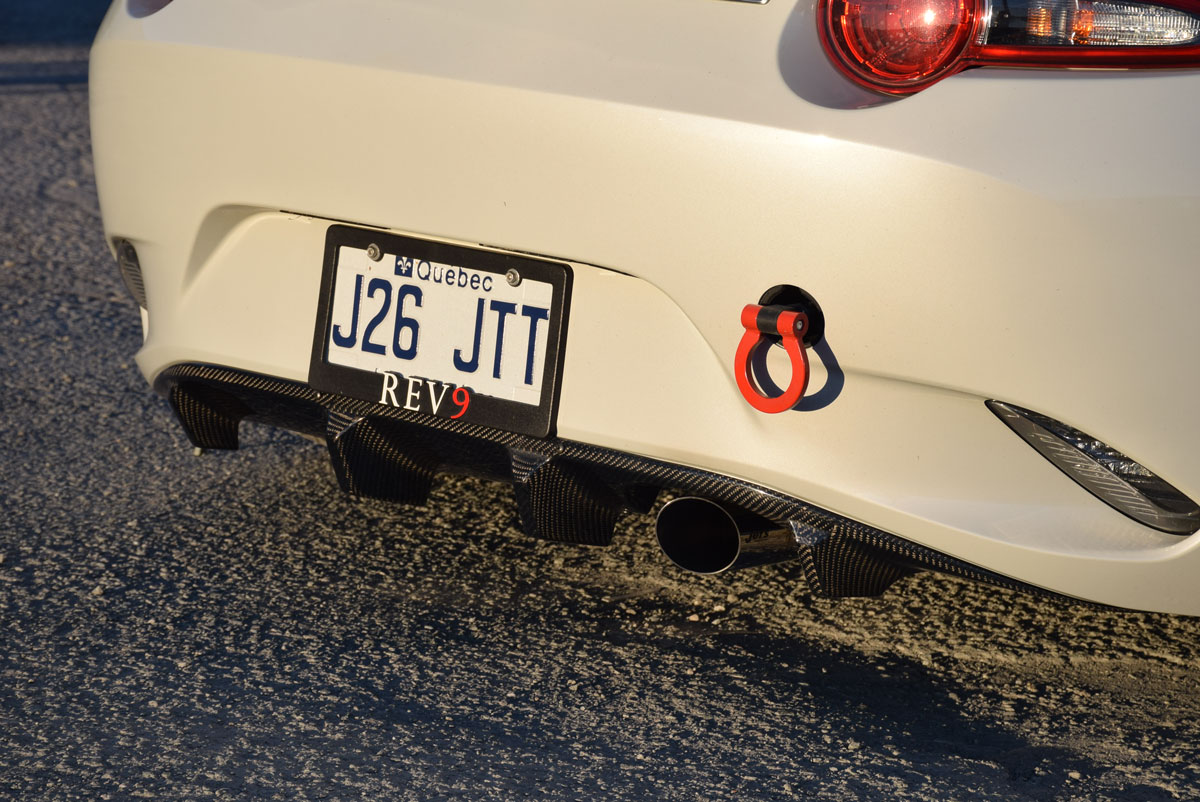
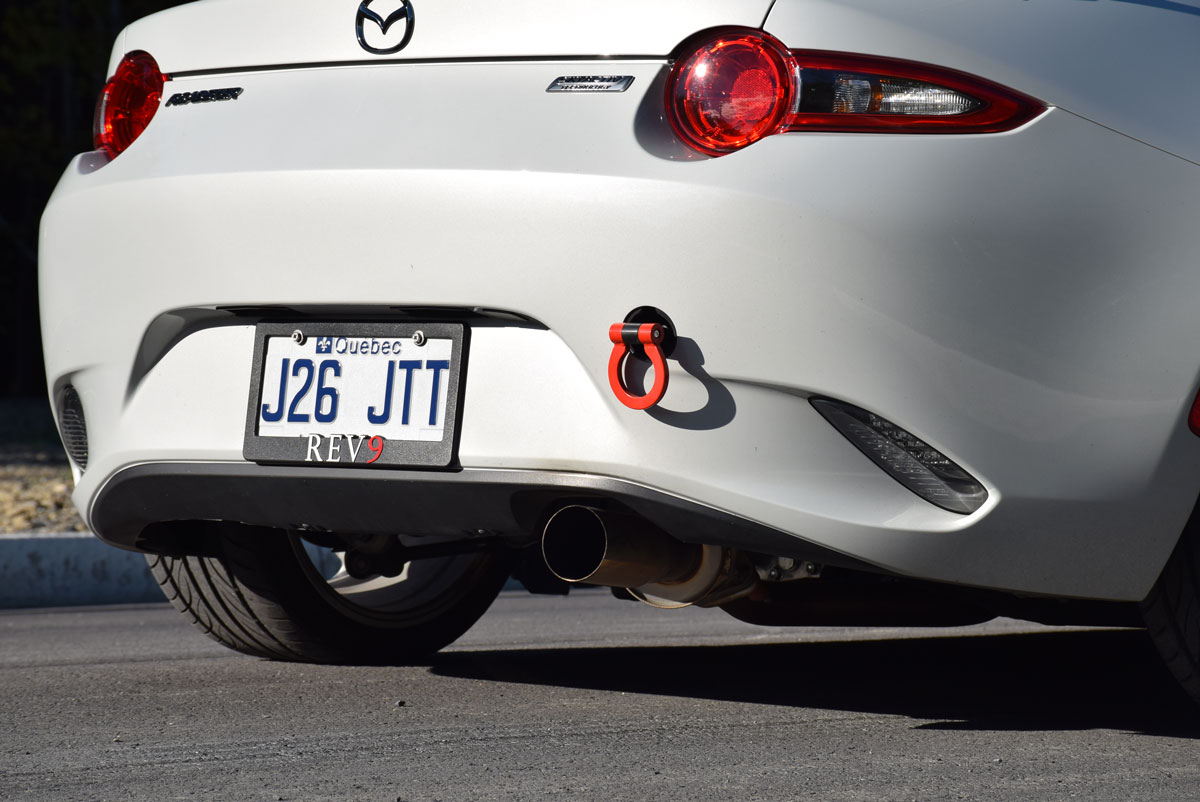
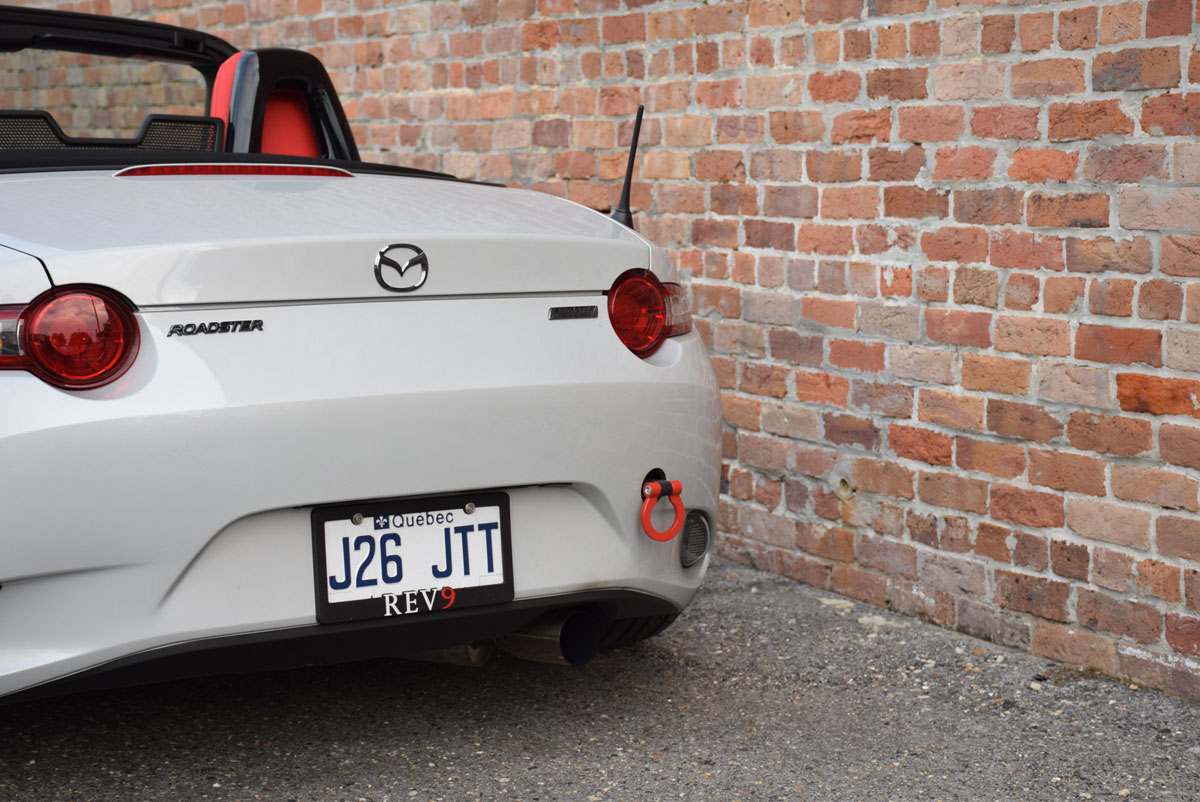
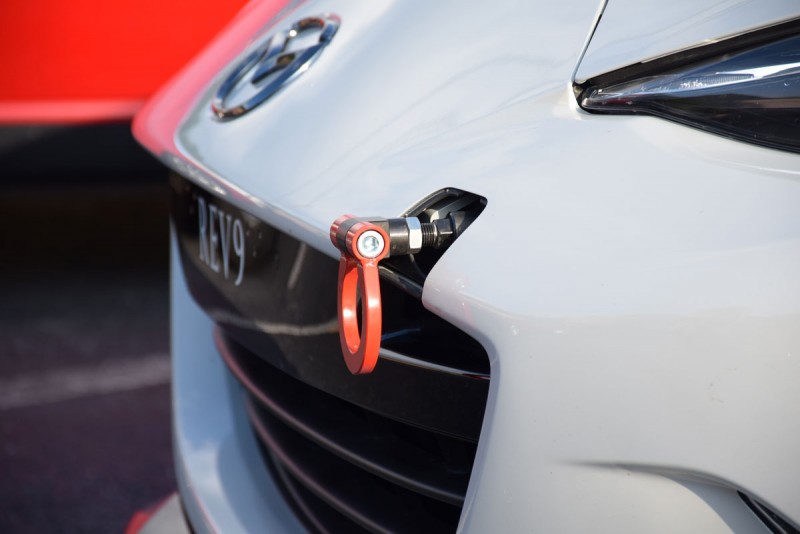
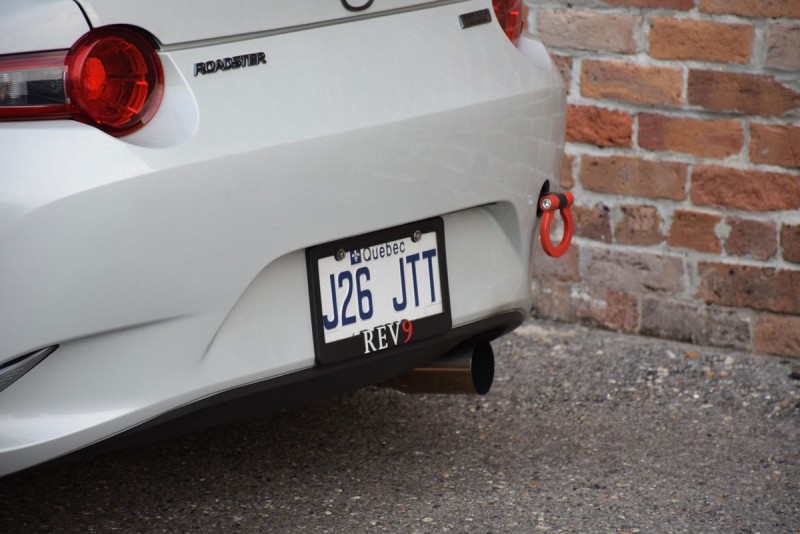
DSC_0152

Tow Hooks Review

The Beatrush Tow Hooks were pretty cool to have on the shop car. It gave the car a nice racing look and also saved the paint of my bumper when parking in the city. I know they are not intended to be used to protect the bumper, but I decided to use them this way. On a long road trip, including multiple big cities, things happen. And I know for a fact that the bigger the cities are, the less people care about their cars. That’s why it was a nice feeling to park the car with the hooks and not care about having someone else’s paint on the car. It’s also very easy to install and remove, so, for me, it was pretty useful. I quite like the look, so I keep them on all the time.

DSC_0140DSC_0123

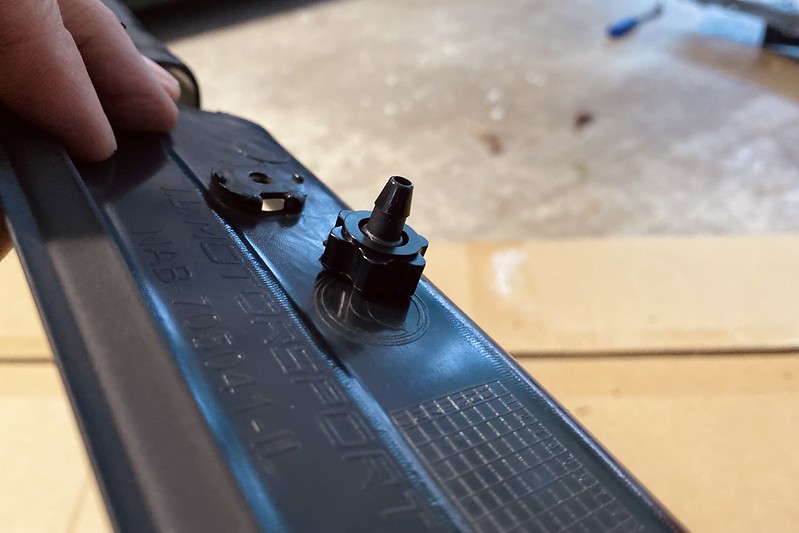
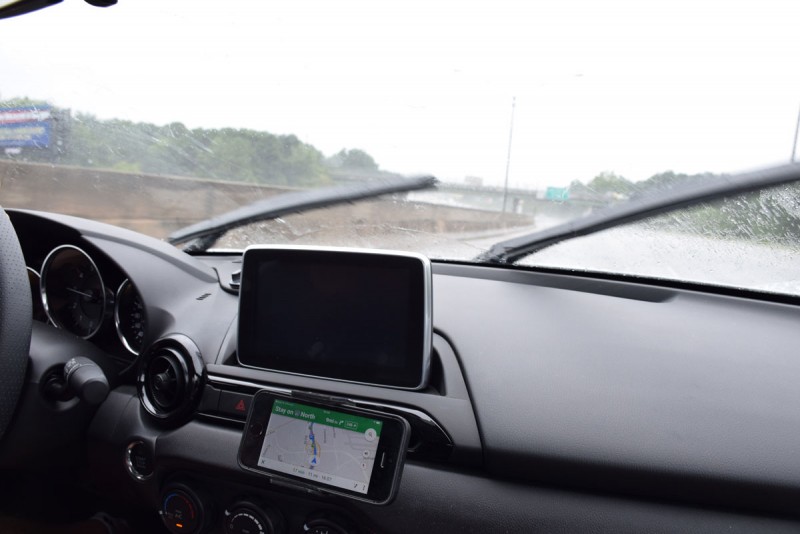
Cellphone Holder Review

I wouldn’t usually even consider this a mod, but oh my god it was a great feature to have. The ZOOM Ventilation Cellphone Holder is so convenient to use, and allows you to put your phone in a nice location to use WAZE or just select music. It can be rotated so you can use it vertically or horizontally. Instead of having your phone jumping around inside the car, it’s held firmly and conveniently. I’m actually putting this phone holder in all my other cars because it’s so nice to have. The great thing too is that it’ll work with any phone or case and you can put your phone in it with one hand in less than a second. The position in the ND is great — the only drawback is that you lose a bit of ventilation, but it’s no big deal (after 5000 miles and different types of weather, I’m talking from experience).
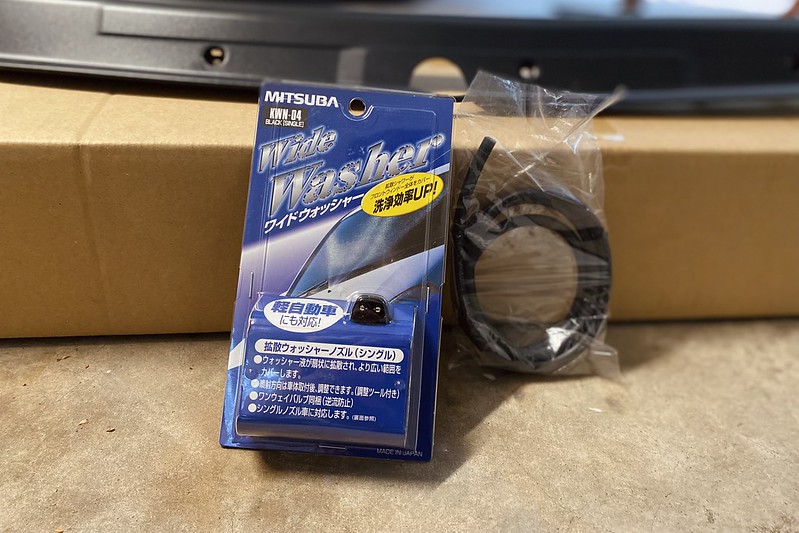
DSC_0137

Part I wish I had

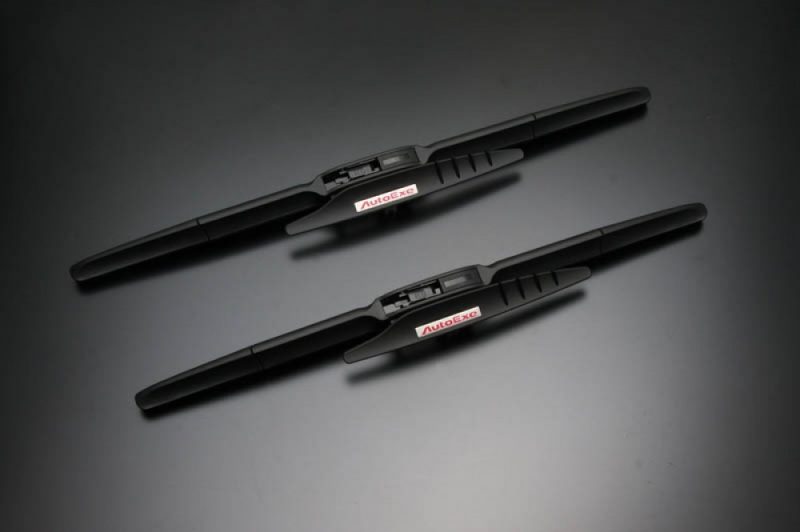
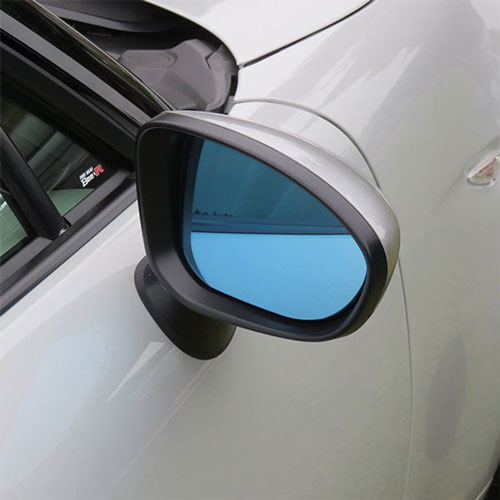
After 5000 miles, there are features that you realize you wish you had. One part I wish I had was Wide Angle Mirrors. When the top is down, it’s no big deal. However, when the top is up, the dead angle on the mirrors is just ridiculous. I almost had a few accidents because I couldn’t see the car in the dead angle. I know from experience (because I ran them in my NB), the wide angle mirrors solve that problem. Also, the blue tint from the mirrors is great against fatigue at night and when being followed by cars with high beams.

That’s pretty much the only thing I felt would make the car perfect. Other than that, the whole package from the ND is pretty awesome as-is.

DSC_0004

Well, this was the review of most parts I installed and how they improved my overall trip over having a stock car. I’m certain the stock car is awesome for road trips, but I feel I improved it in so many ways it became a perfect car for road tripping. I want to say that this is an honest review about the parts we offer for the ND that I felt were great to have during a long road trip. Some may agree, some may disagree with my sayings, but I can confirm that they were great for this 5000 miles trip.

DSC_0962

Next year, I’m considering doing the whole of the USA and Canada for REV9’s 10th Anniversary, so many of these parts will be tested for longevity too. However, it’s very possible that I’ll run other parts, depending what’s new on the market~


What is the Automatic Levelizer Adjustment Rod?

Have you ever heard of Cusco’s Headlight Self Levelizer Adjuster Rod? It’s a very simpe product that everyone who puts coilovers on a car with adjusting headlights should use (seriously).

00B-628-C_super_short

Before we get started, let’s talk a little about the operation of the auto levelizer.

Nowadays, tons of newer model cars are equipped with LED or HID lighting. When there is a load in the rear of the vehicle, the angle of the beam is angled upwards. To counteract this, a part is in place on the vehicle that counters this change and keeps the angle unchanged. This part is the auto levelizer.

So, when the vehicle is lowered, the auto levelizer senses the change in height or angle and will point the headlights toward the ground.

The result? You have significantly less visibility. (see this awesome infographic showing a Japanese creature):

4146a49256

Having said that, this is why we made the auto levelizer adjuster rod. By replacing the OEM rod link and installing our adjustable rod, it is now possible to restore the normal detection of changes in vehicle angle, thereby restoring normal function of the levelizer.

We hope you enjoyed this little read. We also made an Installation Instruction post. You can buy the following Automatic Levelizer Adjustment Rods at our web shop:

Cusco Headlight Levelizer Adjustment Rod

RS*R Self Levelizer Link Rod

Comparing ACRE Brake Pads for MX-5s

ACRE Brake Pads are used by many Japanese tuners and have a great reputation in Japan. Here’s a side-by-side of ACRE Brake Pads for all generations Miatas. Here are some explanations about the following graphics :

Initial bite : this is when you press the brake, is it aggressive (high) or relaxed (low).

Fade : this is the “endurance” of the brake pad when racing, great (high) or low endurance (low).

Wear : this is the durability of the brake pad, short (high) or long (low).

Control : this is the level of modulation you can do with the brake pad, a lot (high) or not much (low).

Disk life : this is how the brake pad will affect your disk life, not a lot (low) or a lot (high).

Dust : this is the level of brake dust that the brakes will produce, not a lot (low) or a lot (high).

As mentioned in the graphics, all of the bars are in comparison to stock brake pads (set at level 5).

There is also additional information such as Proper Rotor Temperature (so they are optimal), Coefficient of friction, Material & Stage (where they should be used).

Let’s compare all brake pads! The order below starts with their most racing to their most street brake pad.

ACRE Racing Pro Brake Pads:

Racing use brake pads from Acre Brakes. This pad is designed specifically for competition use only. Acre recommends this pad for short endurance events or track days.

ACRE N-Zero Brake Pads:
n-zero
Circuit use brake pad by Acre Brakes of Japan. Acre designed this pad specifically for N-Zero one-make races that are gaining popularity in Japan.

ACRE Formula 800C Brake Pads:
formula_800
This pad is designed to retain a high braking force through a wide temperature range and also not be terribly harsh on rotors.

ACRE Formula 700C Brake Pads:
formula_700
This pad is appropriately named 700C, for its ability to thrive at rotor temperatures around 700 degrees celsius. This pad is a circuit use pad that will also work on the street. 

ACRE Dustless Brake Pads:
dustless_real
Acre’s customers asked for a pad that offered potent stopping power, but with little to no dust and no squeal. This pad is their answer to that request!

ACRE Light Sports Brake Pads:
light_sport
This pad is designed to offer the driver a high degree of control over the vehicle in all weather and road conditions, a great all around brake pad.

ACRE Super Fighter Brake Pads:
super_fighter
This brake pad was designed with the street user in mind. The super fighter is usable from the get go, without a warm up needed.

If you have any more question about the brake pads or need them for another application than the Mazda Miata, please don’t hesitate to contact us at info@rev9autosport.com!